Emerging technology Production piece
Introduction
For my production piece, I plan to showcase the possible use of VR art to aid in costume creation. To expand on that, my end goal is not to make a brand new idea per say, but to show off the use of VR art in an innovative way by testing out if it is viable by doing it myself and documenting the benefits and drawbacks. I began by finding my software of choice to make the art, I was originally planning on using Tiltbrush but then was suggested Gravity Sketch by a fellow student and after only a short amount of time spent in the software I knew I wanted to use this instead. The ease of access with the tools, being able to have a subdivision tool, and the use of volume shapes allowed me to have more control over my model and enabled me to create a model that isn’t “scratchy” which was my main issue before. My project relates to the objectives as I am taking a new and upcoming software Gravity Sketch. It is still a new software released in 2017, but became free and therefore much more popular in 2021, and using it in VR to aid in costume creation and character design is difficult to see online as I have not found many examples of anyone else trying it, and if so they have only been small experiments. Its purpose is to hopefully gain more confidence in using VR for art and to show off character creation in VR and its possible use in the creative industry.
Further research
After completing the proposal, I engaged in some further research to fuel my drive and to allow for further refinement of my idea. YouTube was a valuable resource and I found many small creators that made captivating videos showing off their work with Gravity Sketch, and it allowed me to see the way they used the tools provided and also showed me lots of tips such as using a built-in virtual wristwatch, which sounds small but helped me manage time without having to keep pausing which helped my workflow feel smoother. Below I will show different videos and how they helped me in either workflow or research.
This video inspired me and also taught me about the limitations of my software of choice. It taught me that I can use Blender to help optimize my model, and also included a helpful tutorial on how to export and import models.
This was an informal video about a furry VR convention and was helpful as it showed me many VR models of furry characters already existing and also about how normalized VR is getting with its popularity growing and common people attending VR events.
This showed me what top-tier work looks like in Gravity Sketch as this creator is a very skilled character artist, and it shows in his work, which allows me to see the higher-end limit of the software which helps me in planning my models.
This is a medium-level modeller using the software and gave me references of models that are within my artist ability range of making and showed me the subdivision tool and how you can select certain parts of a model to move, scale, and edit which turned out to be key in my process when making my final model.
This article proposes an idea similar to my own and uses VR art to visualize staging for plays and make the sets and then walk around them to ensure that the actor’s foot traffic will not overlap and the staging is correct for the viewers to be able to see the actors. This was a valuable read as it allowed me to see what others have done with an idea similar to my own.
Project Management
To keep working at a suitable pace to ensure the project would be done on time I used my Trello board to easily visualize my tasks and this also allowed me to have a winter break. Throughout my time at university I have found that I can easily find myself overwhelmed if I cannot see what tasks I need to do/have already done, causing me to lose track of the project all together, so to have a Trello helped me to remain calm while doing the project.
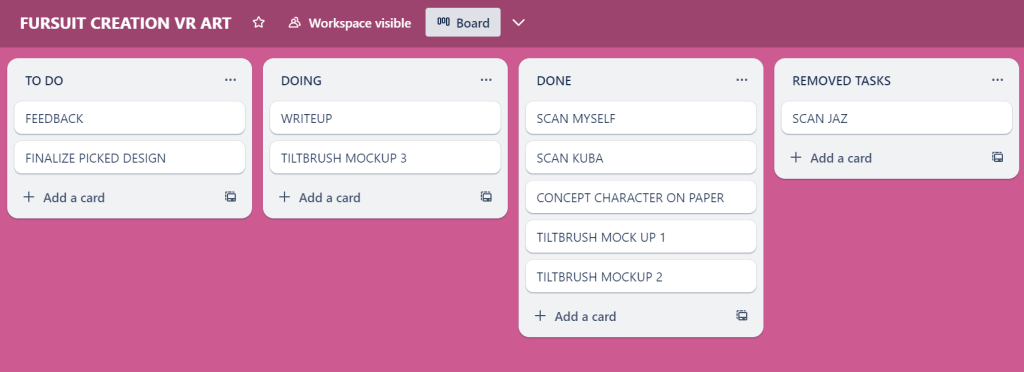
One of the challenges I faced was Christmas break, as I did not anticipate that after the break I would find it so difficult to get my brain back into “work mode”. Now I am aware this is through pure fault of my own but I felt it important to mention as it made me reflect on my personal workflow and how I allow myself to become controlled by how much work I have done and to not feel guilty if taking a break and to be able to simply go back to working without immense guilt. I find that when I work without guilt my quality is better, as I do not rush to catch up, so this was a good lesson for me to learn.

Another helpful method for me was asking my friends to hold me accountable to my goals as it added another layer of pressure which I felt helpful to have as it further motivated me on days where I did not wish to work. It could be seen as stupid to say that I struggle with self-accountability but I think acknowledging it and finding what works for me is better than ignoring it and pretending I don’t struggle.
Scanning:
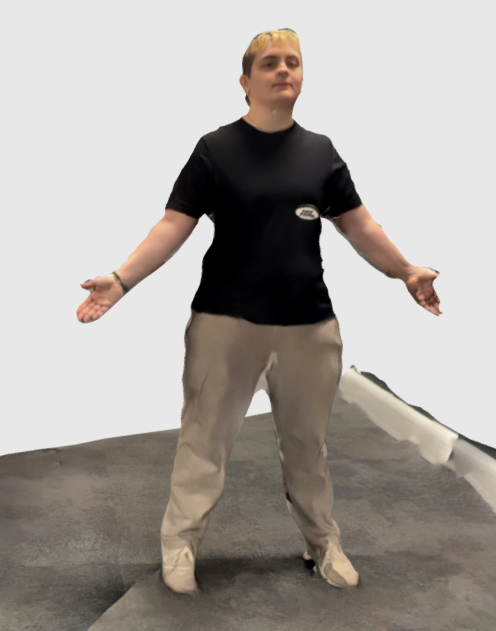
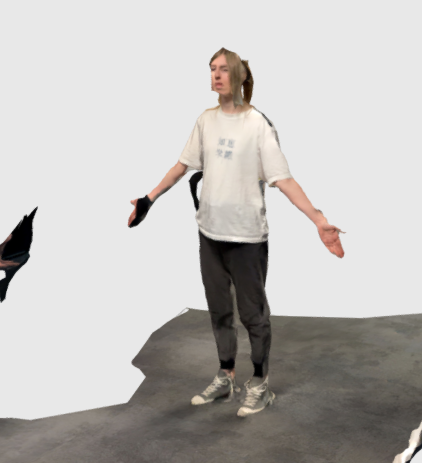
Before we could start 3D modelling in gravity sketch I needed to scan in the scans of me and my friend Kuba, We used Scaniverse on an iPad that I had previously tested to ensure that it worked well for scans of the human body. The models come out clean with the shape of the person captured, the downsides are that it cannot do detail so the face becomes a flat plane and it scans in the ground so once scanned you need to go into Maya and delete the floor by hand which did not take long but was tedious. Also to note everyone scanned was scanned with consent of their data being uplaoded to SketchFab.
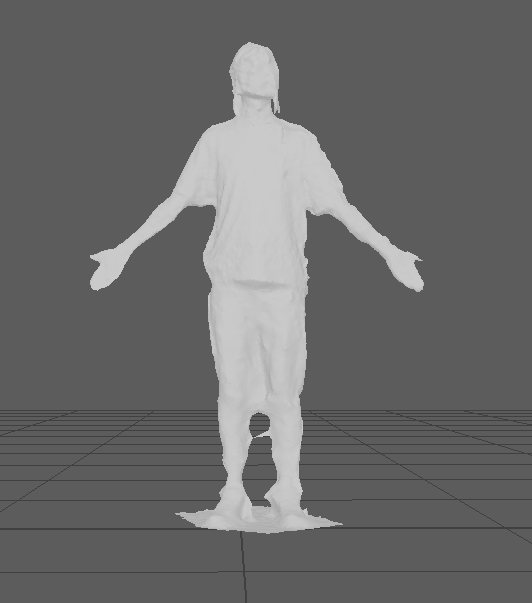
Scan of myself:
Scan of Kuba:
I imported the model Maya as it was a very high polygon due to capturing the floor so it needed cleaning up which did not take long as I just selected the floor roughly and deleted the faces, as I did not need the model too clean as it is only for guidelines.
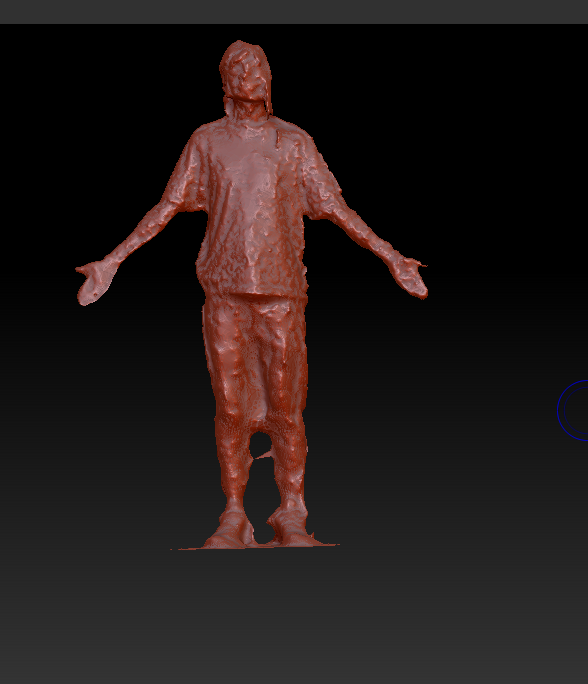
Once the model was cut down in Maya, the mesh was then reduced in ZBrush to make the model under 10k points to import to Gravity Sketch Landing Pad which is how you get custom models into the software.
Software Proficiency
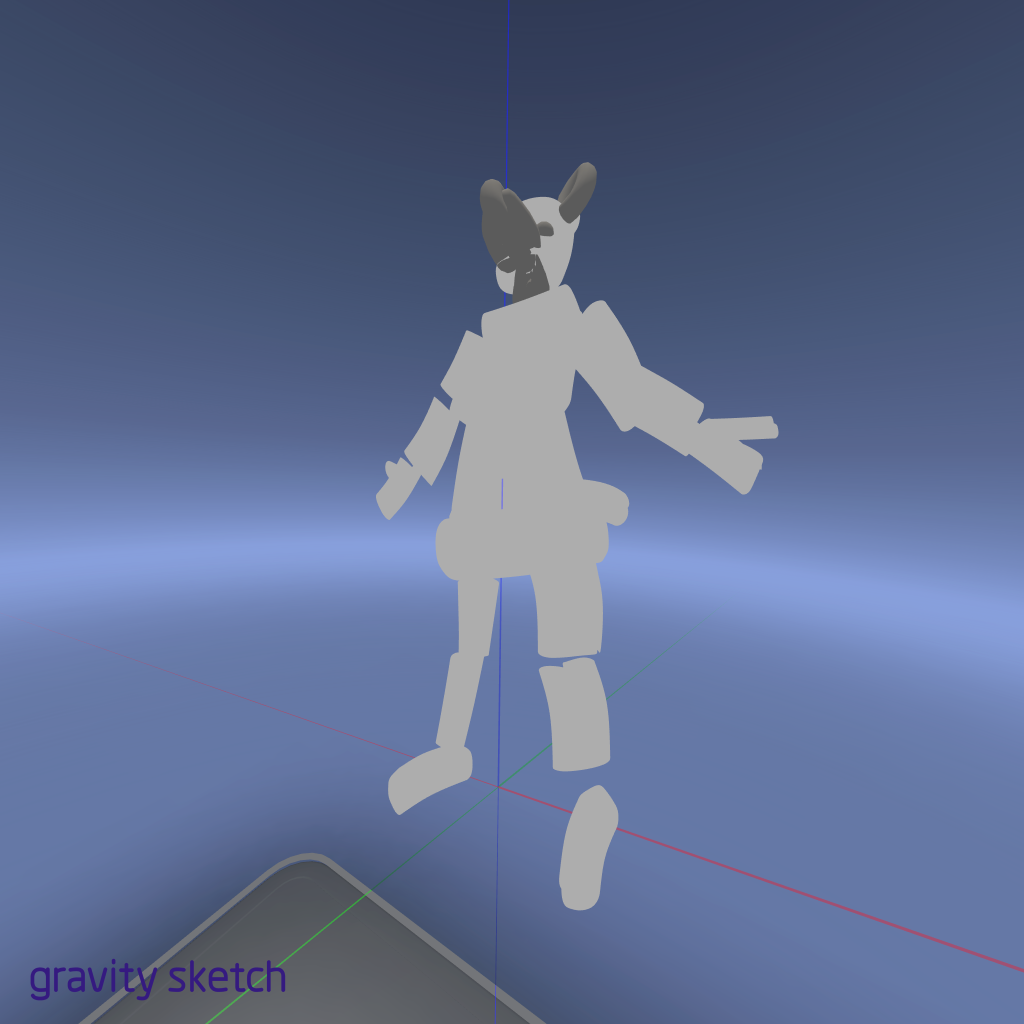
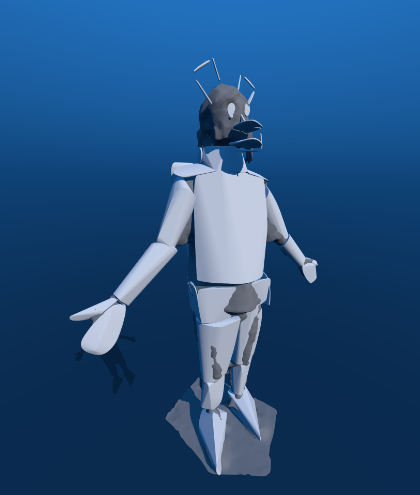
This is my first test using the software and it is very basic in its approach using the simple shape tools to try and make a skeleton model over the scan of myself. It is very patchy which I found to be a consistent theme of this software and what I believe to be one of its main drawbacks. This was a key practice, however, as it got me thinking about how to approach this new form of 3D modelling and taught me about using an alternative brush to draw on key features to make them stand out when refining the model such as eye placement and ear position as these can make or break a character.
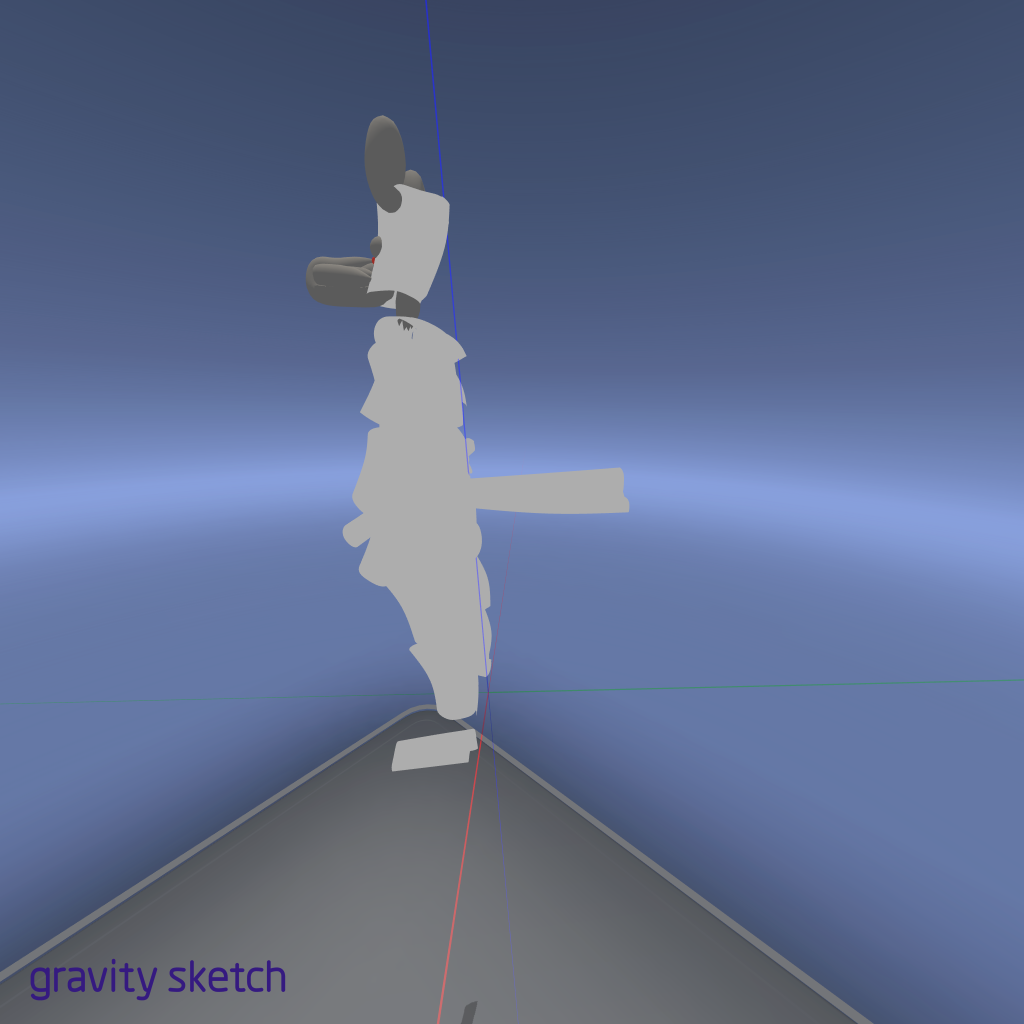

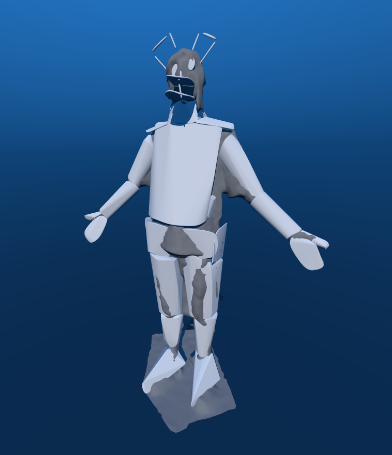
Once I felt like I had practiced enough with the software to understand basic layering systems and how to make sure brush strokes stayed in line and other skills which come with simply using the software I did another test more resembling what I wanted my end product to look like. This time I simply used normal ink brushes to see how that would affect the outcome and I found that while it allowed me to make finer strokes it looked even more patchy and sketchy leaving me with frankly a very poor piece of art but was a good test nonetheless. I include a time-lapse of my work as well so you can see my strokes and my workflow as I figure out this software more.
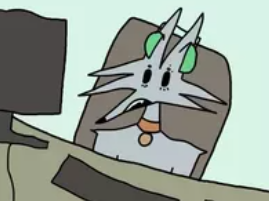
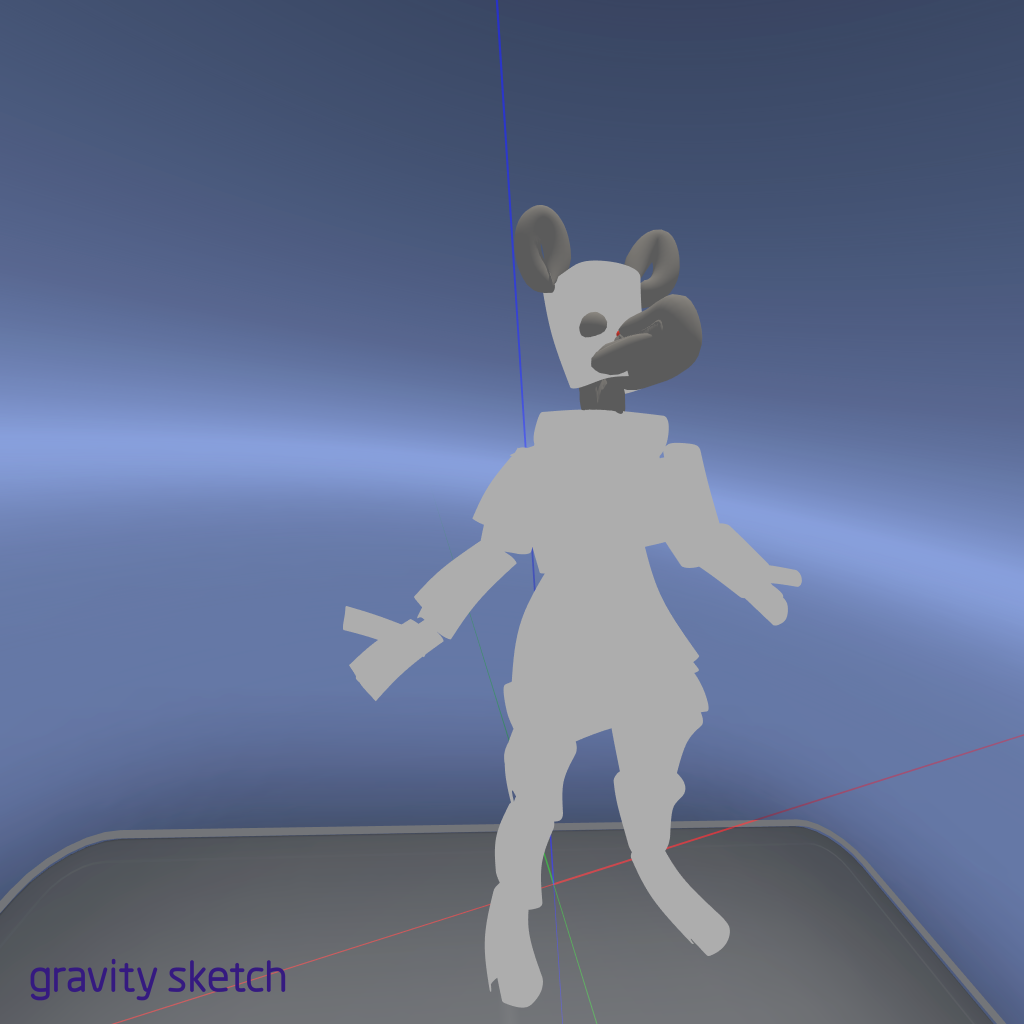
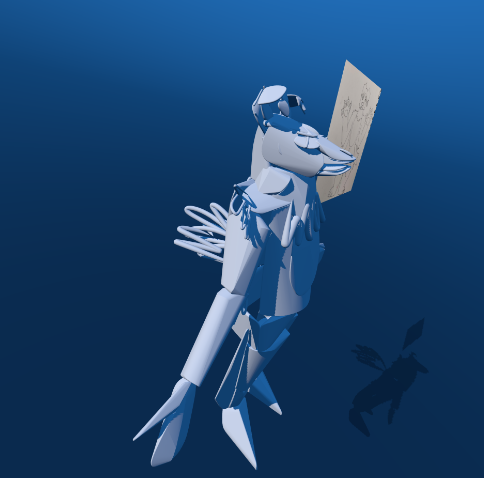
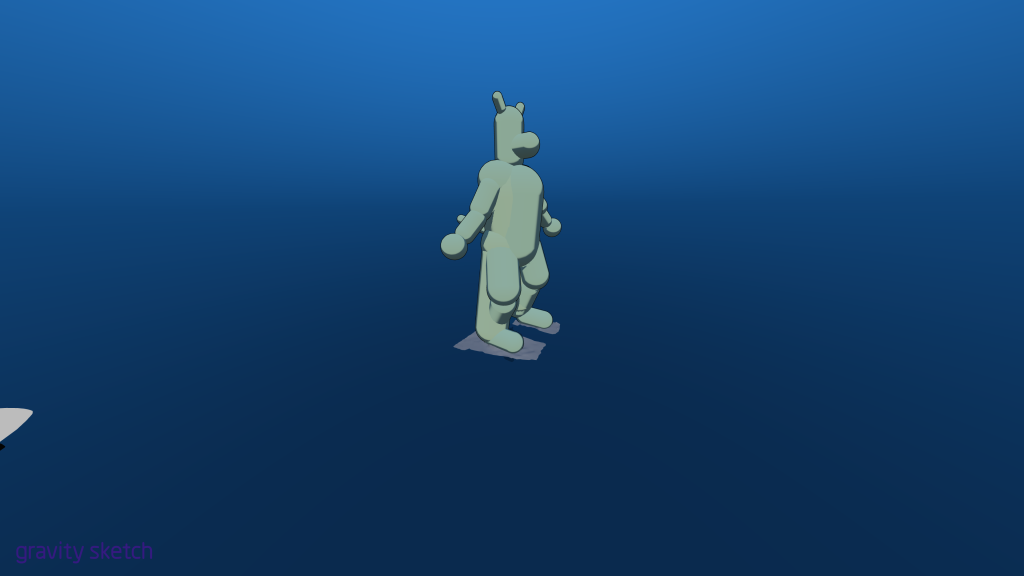
This test is when the final product starts to resemble something the mind can easily read as it isn’t patchy and has a clear form. I used the volume brush this time and I believe this is when I truly fell in love with the workflow as I can see my model taking place before my eyes and it was very satisfying for me. Using the volume brush allowed me to model directly on top of the 3D scan and very quickly get down the base shape of key areas such as the legs and make quick changes as I could grab each volume shape and edit it as needed whether that be scaling it or deleting it. My plan for this model was a simple two-legged hyena creature and I did not make any concept art and just modelled freehand. This was a poor decision and on the next model I knew to make concept art as I found myself getting stuck on the design multiple times.
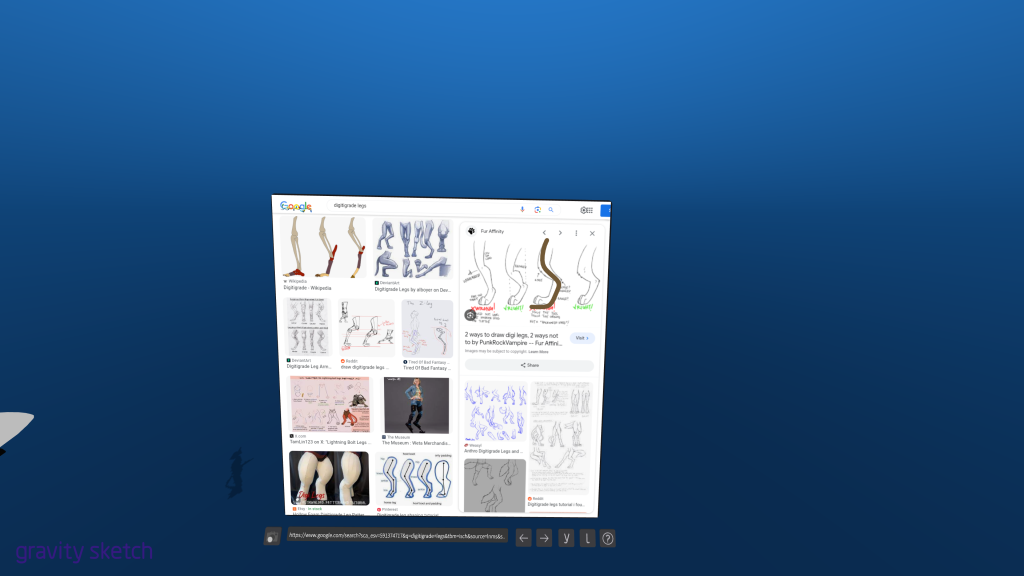
Once the base was down I used in engine browser, which is an experimental feature, for a reference image and drew a single line of the shape of the leg I wanted then lined that up with my model and built up the rest of the leg off it. This allowed me to quickly make what is known as digigrade legs which are legs that animals have that walk with their toes but have their foot lifted. This is a very recognisable part of a fursuit and can look very wrong if done poorly so being able to have a direct reference in-software was very helpful.
When the model was finished I went into paint mode and added colour to the model which made it come to life. Even with the colours and overall style being very toony the model now holds a likeness of the original concept of the two-legged hyena creature. I was not happy with the face, however, with the eyes feeling very slapped on and wide but I could not find a way to combat this problem as the tools are limited and no matter what it seemed to look rather goofy.

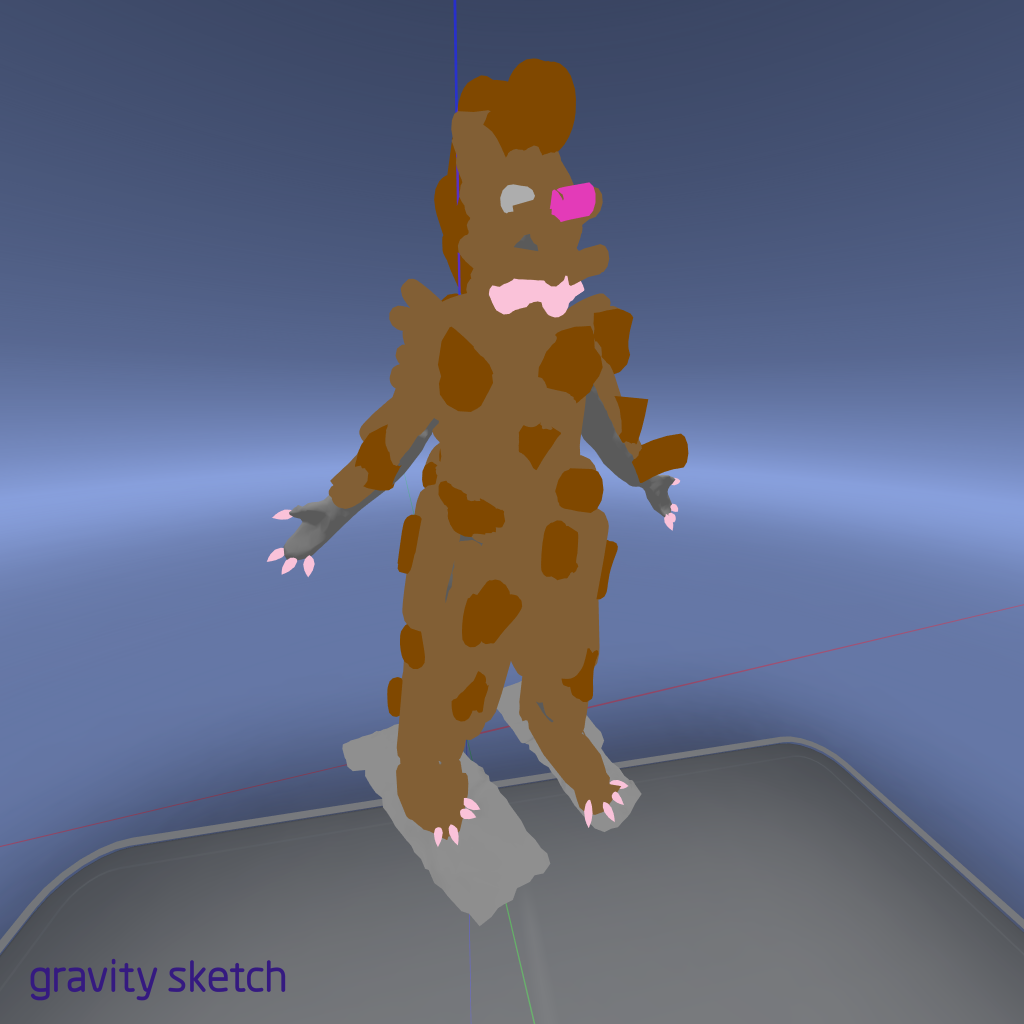
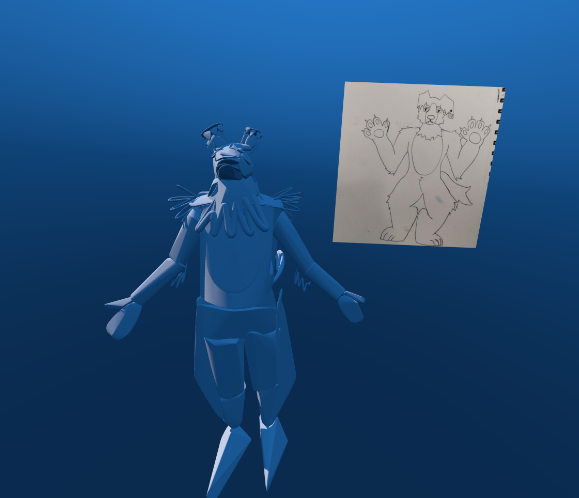
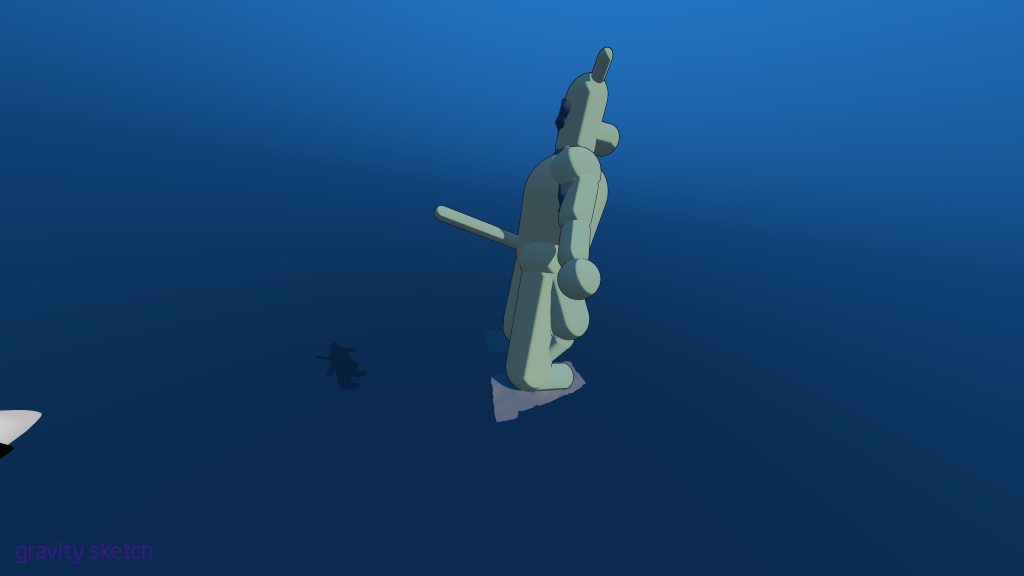
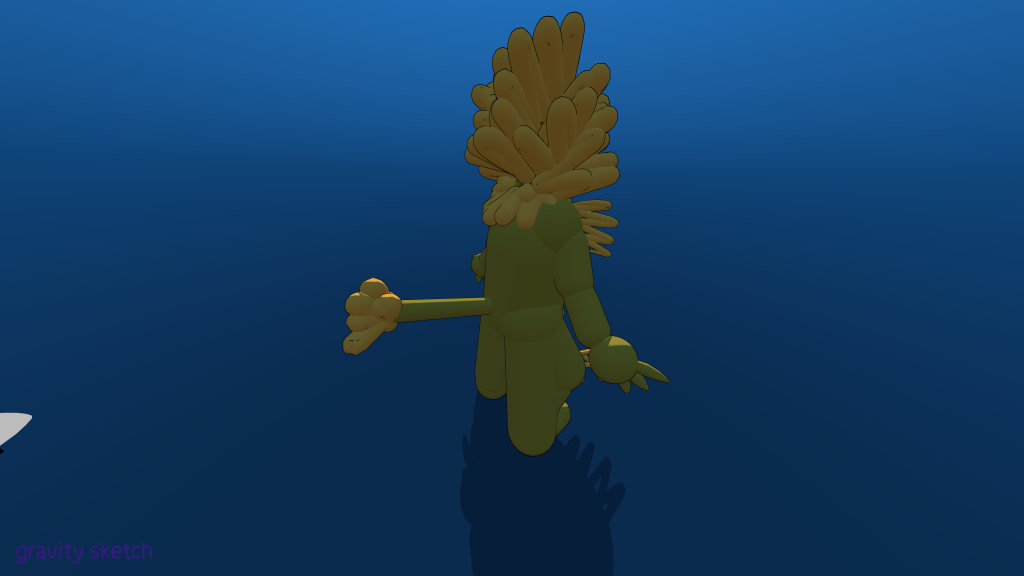
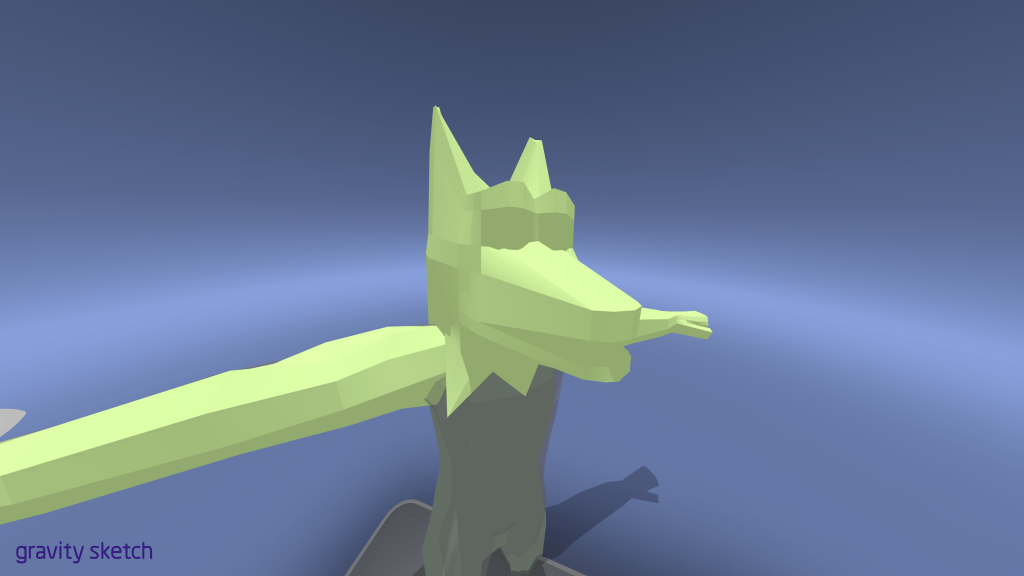
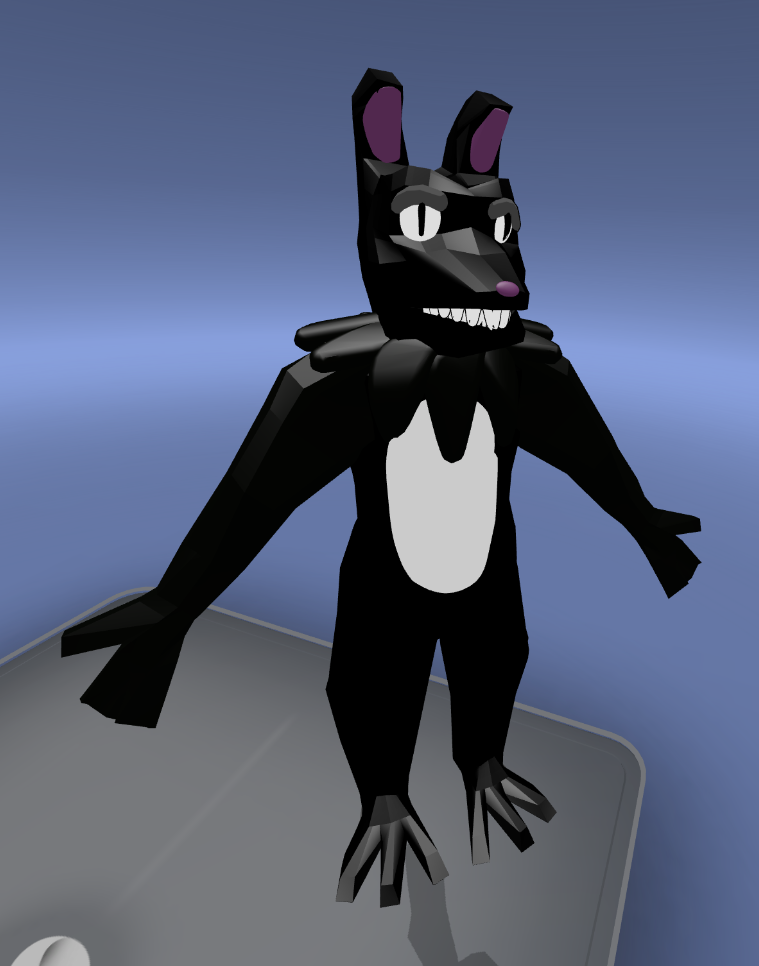
This model used a combination of tools and was my cleanest model yet in my opinion. I learnt from my previous mistakes and made concept art which I imported into the scene and could look at while working which further helped my design come across and kept my model tidy with every stroke being made with purpose.
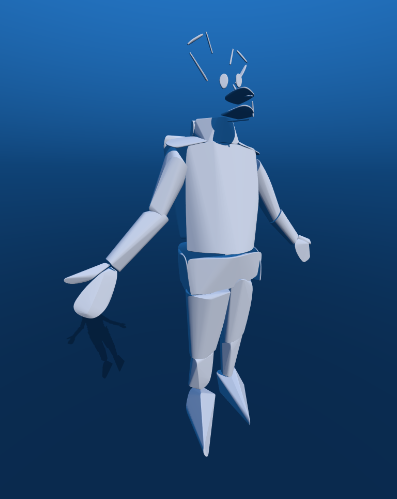
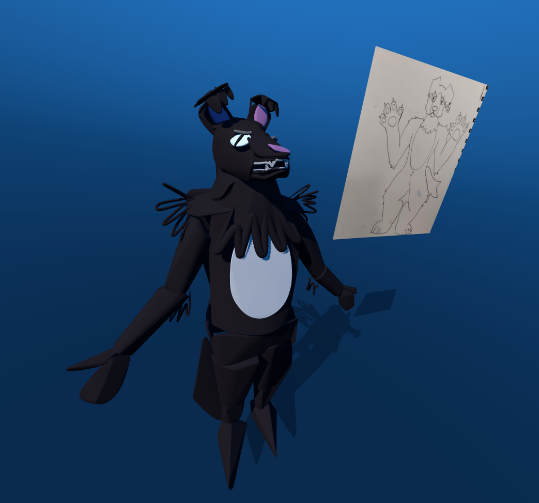
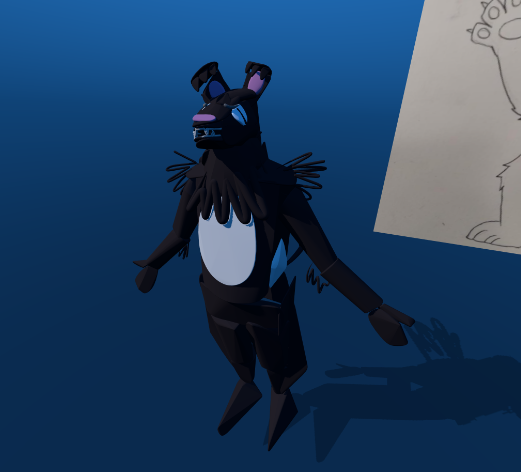
This model is easily the most readable and also the slimmest design so it is feasible that it could be made into a costume and still have mobility for walking around.
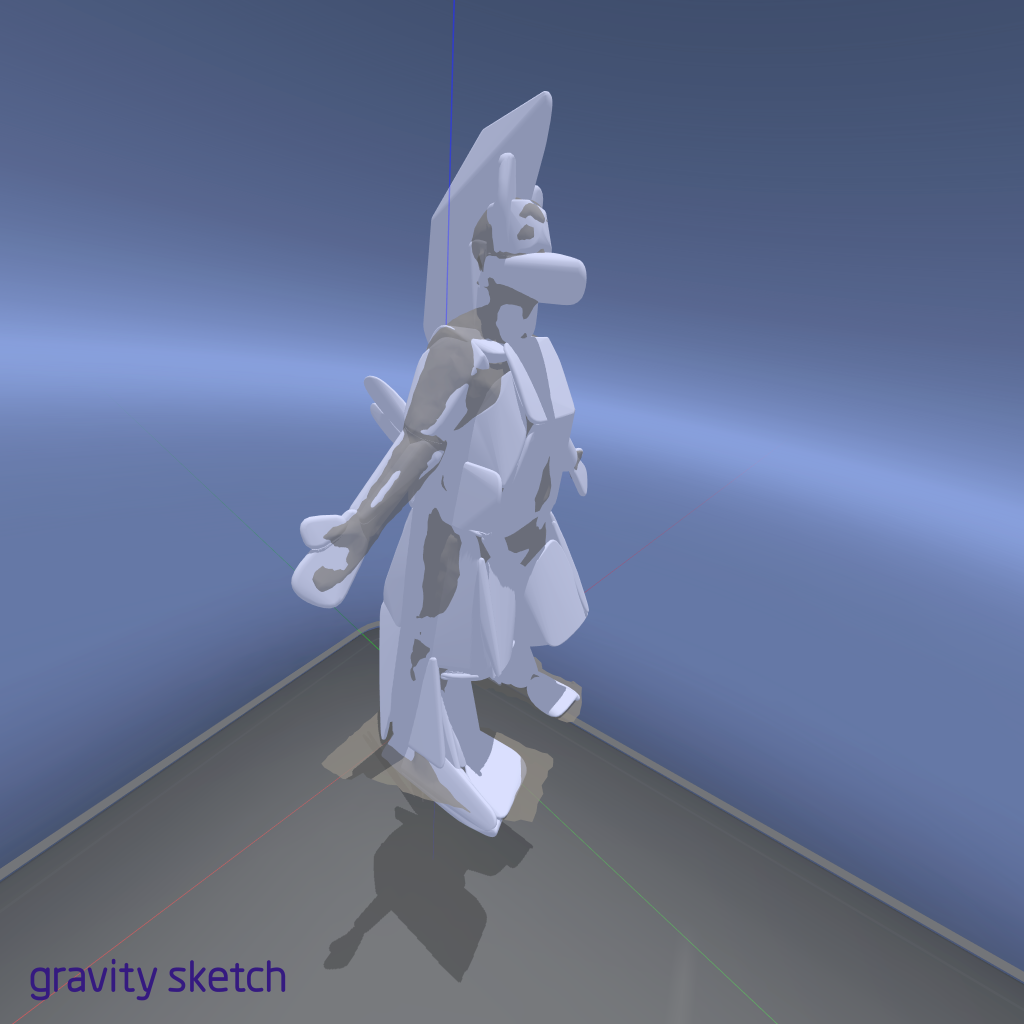
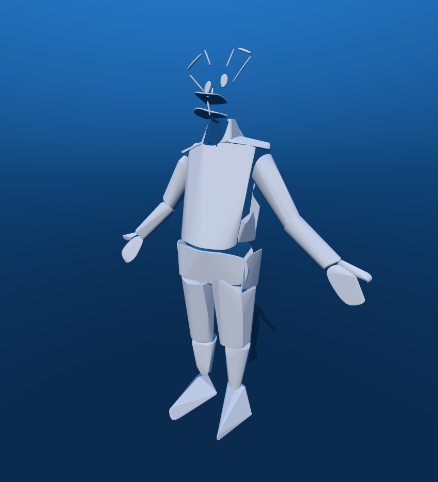
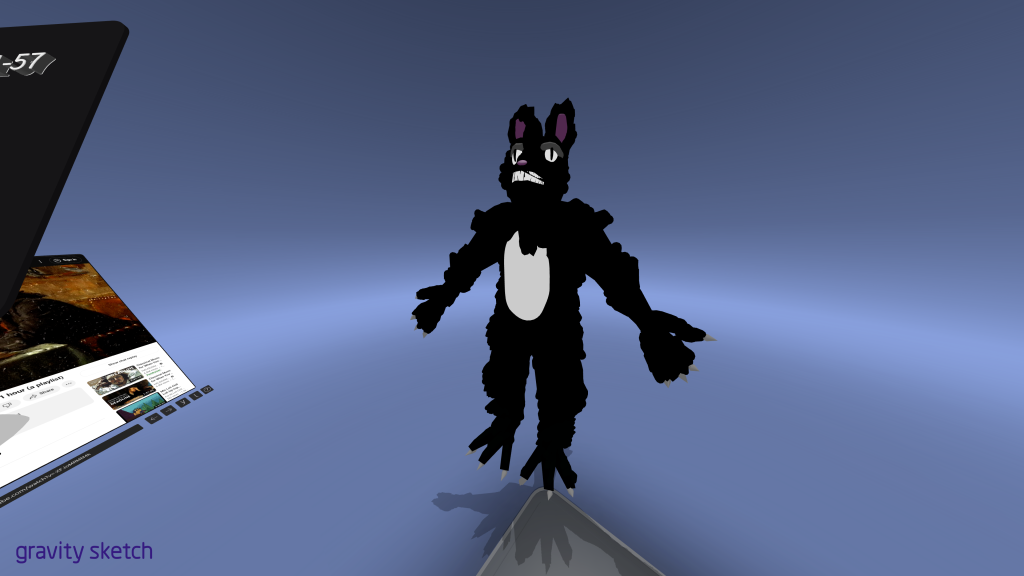
This was my last test design to make and I used direct modelling after a talk with Jason, who suggested I try it out. He wanted to see how not using a base model would affect the creative process and whether it would still yield a good product while cutting down production time.
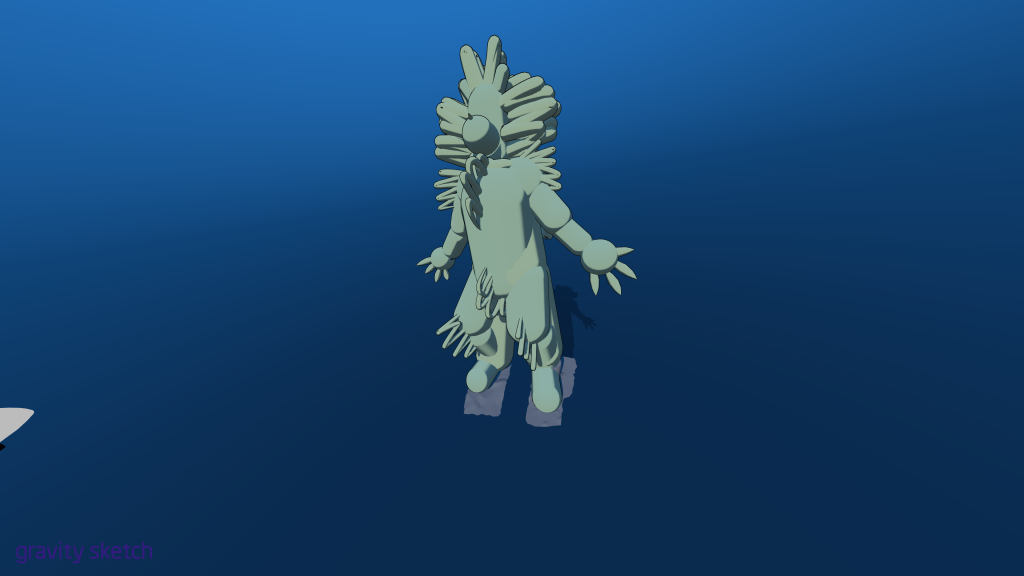
This certainly was my quickest model to make and the result is a passable but not polished piece when compared to my previous model of a sheepdog. It was a good test to have as it allowed me to further explore techniques in the software making me even more confident when using it.
Feedback
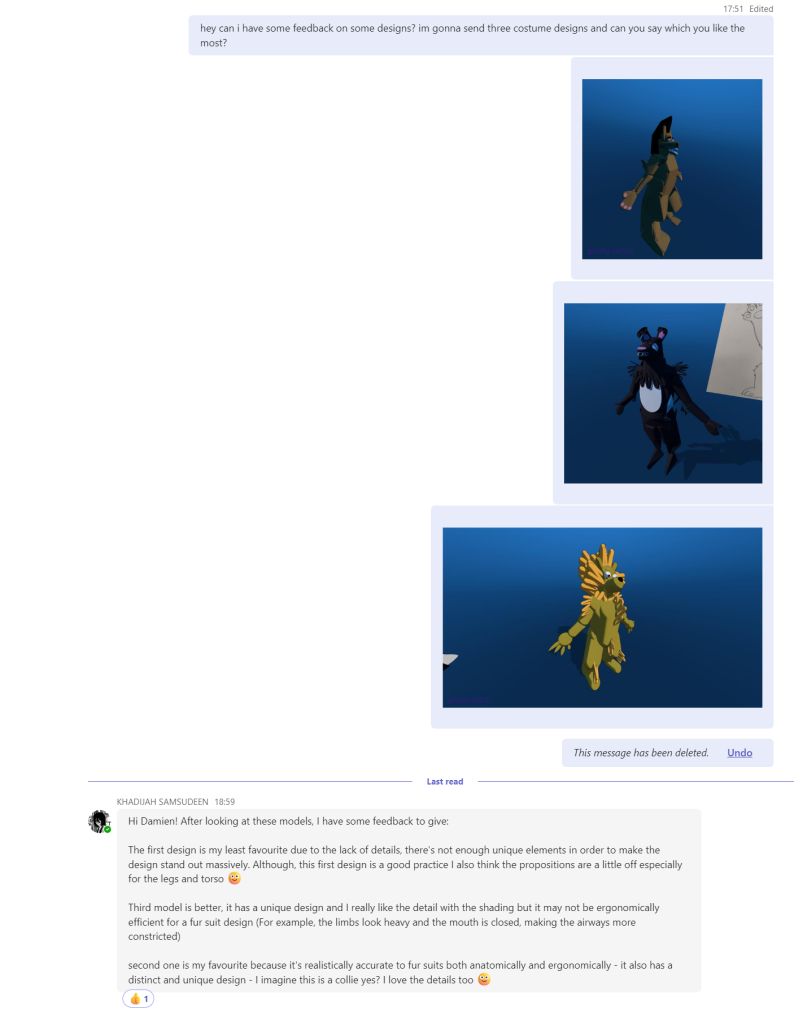
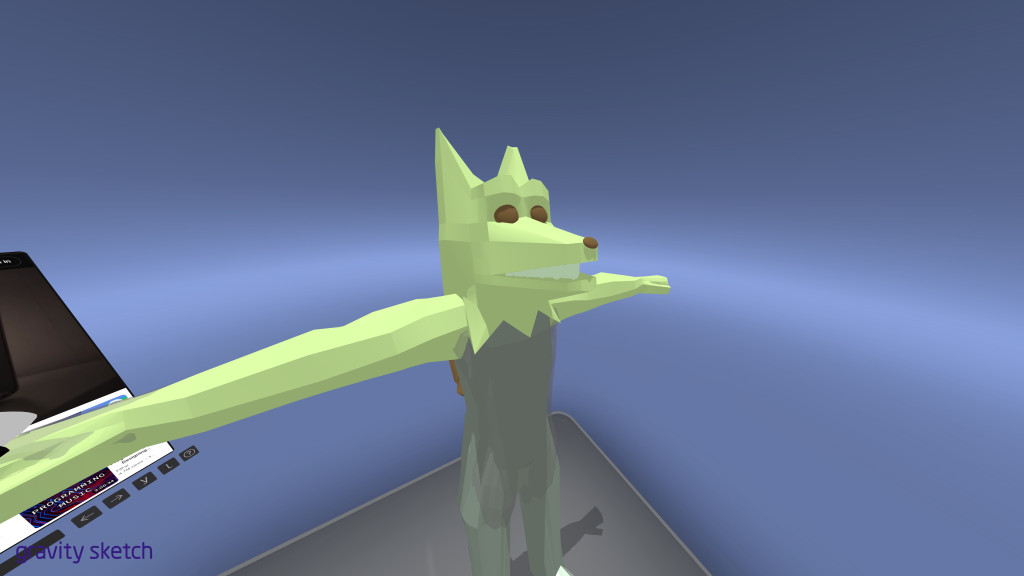
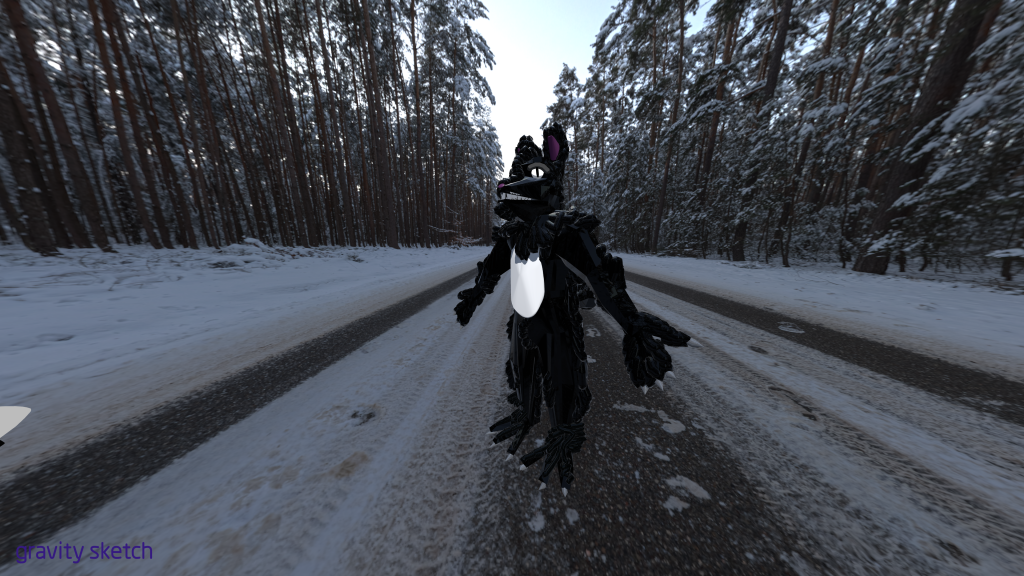
Once the three models were made I asked one of my friends in class for some feedback on which she believed to be the best design to then take that design forward and try and upscale it using the subdivide tool. Asking someone else for advice was key as it allowed a different person’s eyes to look at my work and point out mistakes I could not see and also not a biased view as since I made them I was inherently biased even if I didn’t think it. She informed me that the second dog model was the best as she could envision it being made into the suit the best as it allowed for ease of movement and ease of sight and breathing compared to the others which is a key feature to keep in mind so gave me valuable feedback. Based on the feedback I agree with her and will take the second model forward.
Final model
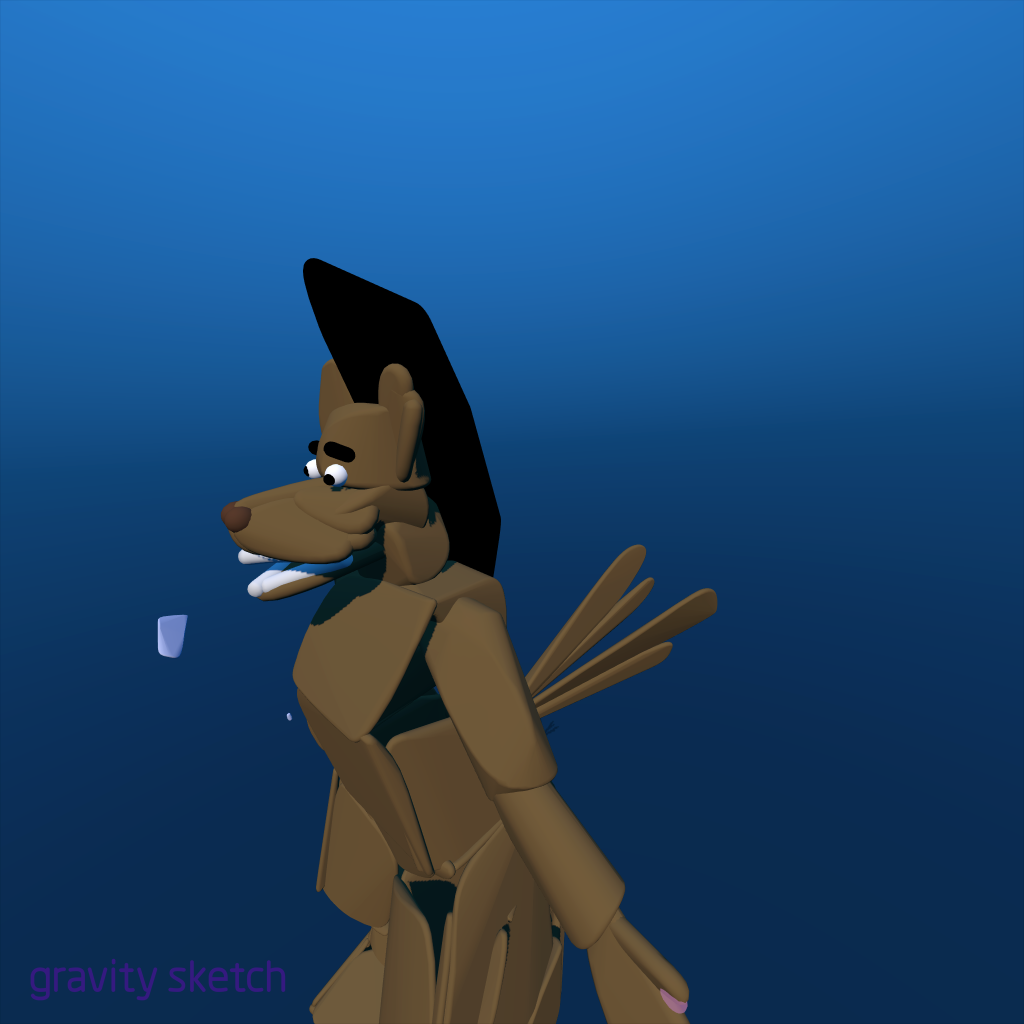
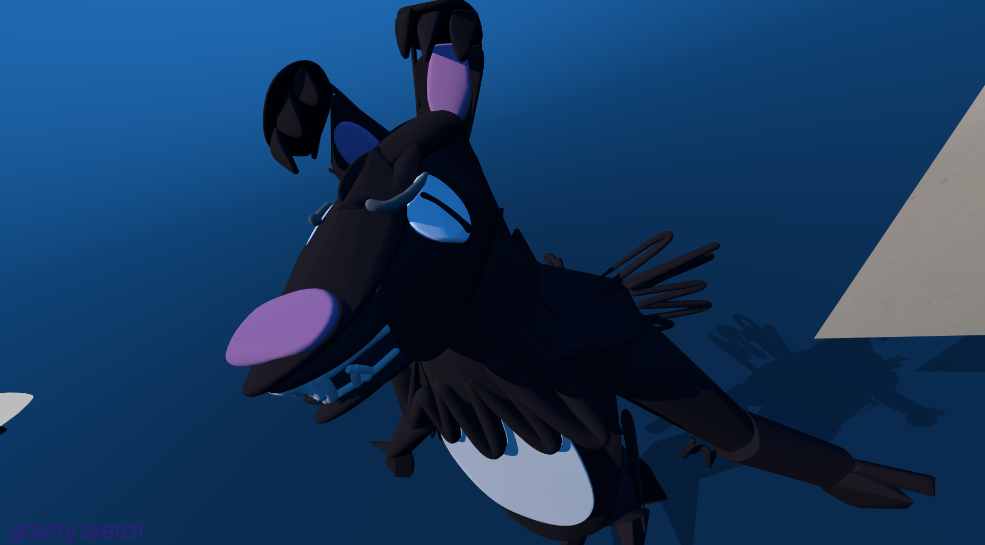
Here I will show the process of the final model which used the subdivision tool and this allowed me to use mirrored mode for ease of modelling and even more fine-tuned editing with me being able to move individual points and create edge loops for a high-level result.


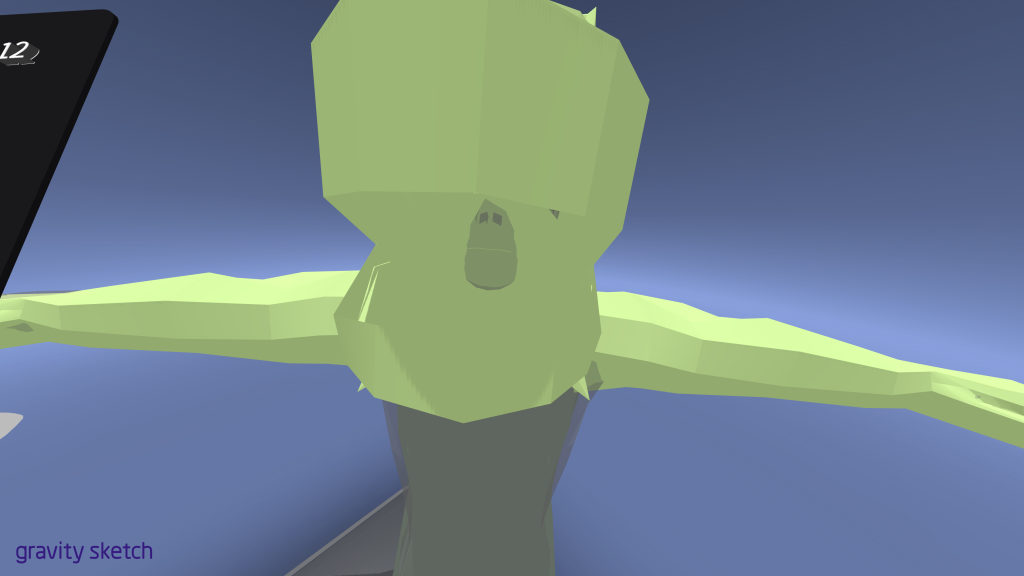
I ensured the mouth opening lined up with the nose and mouth of the person inside it for ease of breathing if this was a real fursuit.
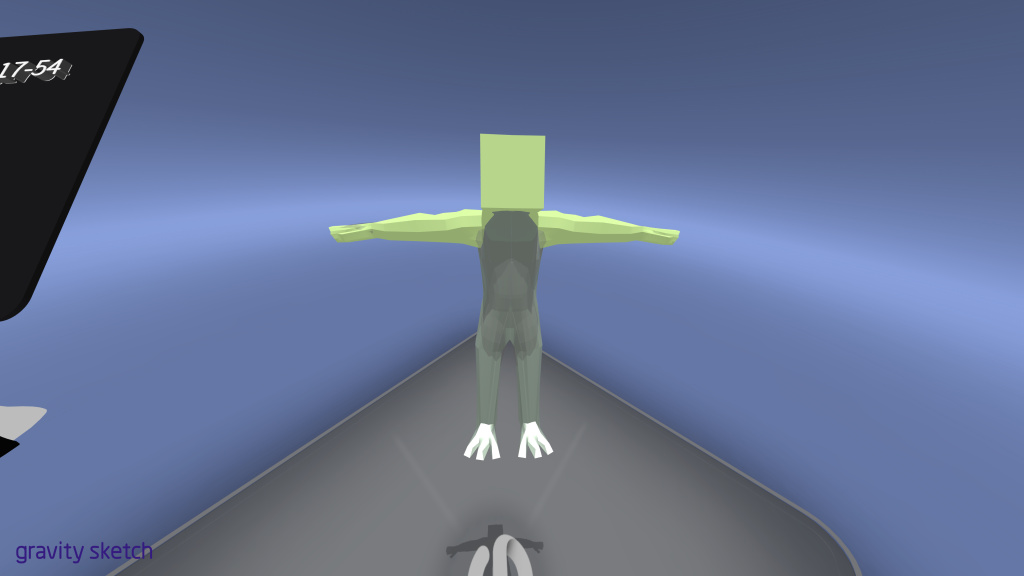
Moved face around
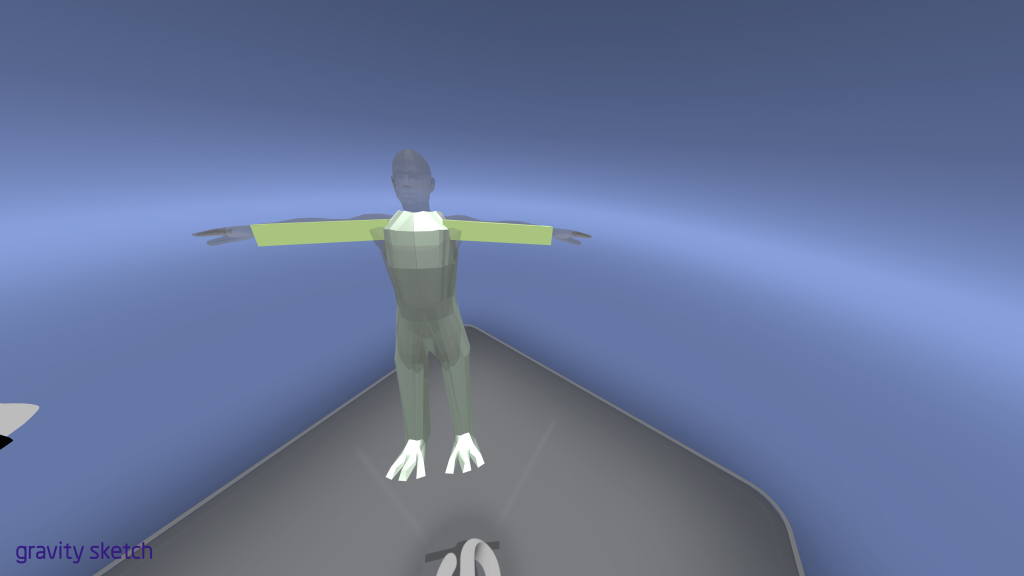
Moved into A-pose

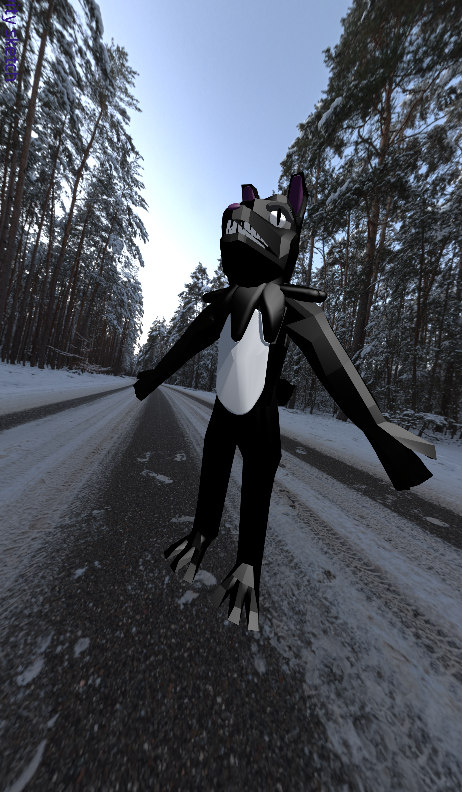
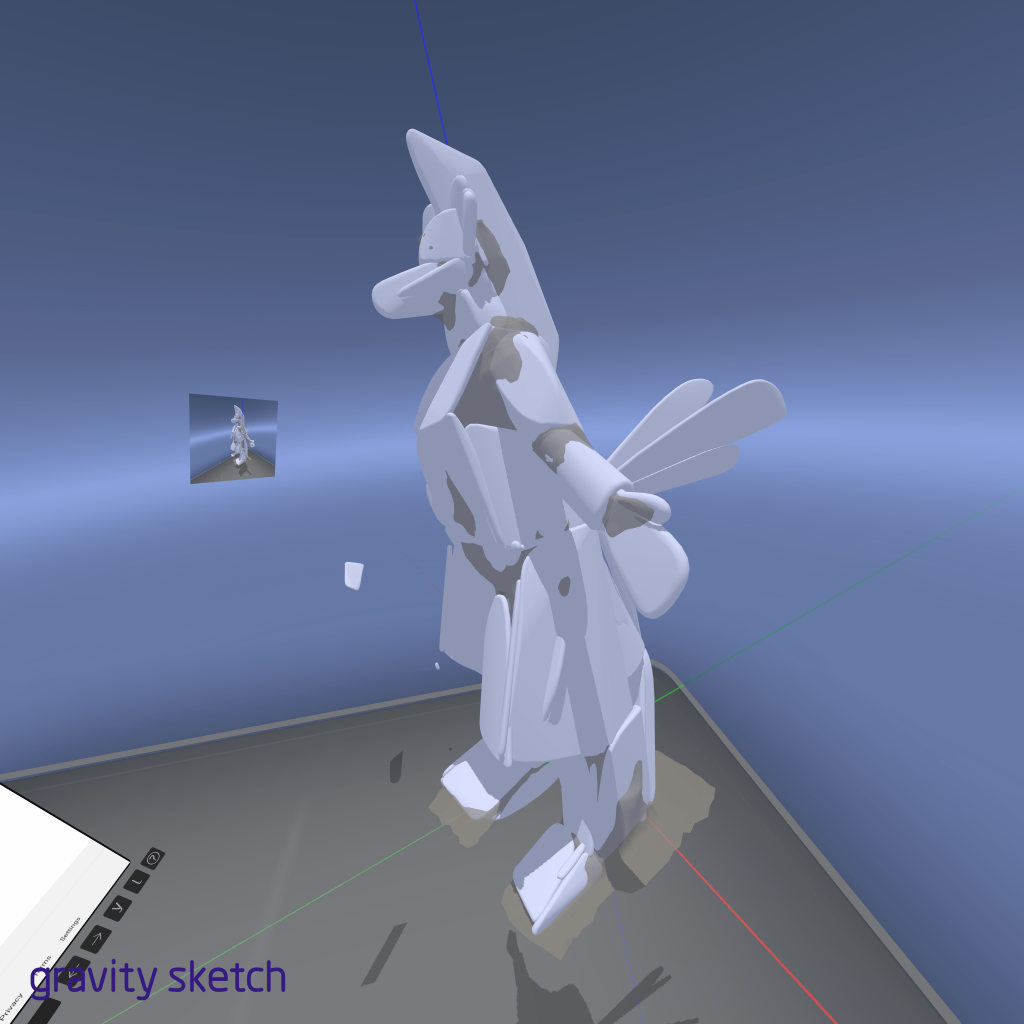
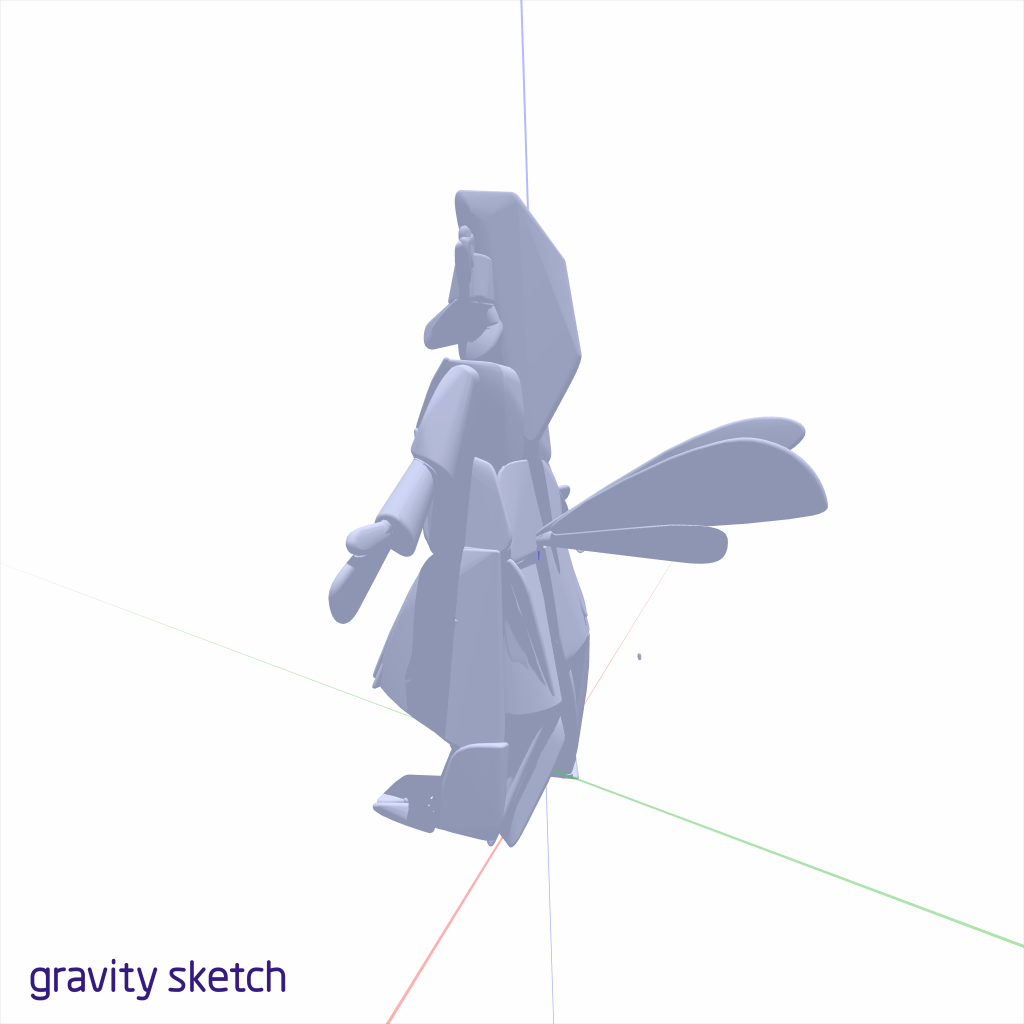
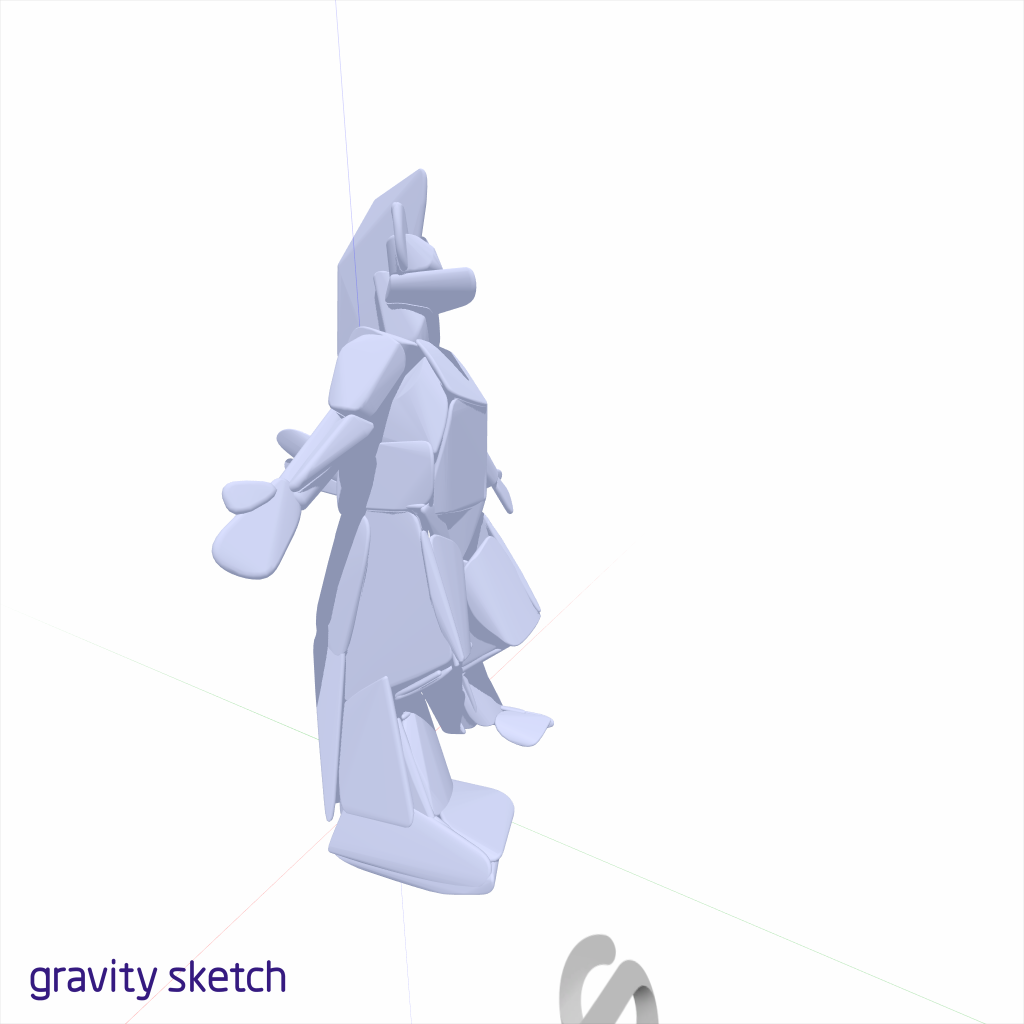
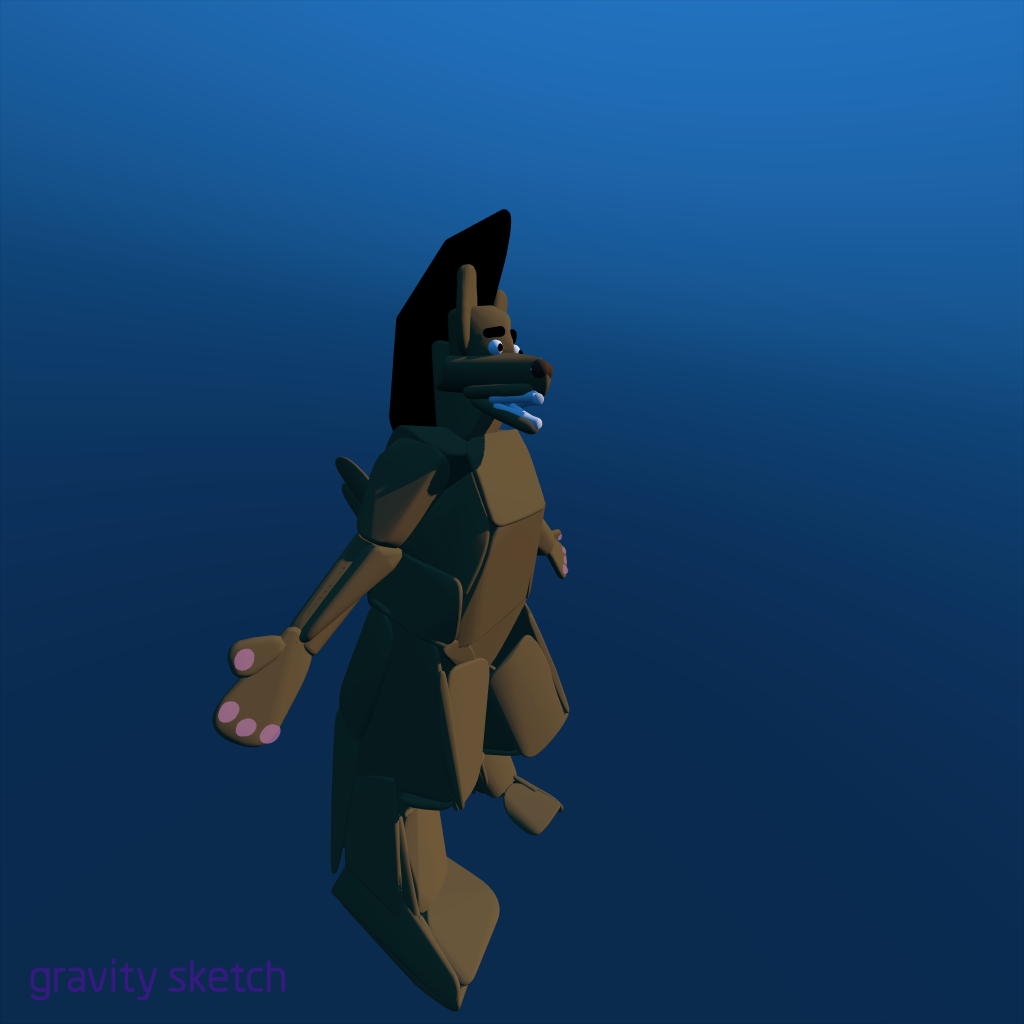
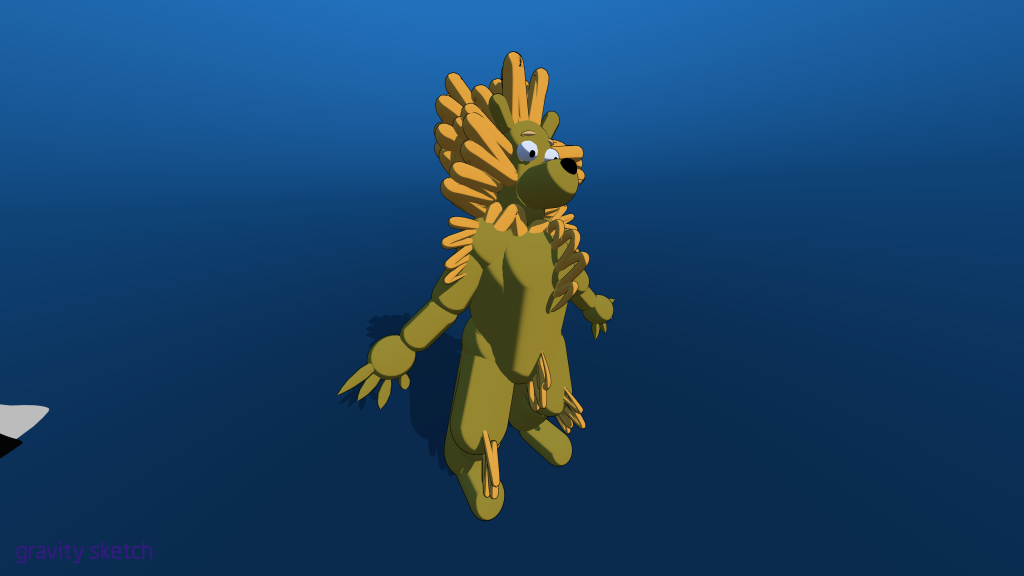
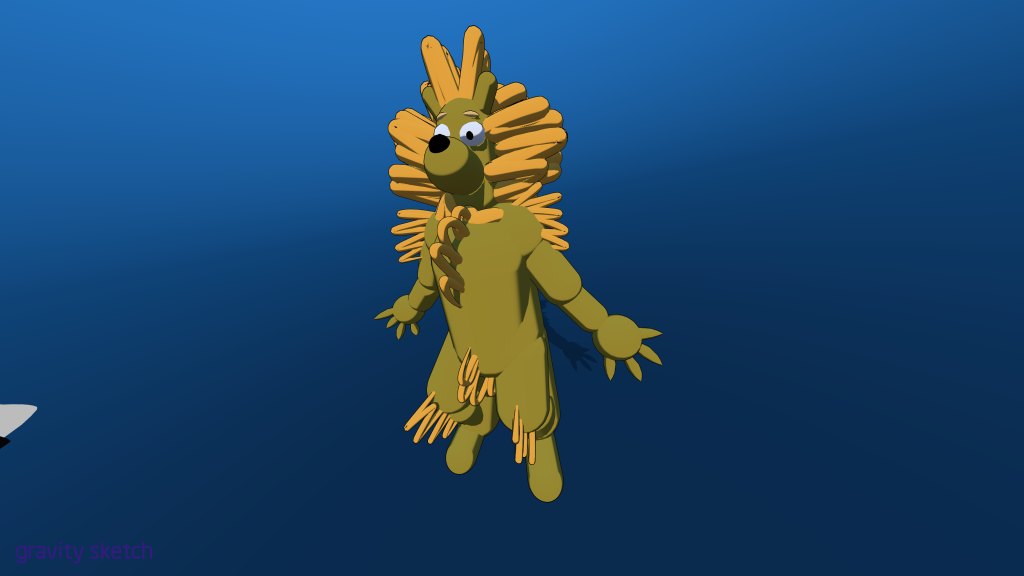
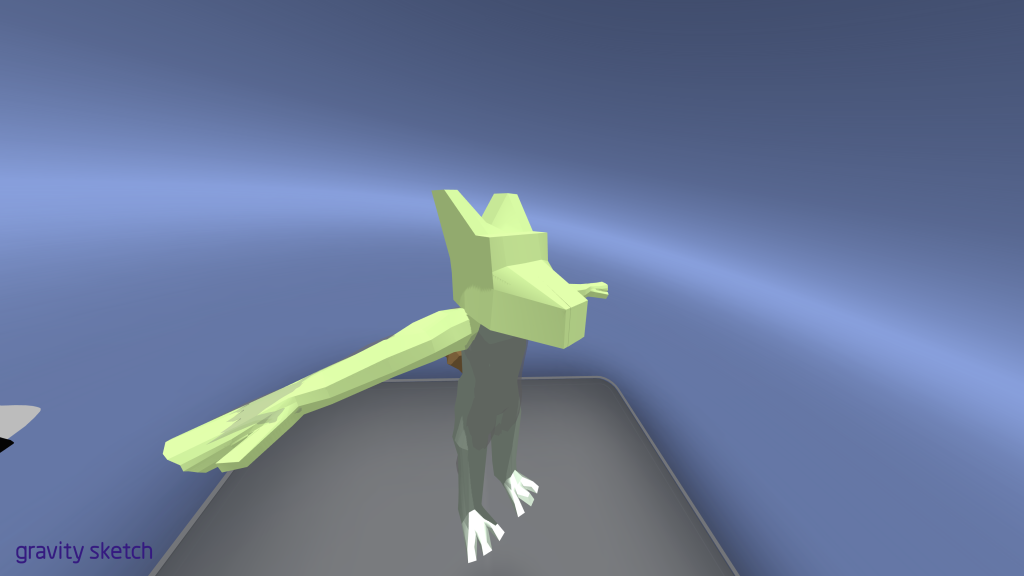
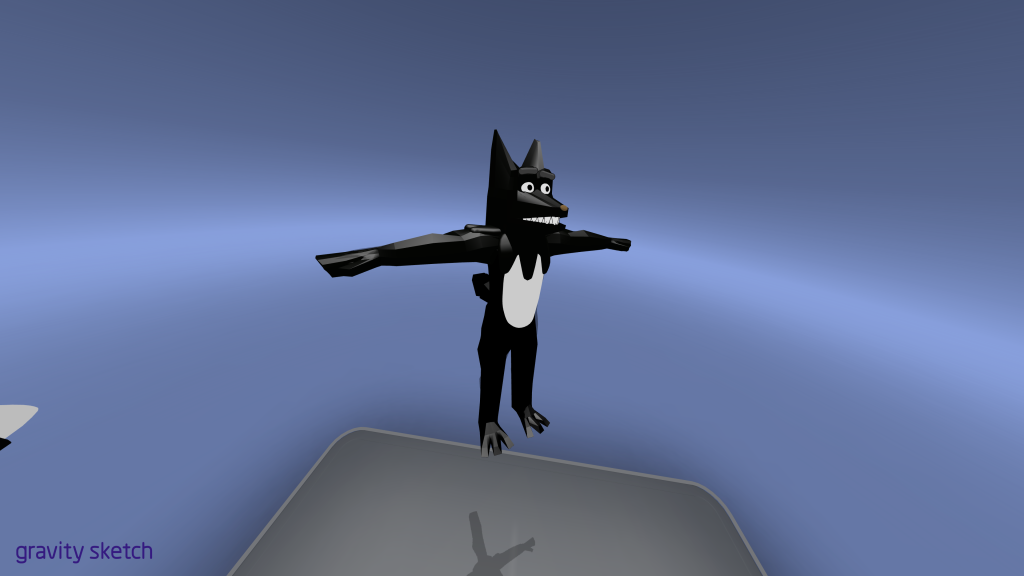
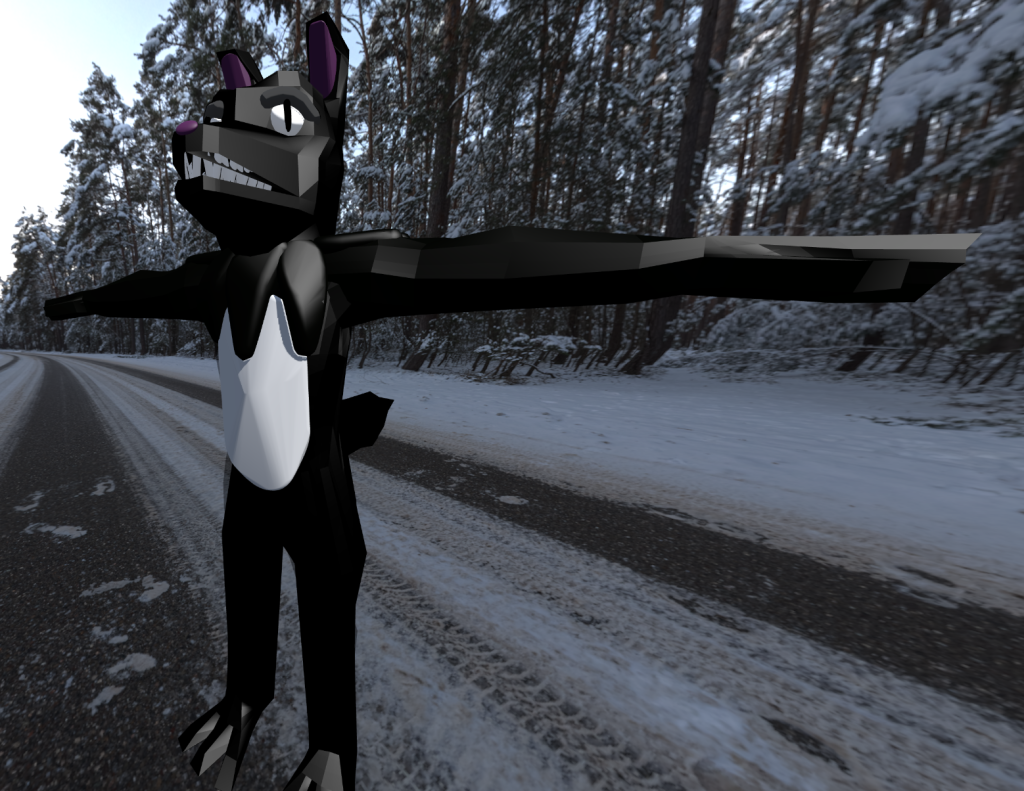
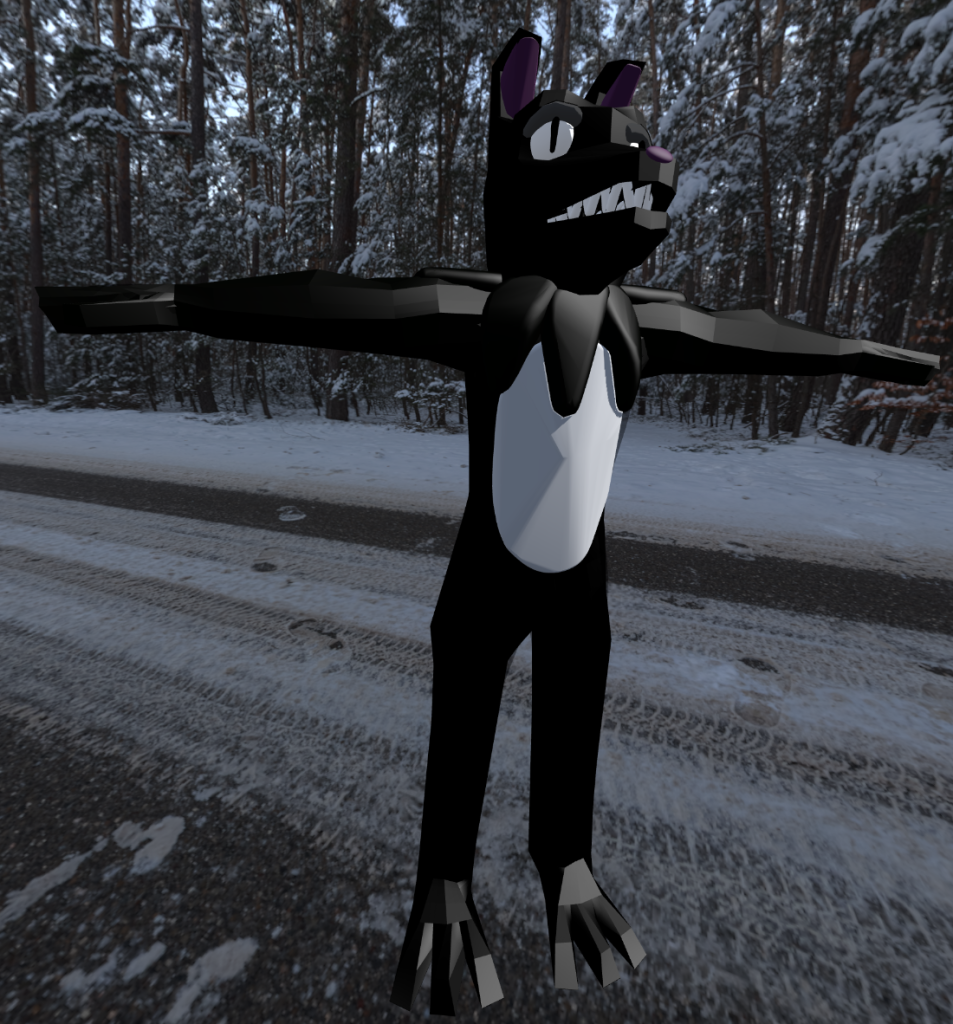
This method allowed for a clean model that was poseable in some manners with me being able to move the arms from an A-pose into a T-pose. This is my best model in Gravity Sketch so far and was an interesting use of this new technology for something the likes of character creation for costumes. However, after some time away from the model I found myself feeling very dissatisfied with the result and went back and made several interactions to try and improve the model by adding shape to the legs and arms and some different colouration to make it look more like a border collie.
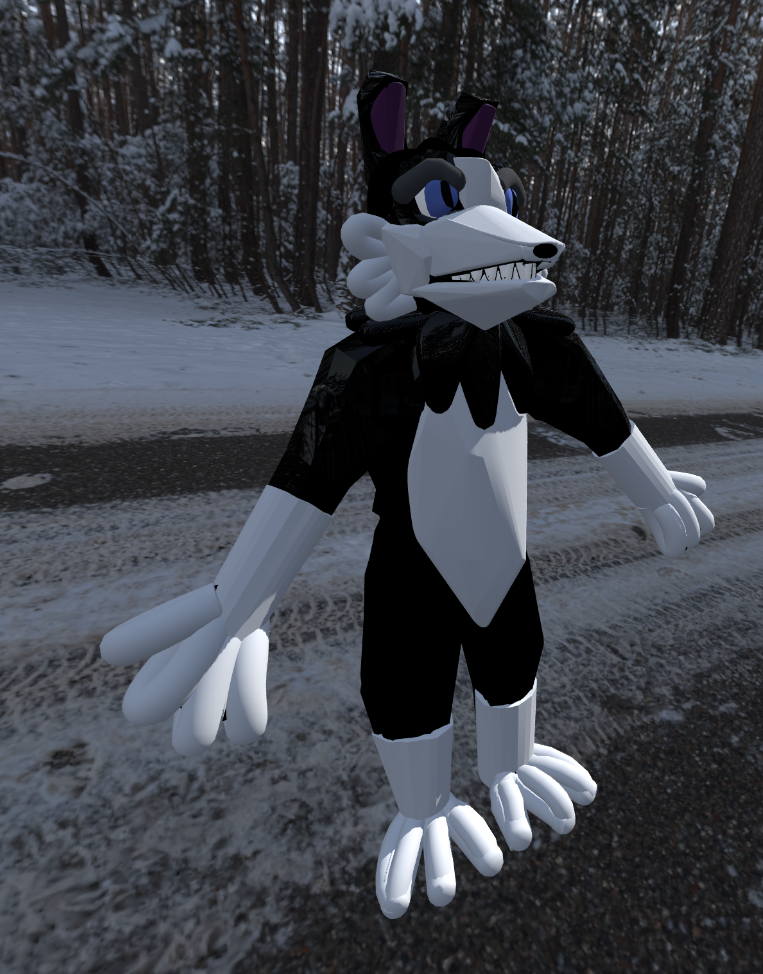
This is the final result after a few hours of editing the model and after the edits it makes it look certainly more recognizable as the base design of a border collie. I had to add the colour on top as you cannot paint the models freely and have to make them all of one colour which sadly ruins it slightly but overall looks good.
Ethics and Drawbacks:
The Ethics of this type of emerging tech are limited as it is not an experience but an application of software. If this were to be used more widespread though, the ethics could be the cost of VR and the motion sickness that can come with the use of it. VR technology even though getting cheaper is still a minimum £300 purchase that makes the entryway to this impossible for some as if you are already creating costumes and if you add this technology it would bring your prices up to compensate for the cost maybe turning away some clients. A personal issue I found as well is the motion sickness that came with being in the headset. Every 20 minutes or so I found myself getting incredibly sick and had to take frequent breaks during the modelling process so if this were to become more used in industry there would be great ethical concern about sickness and people overworking themselves in VR and becoming ill because of this. A way to combat this would be Gravity Sketch implementing a timer that goes off every 20 minutes to advise the player to take a break.
Now my personal drawbacks with the software were the VR sickness as stated above and Gravity Sketch has a point limit so when you make an overly complex model it starts to become very laggy and the frame rate drops drastically, making my motion sickness even worse, so you have to keep your models simple for this reason. Lining up the brushes is also a task that takes some getting used to as working in 3D has its own unique way of painting as you need to check constantly the brushes line up and this can cause the work to often look scratchy and can be difficult to make clean looking art. Lastly, when exporting or importing models you need to use Landing Pad and often for me it would not save my photos when screenshotting and finding your files in-software can be difficult as the UI is rather poor in my opinion.
If VR design was used more widespread as well it would help in reducing the waste made in the fashion industry, which is a major ethical concern at the moment, as if you make a mistake in VR or if you no longer like the design you can just remove the part you do not like instead of throwing it out increasing land waste. There is also a data concern on SketchFab and Scanniverse as the scans uplaoded can be downloaded by all since to make them private is a premuim feature. This is a paid feature so most people won’t have this ability. The concern is the wrong people getting access to the models and using them for such mallicious acts as deepfakes ,which is the use of AI to mimic people in either their voice and/or body which a downlaoded model will give them that ability. This is good to keep in mind if this technology becomes more widespread and sites such as SketchFab may need to revise their data privacy.
Video
Reflection
From making my final piece I have been able to solidify and consolidate my feelings on this type of emerging technology. I believe that using VR art to cross the realm from digital to real-life creative processes in things such as costume design can be achieved and I can see it feasibly being used in the future, that being said it is not without its drawbacks. The work pipeline can feel rather messy and you spend a large chunk of time building on the mannequin you have already scanned in to make it useable which feels like a waste of time, while making a base T pose human is very easy in software such as Blender or Maya. With this knowledge, it makes sense if I were to do this again to make the base model of the human in another software and then import it as a .OBJ into Gravity Sketch then model on top adding detail and quickly be able to make changes such as colours, adding fur patterns, sketching on placement of fabric and such like, as I don’t think making the entire model in VR is very efficient but was very valuable to trial using and I feel like I have a better understanding of this emerging technology now.
If I was to improve GravitySketch I would make it have more specific features for fabrics and the design of such items as clothes with an example feature such as cloth simulation physics. I think a key missing ability is more brushes that allow smooth strokes to avoid messy lines and for the topology to come out smoother when using the subdivision tool as in its current state the model is unusable for animation. GravitySketch also needs the ability to paint only a prtion of the model as right now you can only bucket tool the shapes which means they lack detail currently.
Overall this was a good test and met my goal of attempting the use of VR art within the costume creation pipeline and allowed me great insight. Hopefully, there will be software in the future made just for clothes and design as Gravity Sketch was good but has multiple areas it could improve on. If there was software specially made for costumes I could see it becoming rather popular as it allows for another medium of creativity and makes you stand out among the rest of the competition. All in all I would say I was successful and met my goal, but I understand its drawbacks due to the current level of software.
References
Oluwaseyi (2020). Gravity Sketch is free for individual users! [online] Gravity Sketch. Available at: https://www.gravitysketch.com/blog/articles/gravity-sketch-will-soon-be-free/ [Accessed 03 Jan. 2024].
Bailey, C. (2021). Virtual Reality Fashion Design: The Benefits. [online] Emperia. Available at: https://emperiavr.com/2021/12/02/virtual-reality-fashion-design/ [Accessed 03 Jan. 2024].
www.furaffinity.net. (2012). 2 ways to draw digi legs, 2 ways not to by PunkRockVampire. [online] Available at: https://www.furaffinity.net/view/5696834/ [Accessed 04 Jan. 2024].
www.youtube.com. (2023). I went to a VRChat Furry Con. [online] Available at: https://youtu.be/hMKd1ZL4K5Q?feature=shared [Accessed 18 Dec. 2023].
www.youtube.com. (2023). Design Massive Worlds in VR With Gravity Sketch | Full Game Ready Tutorial. [online] Available at: https://www.youtube.com/watch?v=2YZr3yqWXzk&ab_channel=TheSpatialCanvas [Accessed 16 Dec. 2023].
www.stolaf.edu. (2020). Northern Boundary News Article 2. [online] Available at: https://www.stolaf.edu/nbs/NBS_Aug_20/Article2/Article2.html [Accessed 02 Dec. 2023].
www.youtube.com. (2023). Gravity Sketch – Character Creation. [online] Available at: https://www.youtube.com/watch?v=AYaqOCY-X04 [Accessed 24 Jan. 2024].
www.youtube.com. (2021). Gravity Sketch vr – creating a character. [online] Available at: https://www.youtube.com/watch?v=iYoTAjzMcaw [Accessed 28 Dec. 2023].