Character design Assignment 1
Planning
When it came to start the planning I took some time to figure out what media I wanted them to be used in and decided that a video game format would be the most fun for me and also fit the 3D style. After looking at other models used in the industry I could get a grasp of how complex I could make the character within the time limit then went on to designing them. I used Padlet for exploring themes and different concepts for the character, then went with an anthropomorphic wolf character as I believe it would be a unique character that would look good on my portfolio. A werewolf-style character would show I have complex knowledge of the software and also a very creative mind to be able to come up with such original designs.
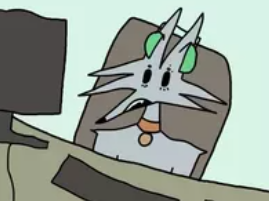
Once I had a base idea of a wolf-man, I needed to give him some personality and backstory and I came up with a 36-year-old man who happens to be a werewolf but not a very good one. One night under a full moon he changed for the first time but was not a big strong handsome werewolf but instead a weaselly-looking lanky one. And here’s the kicker, he didn’t change back after sunrise, he never changed back at all. He is a work-at-home IT man and is living off a diet of popcorn chicken and diet cokes. He sees himself as very “hip” and thinks he is very up-to-date with internet culture but mostly has humour based on the 2010 internet.
I wanted for him to mainly be a character used for comical relief as you find these types of characters are usually well-loved in media. His place in the game is as an NPC and is used for comedic effect with funny side quests. The player can talk through his letter box to learn he wants the new boxset of his favourite show but cannot find it anywhere online, which prompts you into a side mission to help find it and when you post it he opens the door, allowing you to see him and get to properly talk to him.
https://padlet.com/DameDarl/ukt74wj59wsxjjgh
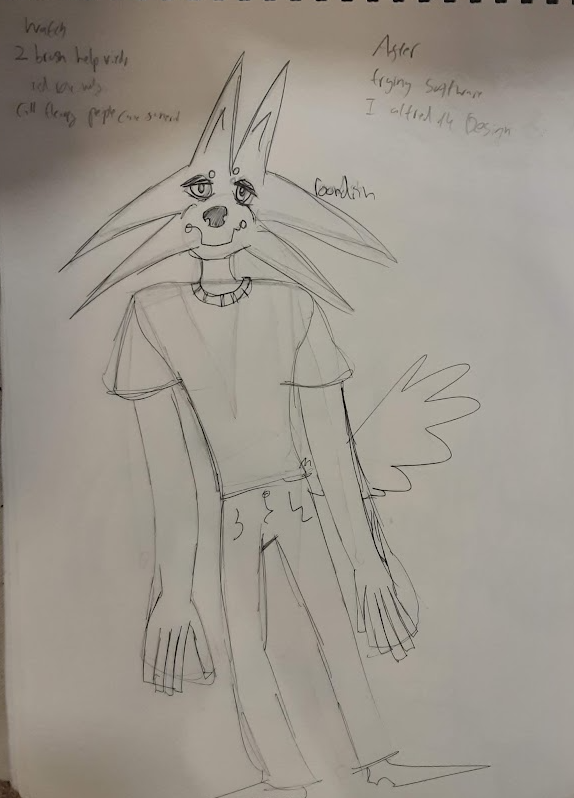
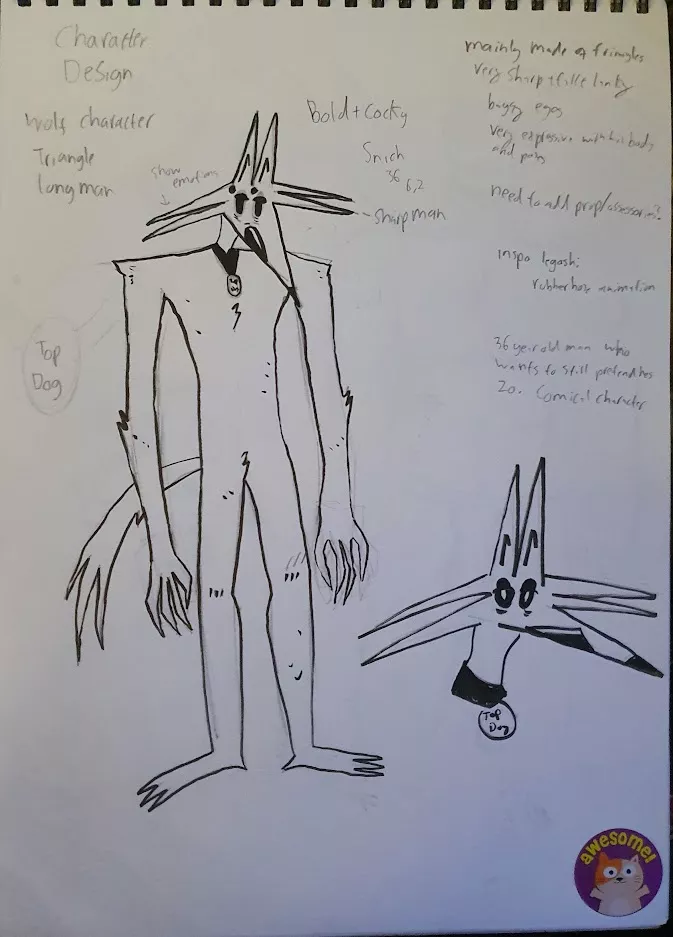
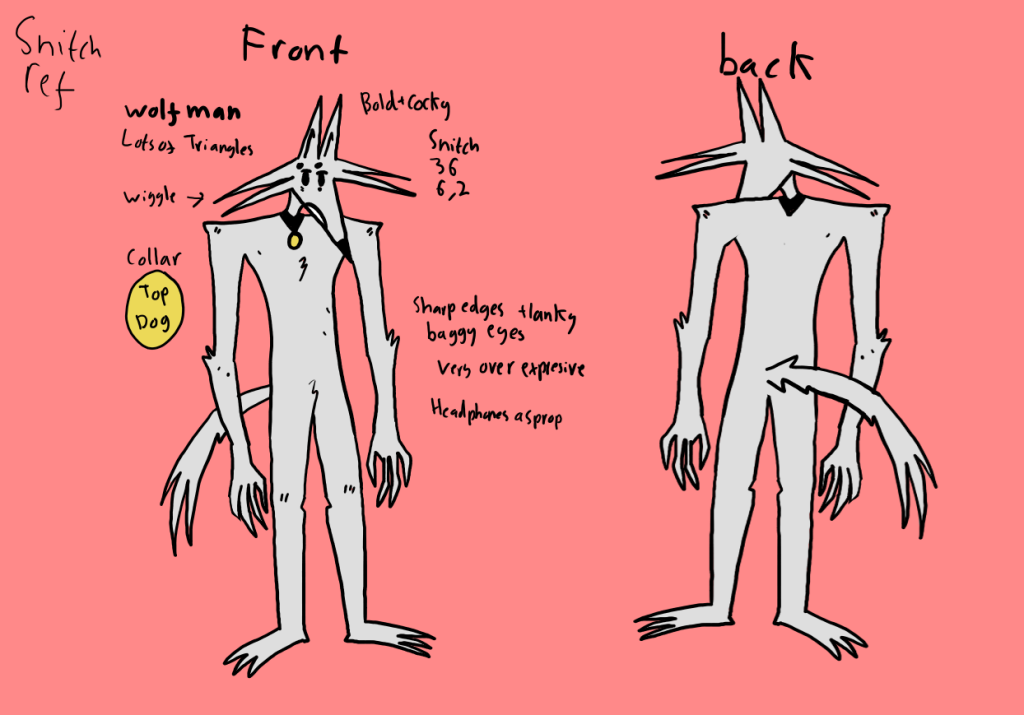
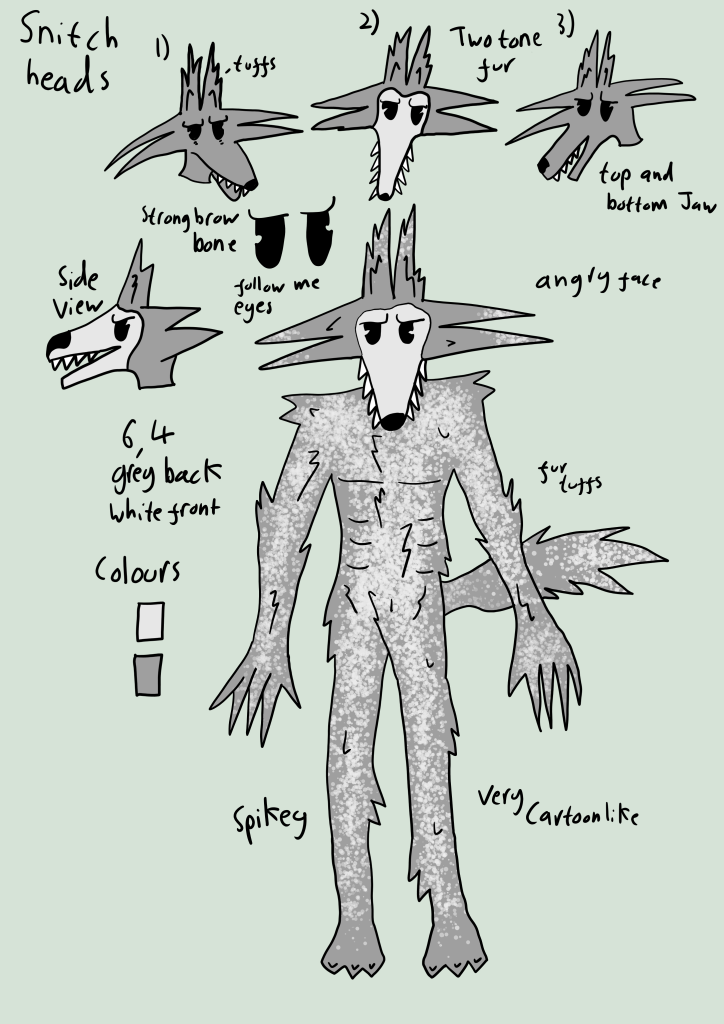
I experimented with different shape theories to really test the design of the wolf character I dubbed Snitch. I tried making him very simple, more detailed and also more rounded and each gave off a very different feel of the character. I don’t think anything works as well to get the overall feel of the character as when he is drawn pointy and sharp and, in term of modelling him, it seems easy to do and yet very effective visually to make him striking. I gave him these huge lurching shoulders and a tiny waist to give him an inhuman silhouette to separate him from the other NPCs in the game world, as well as making him more visually interesting to avoid making him a boring design.
I did multiple drawings of Snitch until I made him a final reference sheet, I played with things such as colour palette, fur type and mouth shape. I chose a dull pallet as it works with his character being a run-down IT man and with traditional werewolves in media already.
Blockout
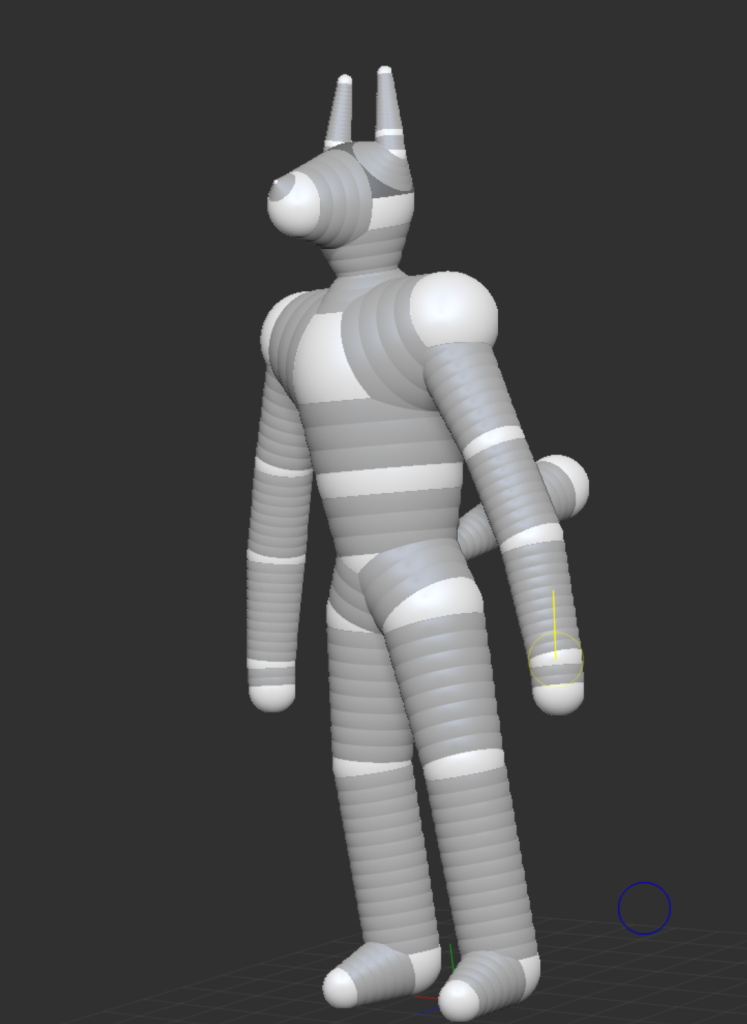
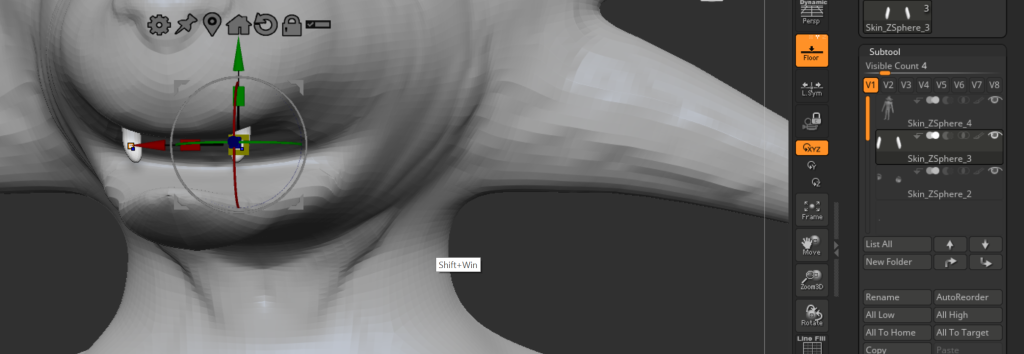
After getting my final design done I could move into Zbrush to start the blockout. To start I used Zspheres to make a rough shape of his body and, once happy with the look, made him an adaptive skin which allowed me to start sculpting him. I found Zspheres very helpful as I could block out the base shape of his body in mere minutes and being able to create spheres the same size as the one before by pressing shift helped with making his legs and arms proportional. After blocking him out I smoothed him down as he looks very rough and this massively helped me have a nice smooth surface to start modelling on top of.
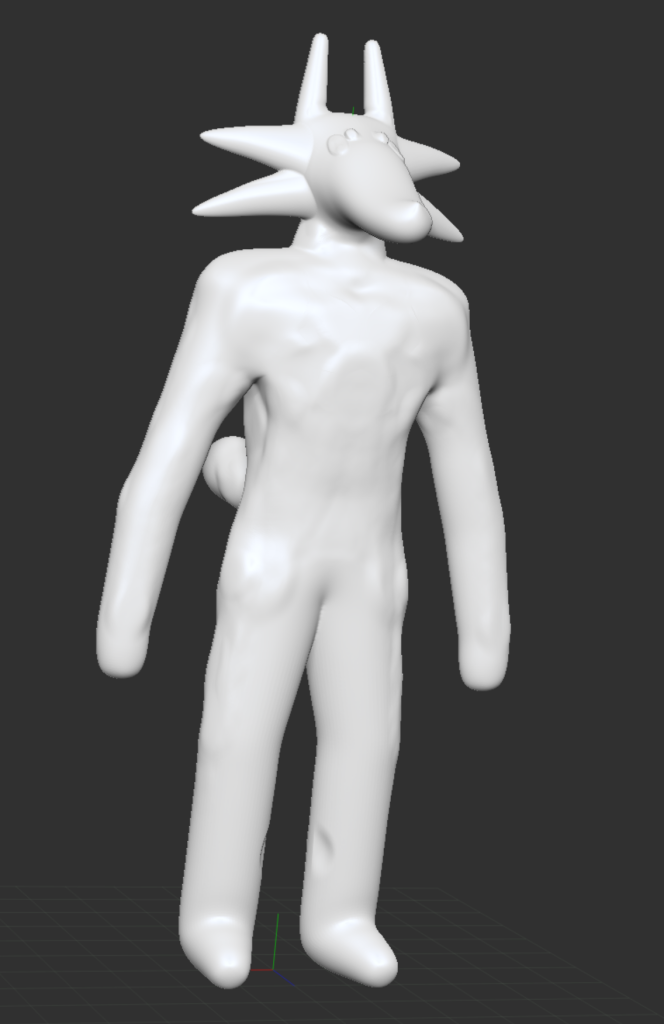
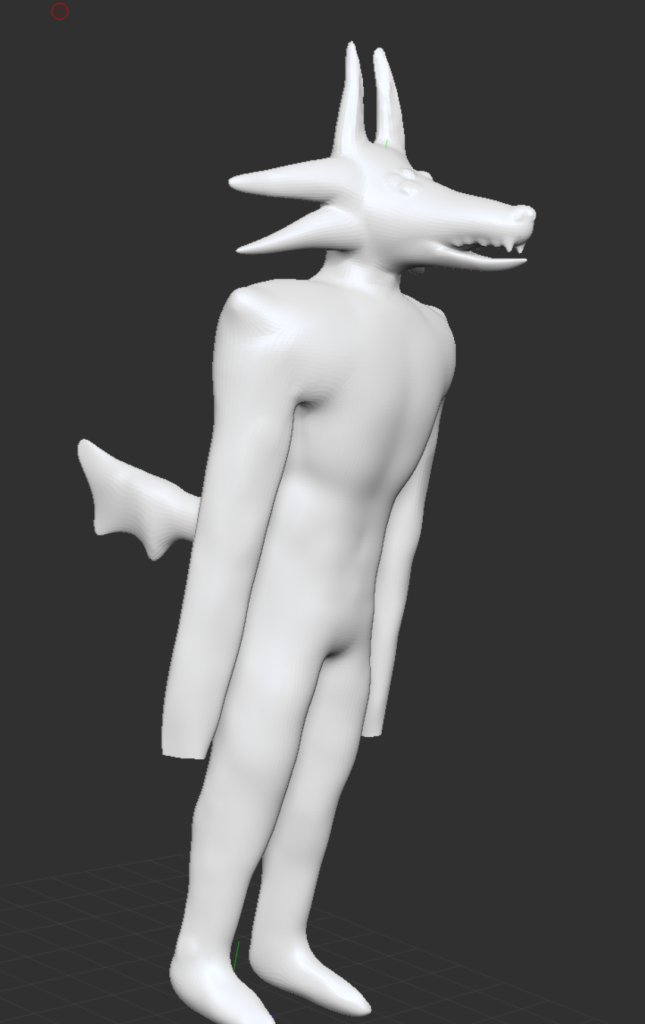
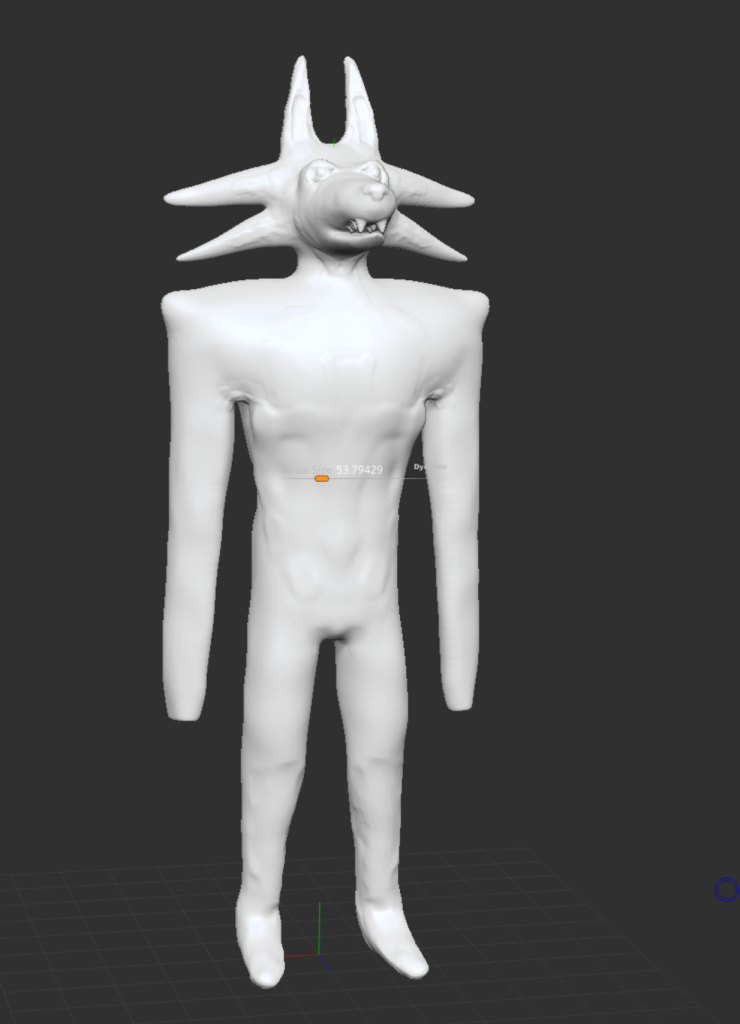
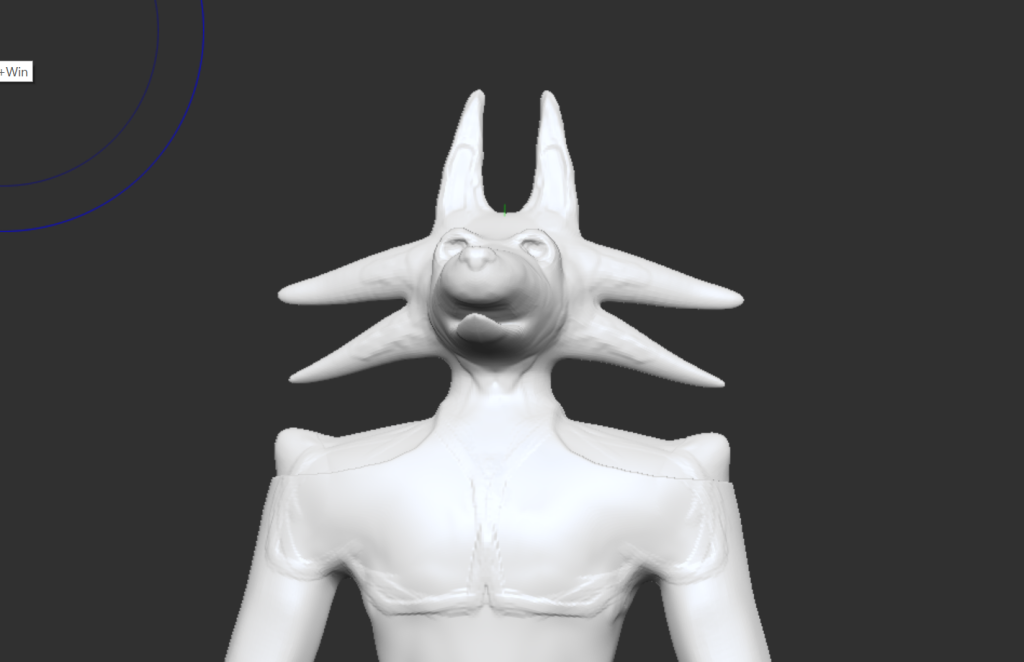
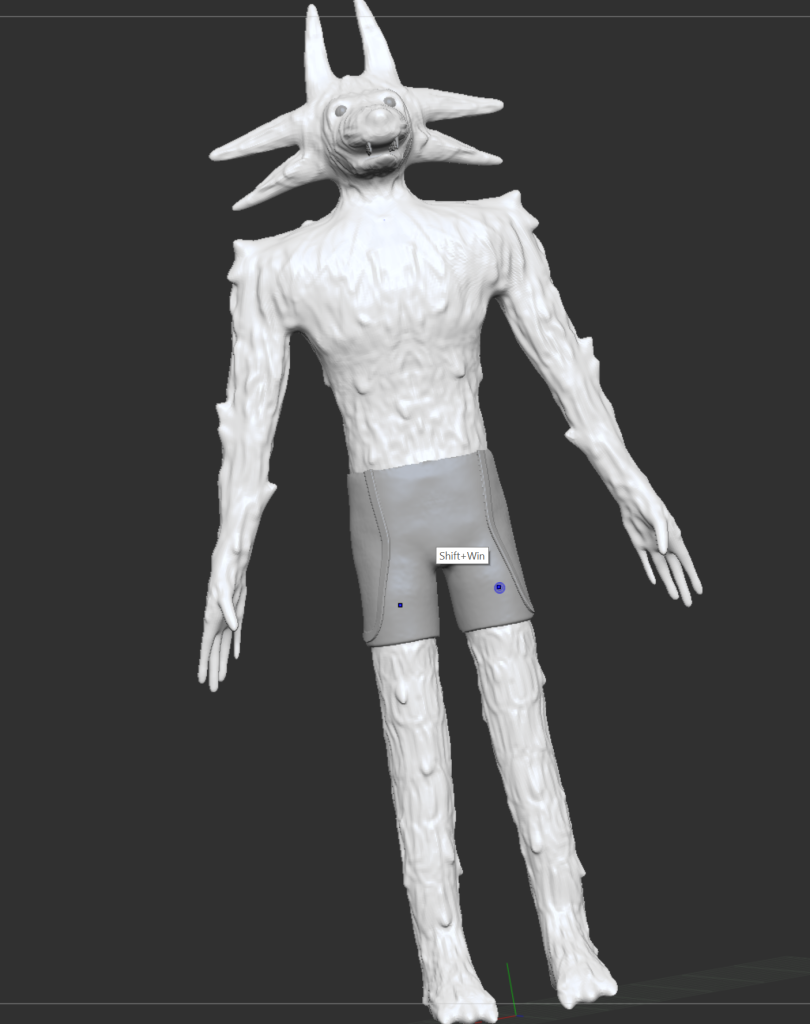
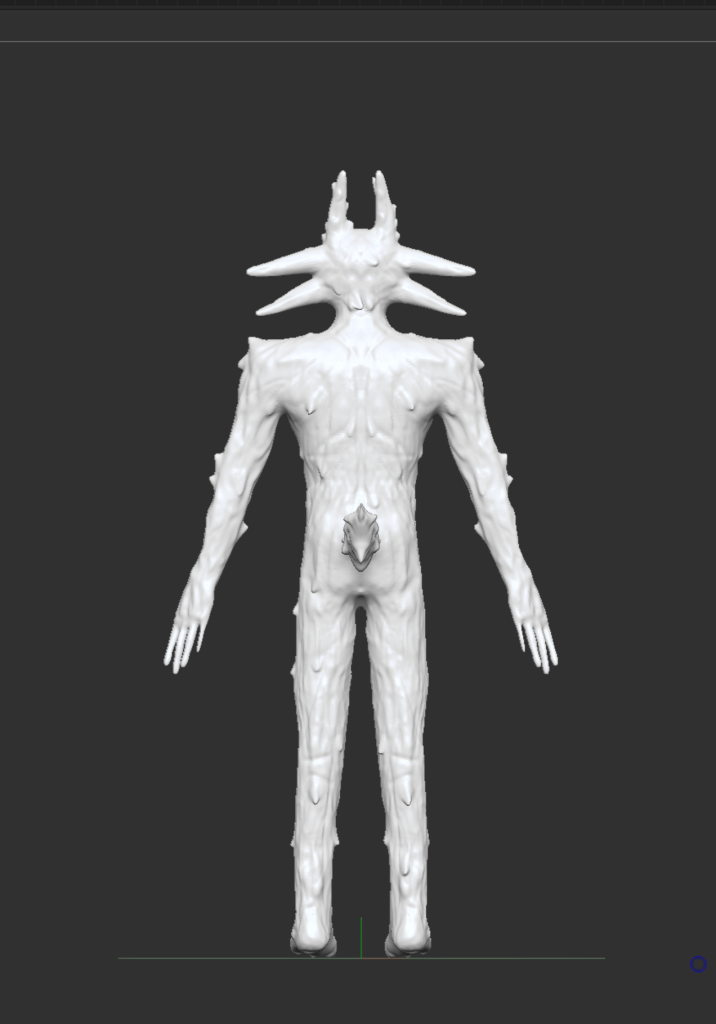
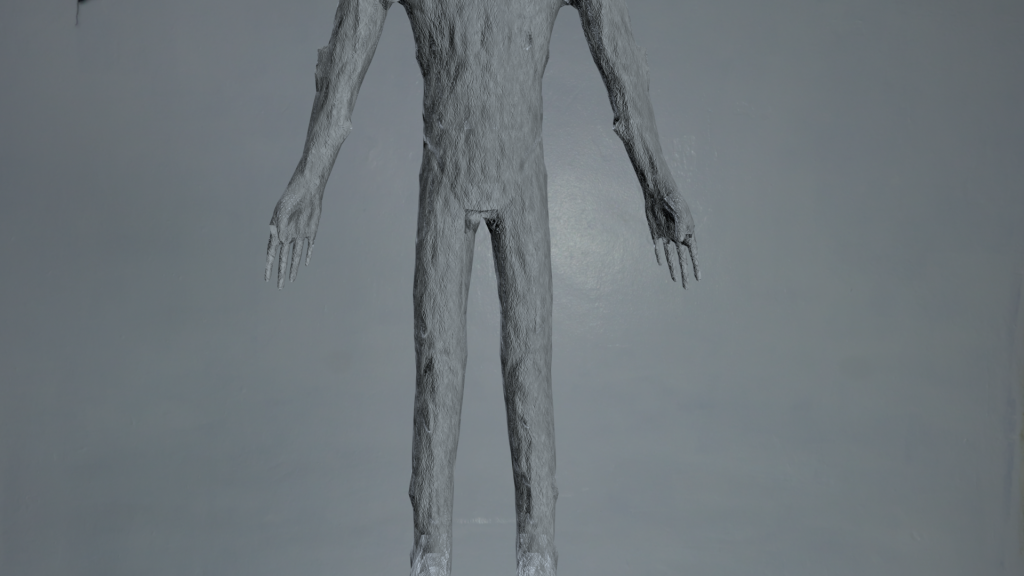
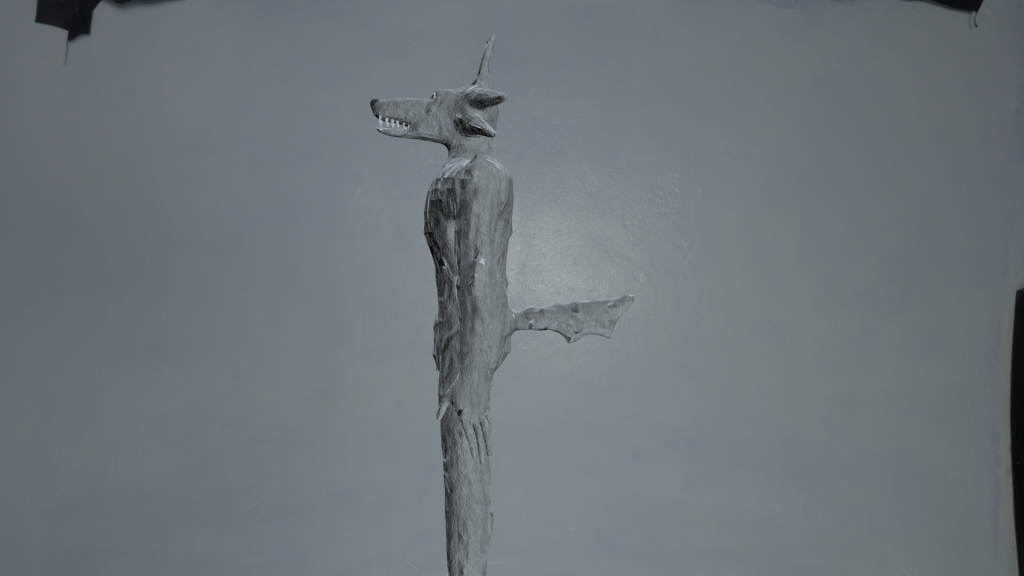
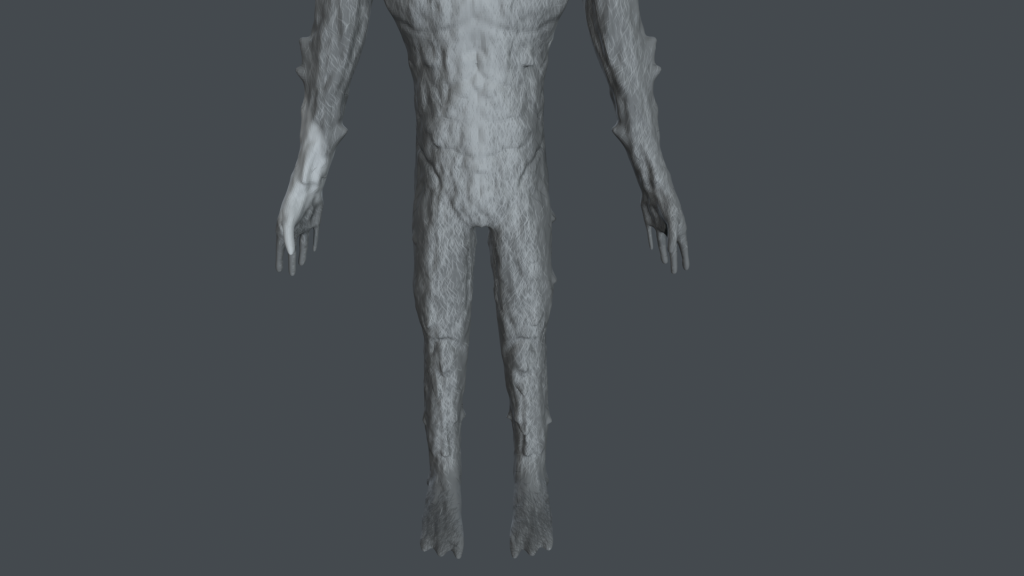
This is what Snitch looked like after some rough modelling of getting his proportions down and also figuring out how to do his eyes and mouth. I ended up deciding on him having a bottom jaw with only the top set having a set of teeth. This allowed me to make him speak by moving his jaw in a cartoony manner which looks effective and gives me an easy way to animate him speaking. I found that his legs looked very bowed so I used the move tool to fix this issue by dragging them in. After fixing the bowing issue I used the clay tool to build some solid muscles on him starting with his calves and also shaped out his feet.

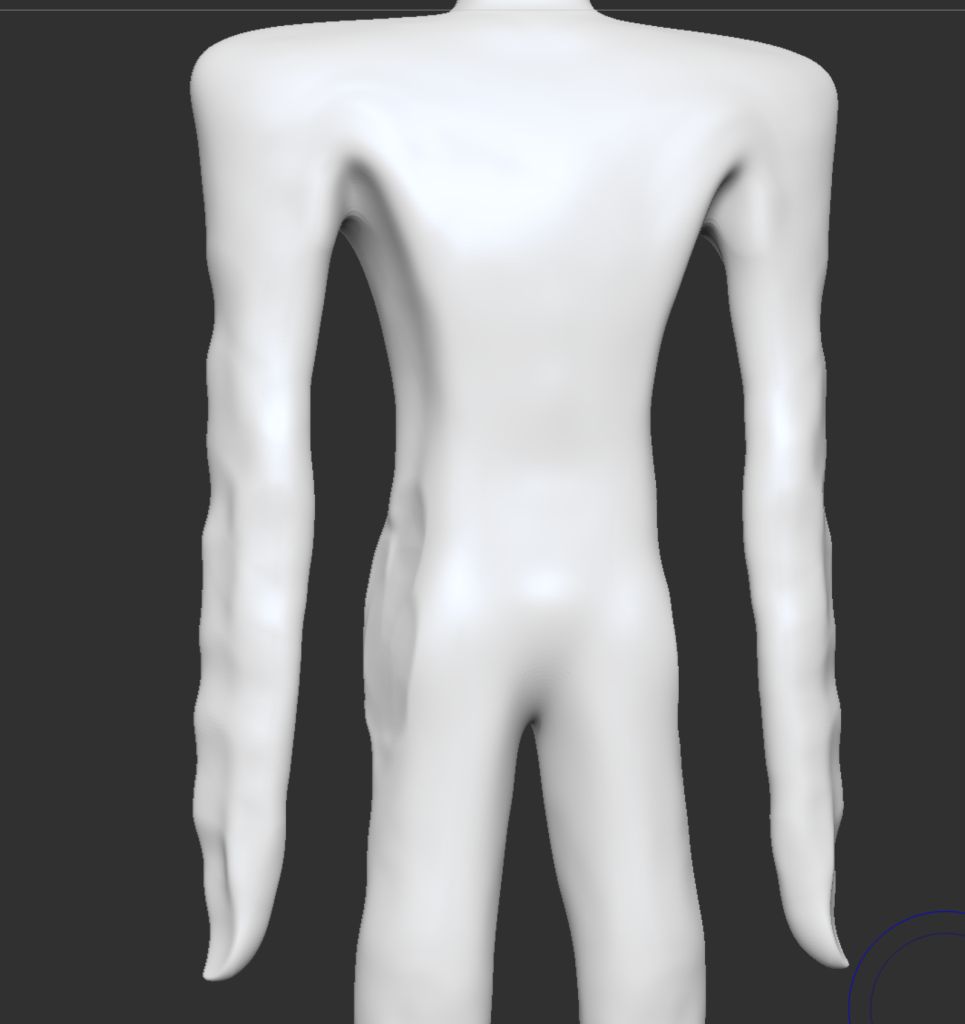
Having my full body art reference image open while modelling was invaluable for figuring out areas that needed extra work and looked odd, such as his armpits needing fixing, which i solved through moving them higher up. Another issue was that his legs were not as long as I planned so he looked very squished. To fix this issue I used the move brush for his arms but this left them very wavy looking so I made my brush size a lot bigger and smoothed the waves out by building them up with clay.

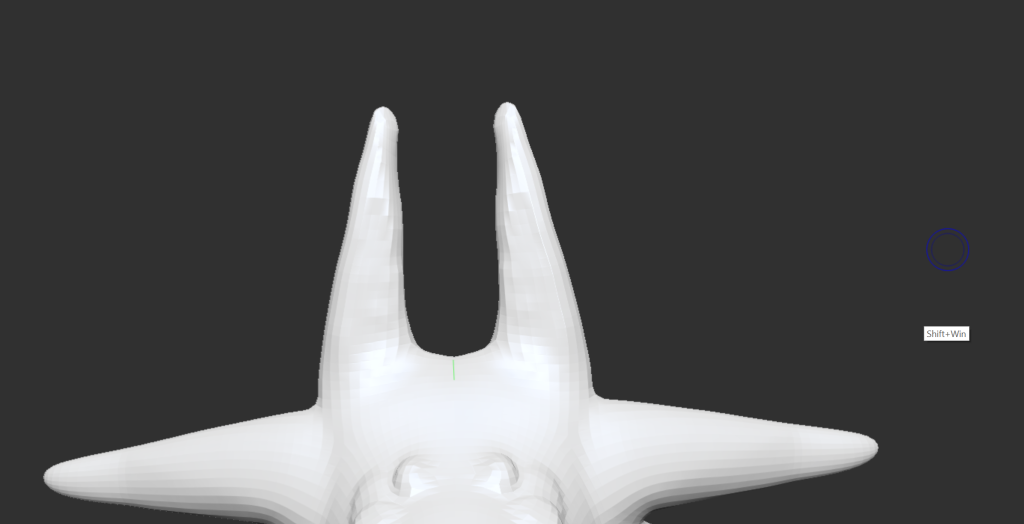
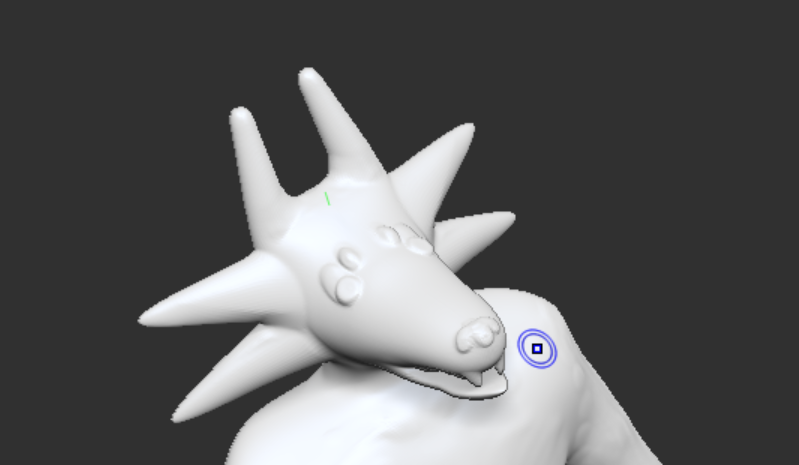
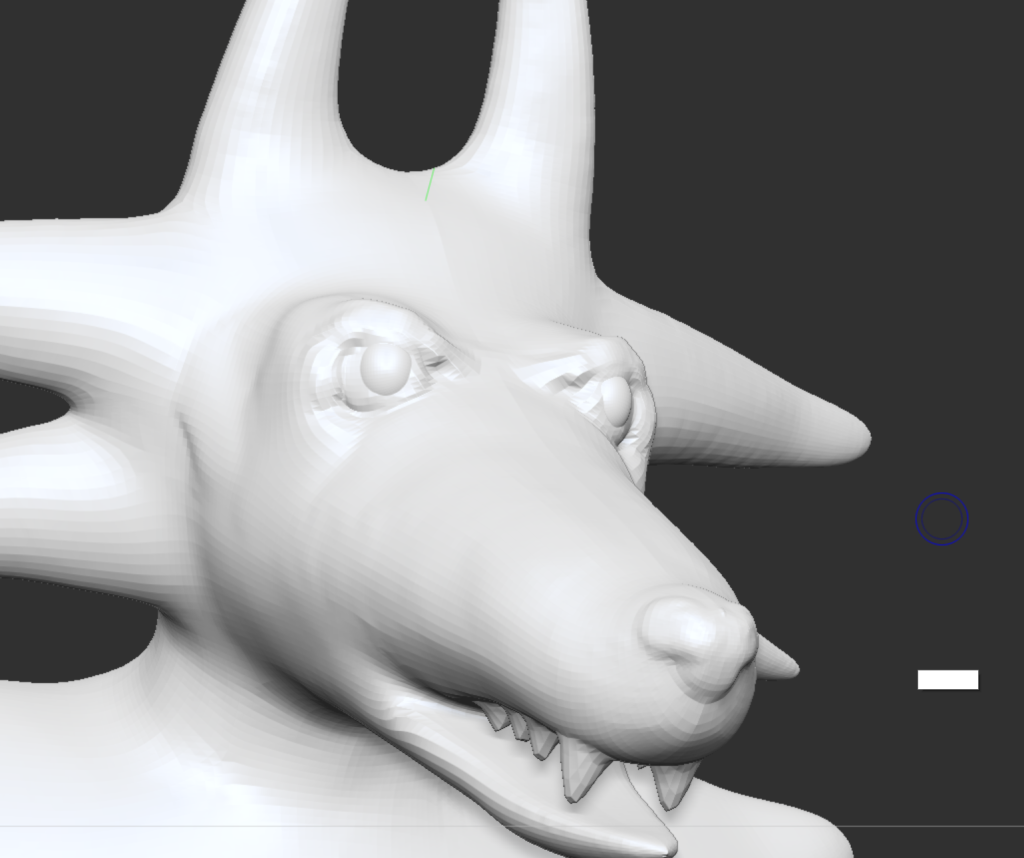
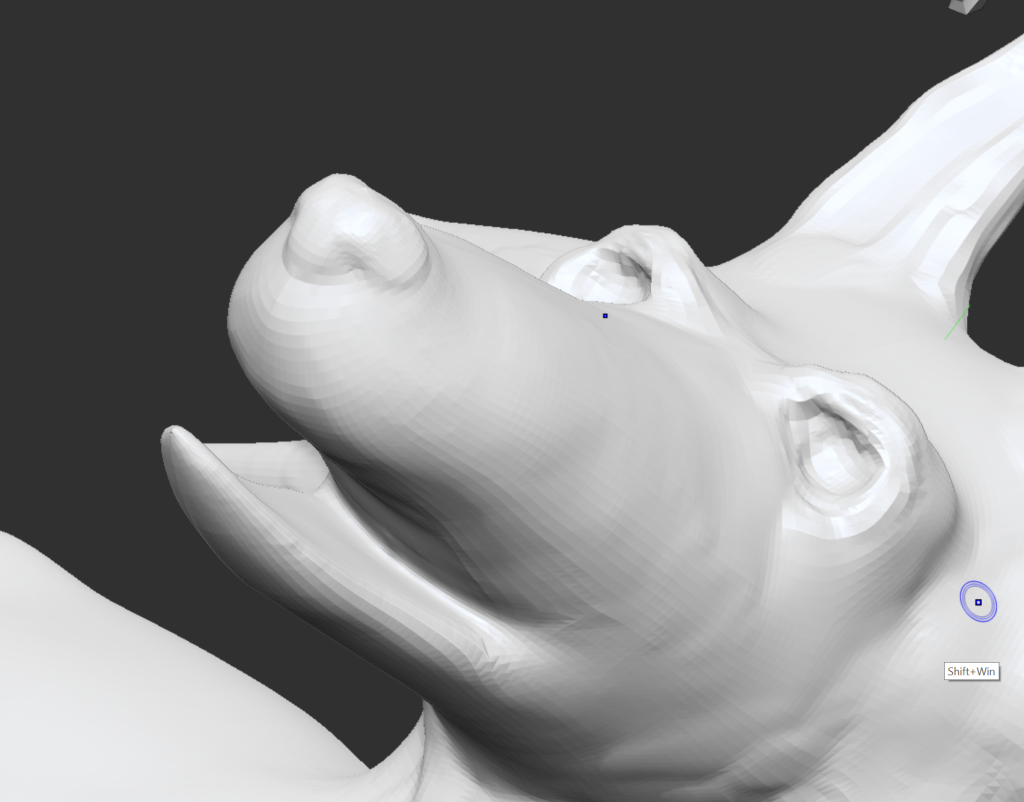
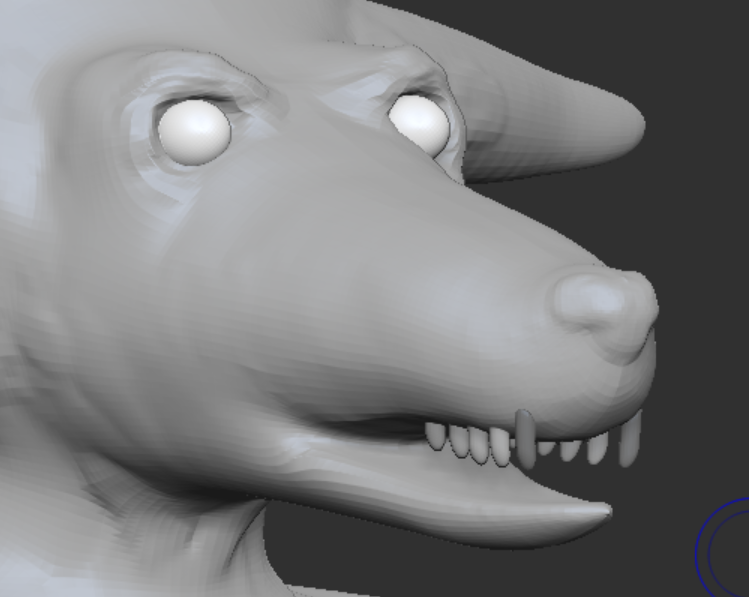
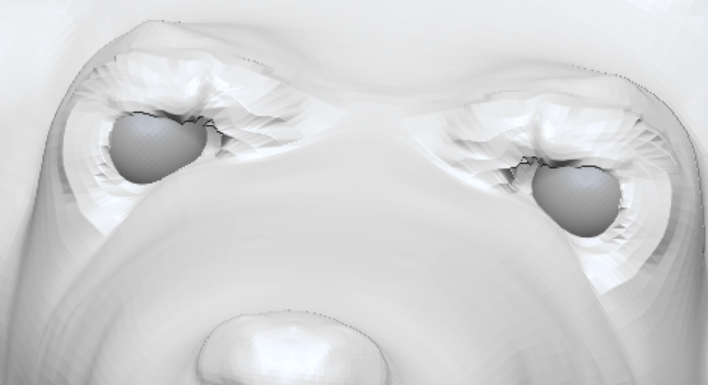
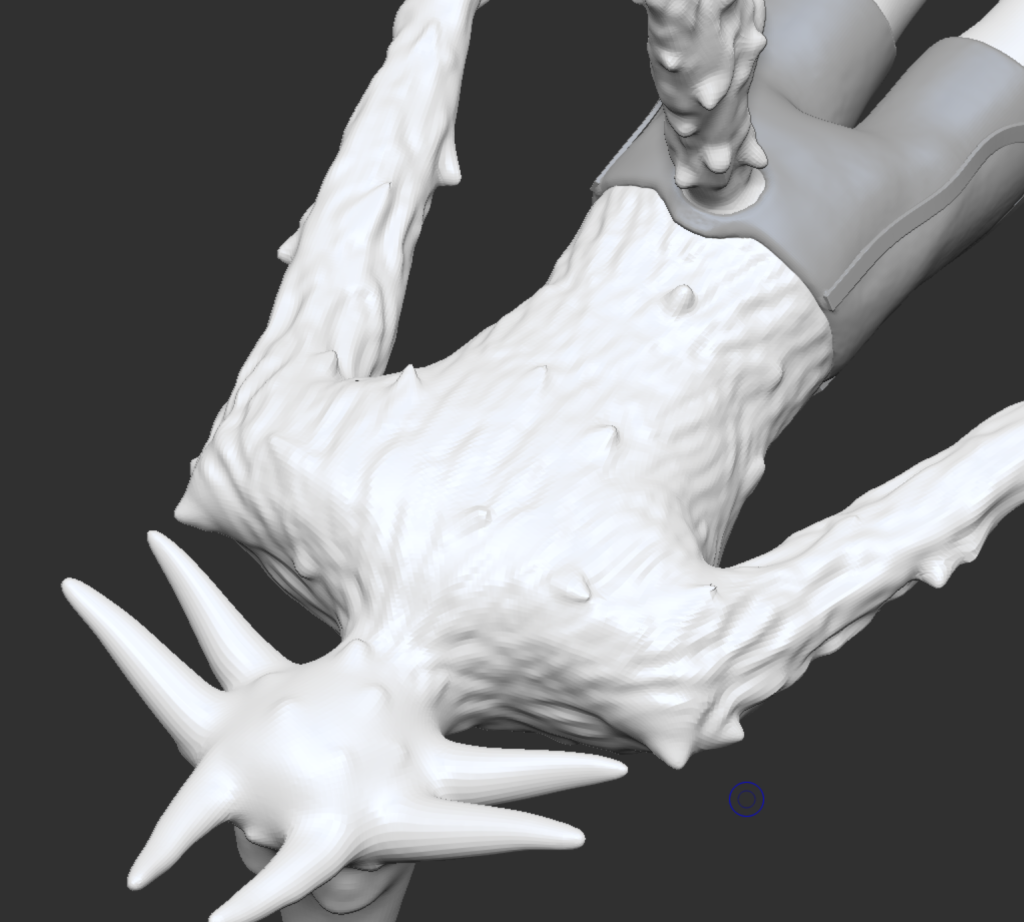
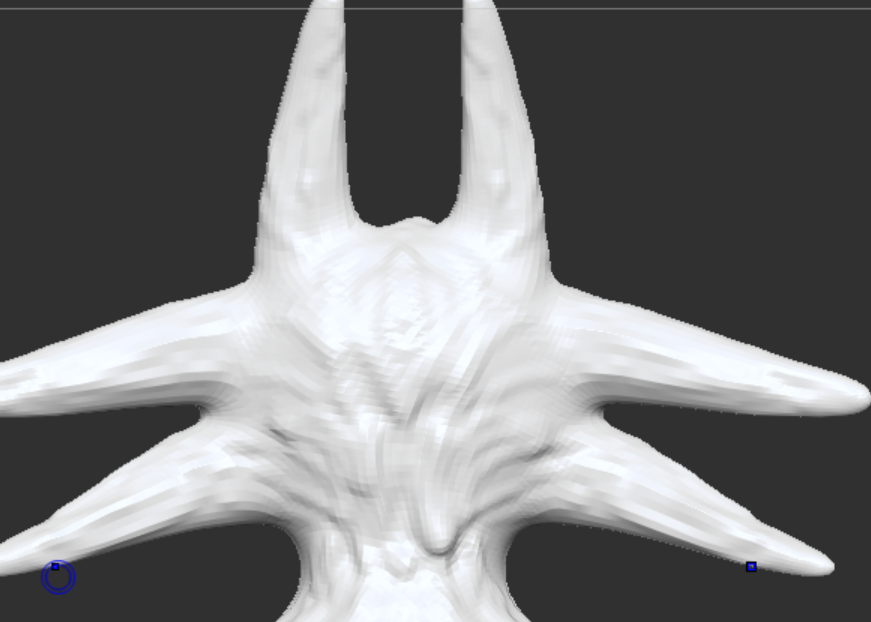
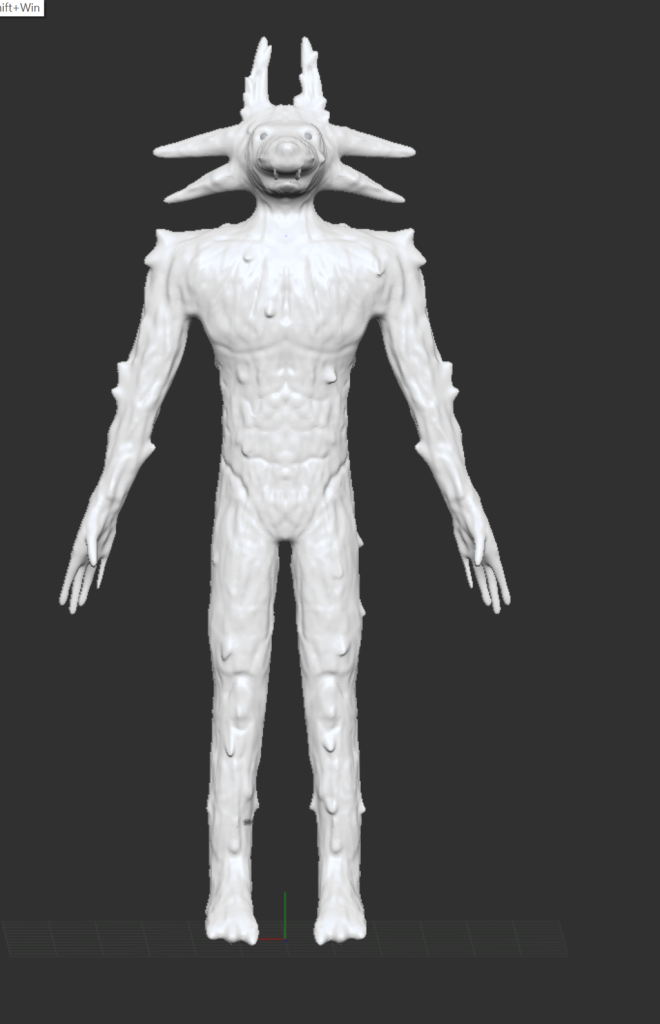
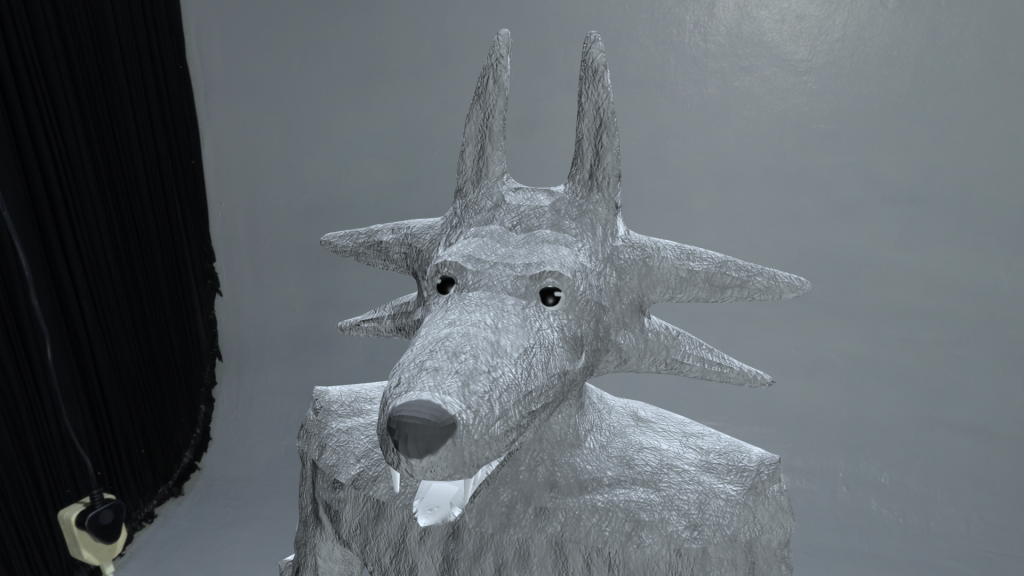
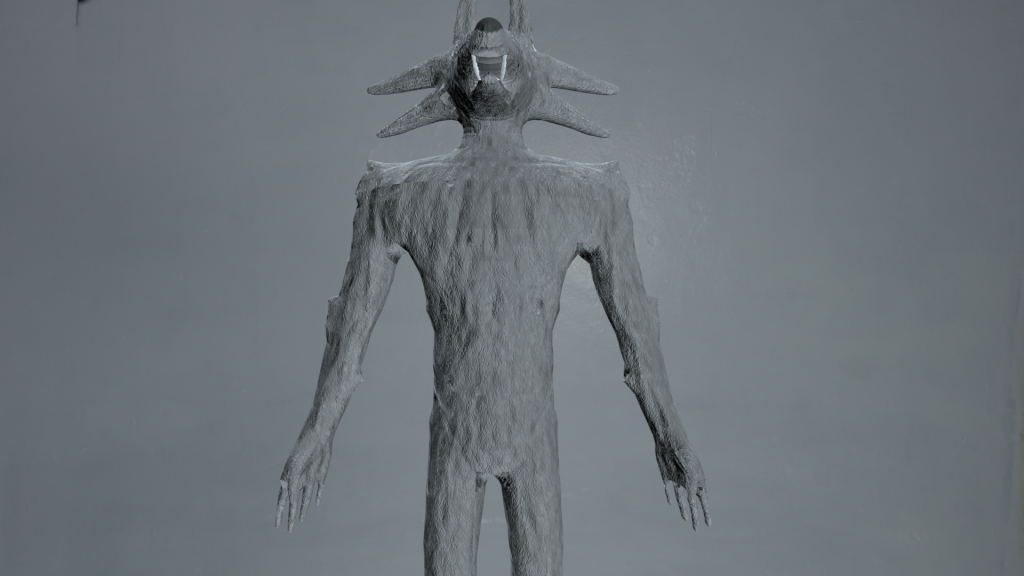
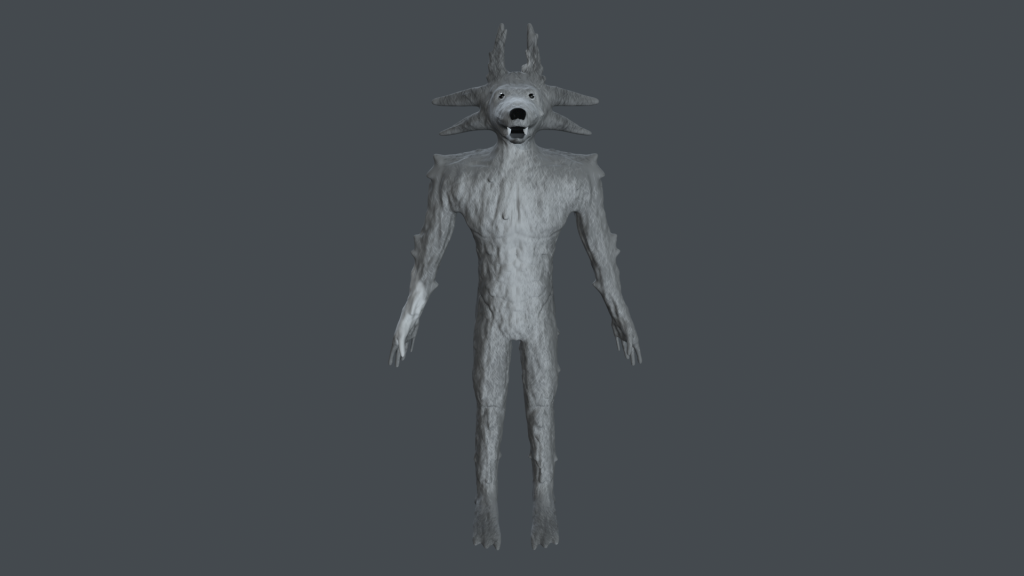
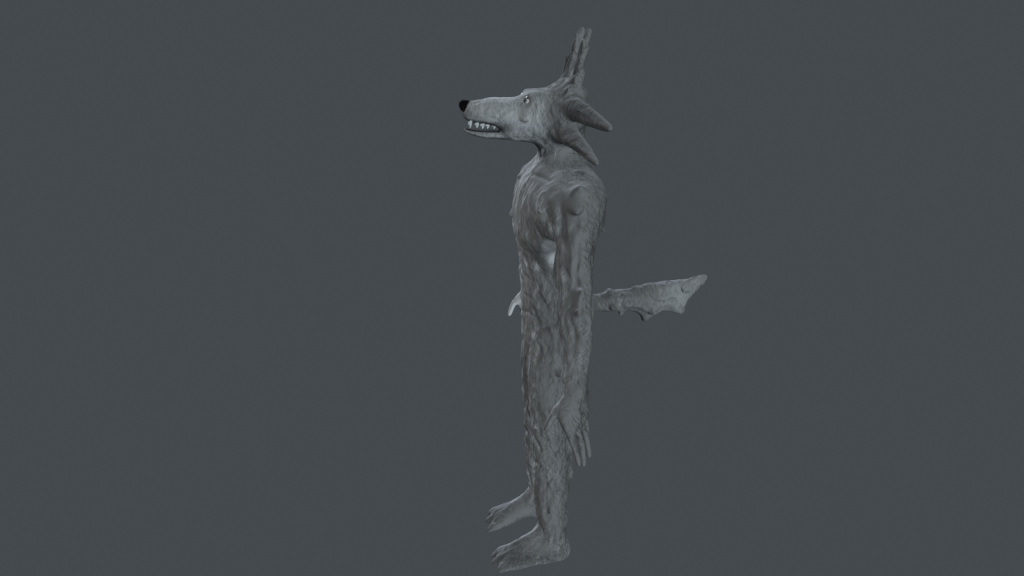
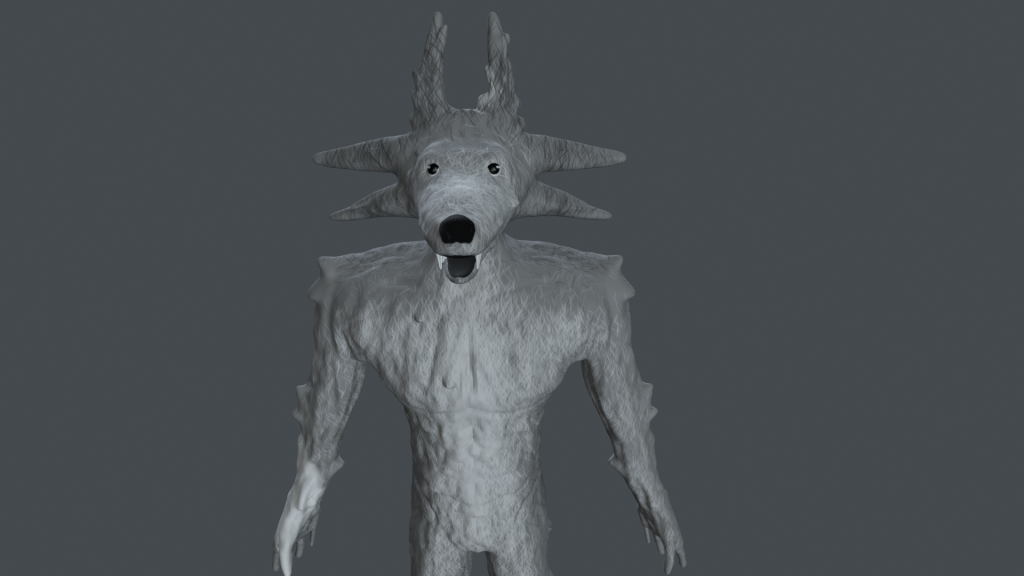
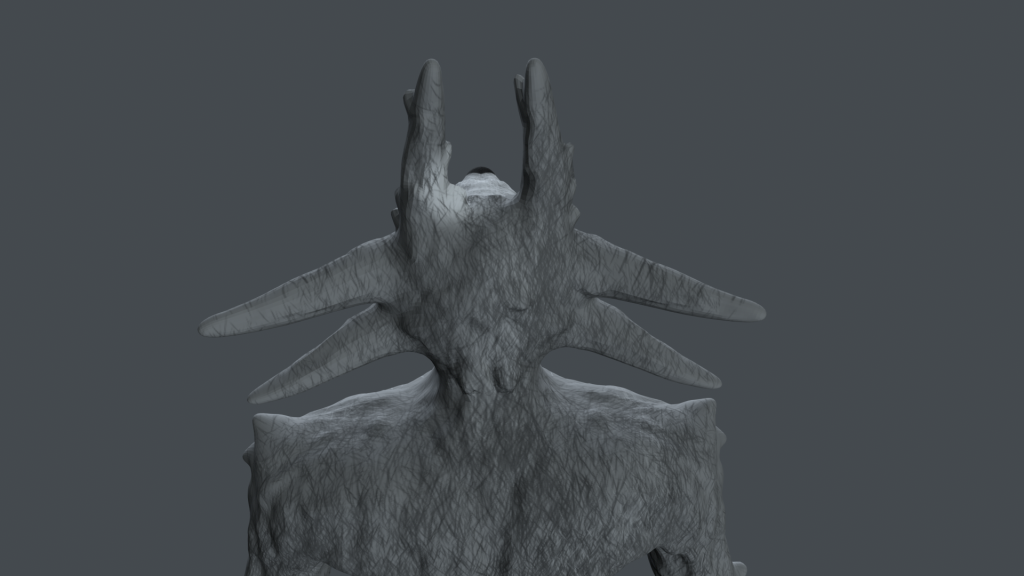
During enhancement week I spent most of my time building up his facial structure properly and working on his eyes and muscles. To make his eyes I inserted two spheres and put them into where his eye sockets would be, then dynameshed them to connect them to the body, I could then use the clay tool to build up the area around his eyes to give him brows and eyelids. I am very happy with the outcome and believe it gives him a lot of character and makes him look a little intimidating.
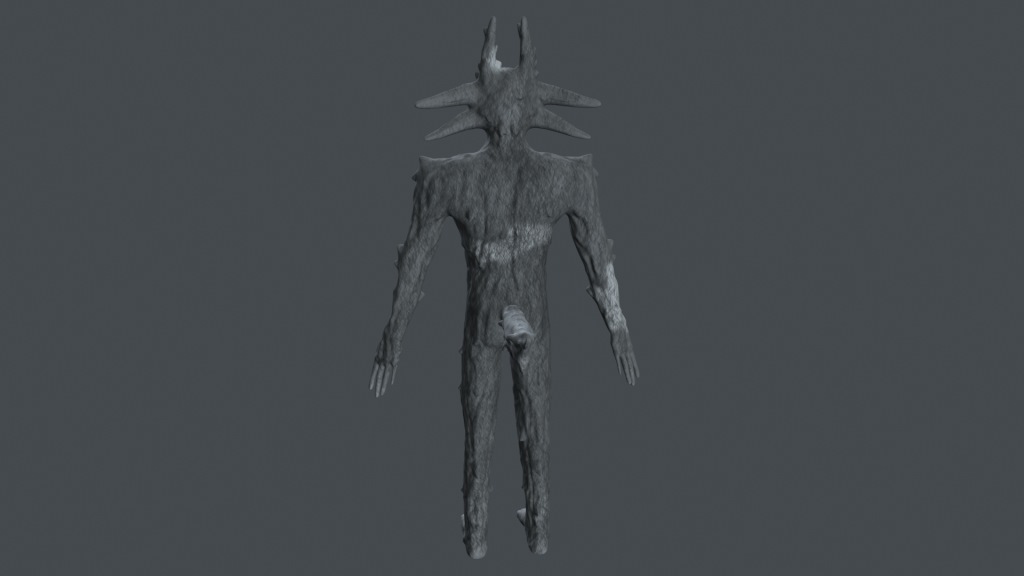
Here is a turntable of my progress so far with my base model of Snitch. This shows what I have halfway into the project and allowed me to get feedback within class on what is good and what needs changing. To make the turntable I used Blender.
During my feedback session, I was told that I need to make his eyes and teeth separate objects and that his armpits still look unnatural and to fix this I need to raise them to make his arms make sense anatomically and to also shorten his arms. Another piece of feedback was to model him in an industry-standard A pose as this allows for good texturing and animation. After the feedback session, I started fixing these issues.
First I separated the teeth and eyes from the base model by removing them and sculpting out his eye sockets using the clay brush in carve mode using the alt key.
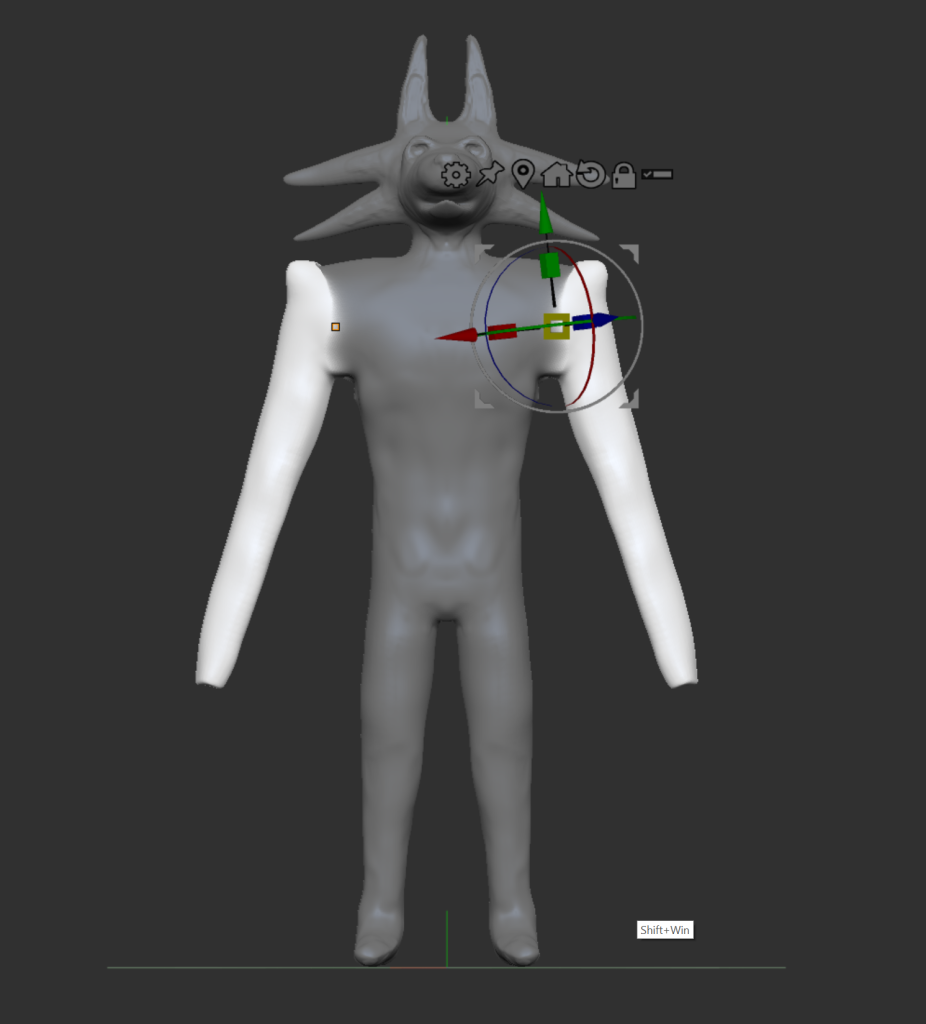
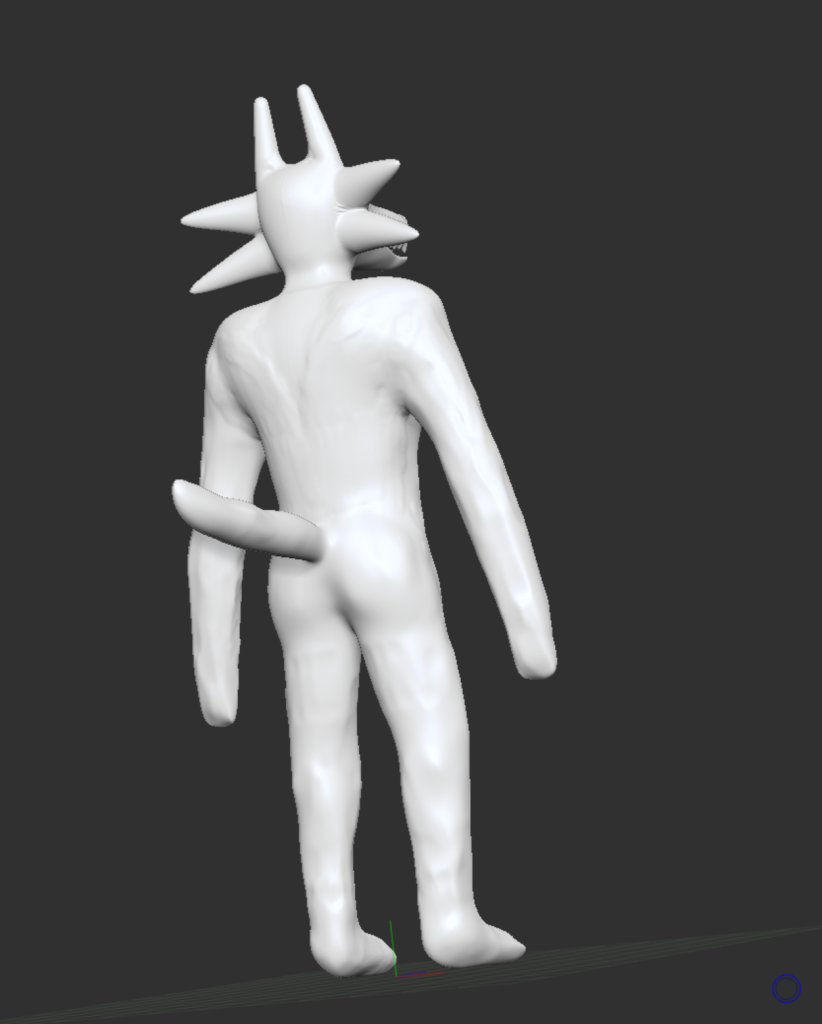
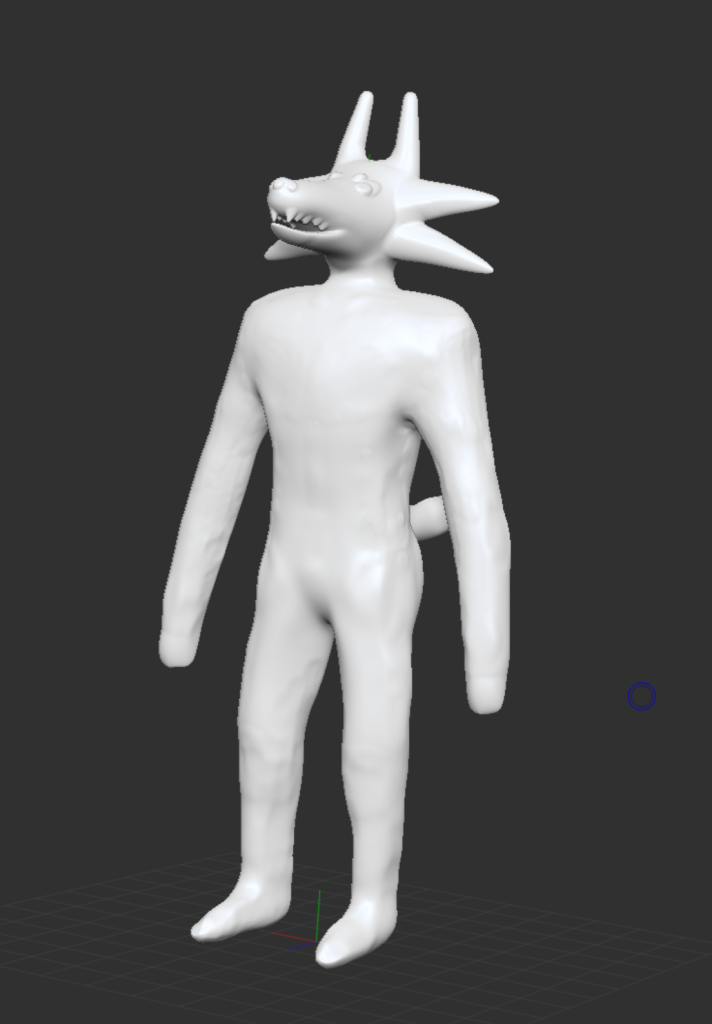
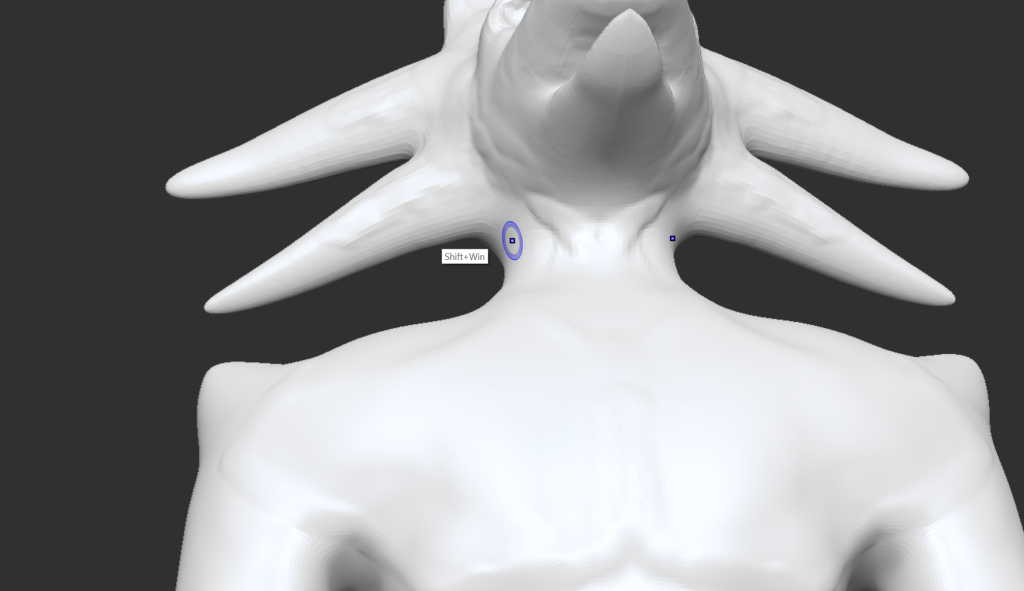
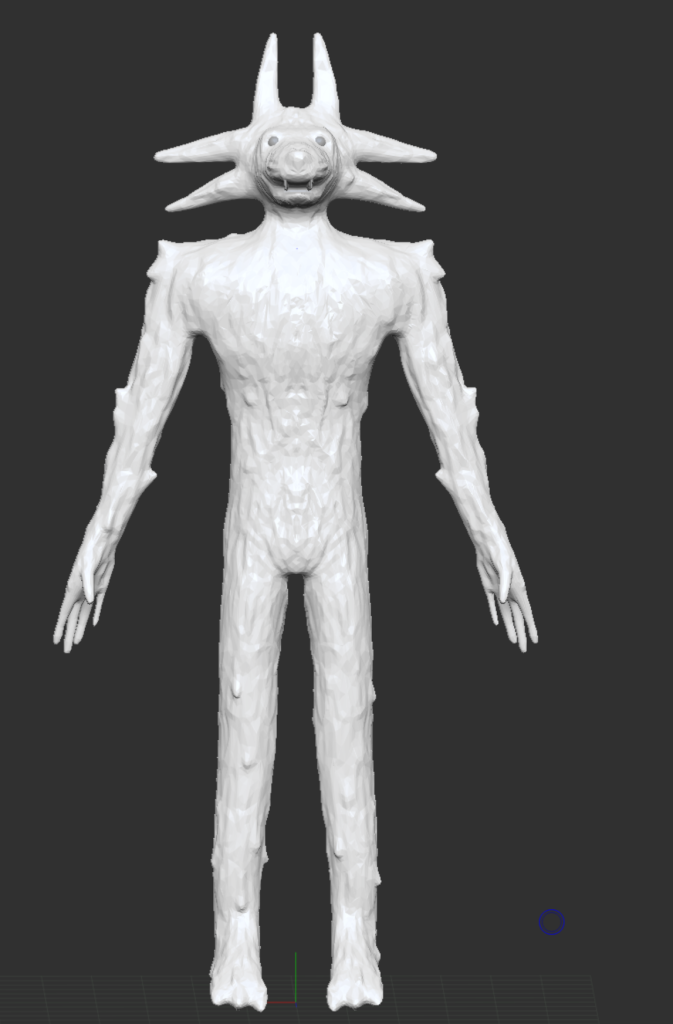
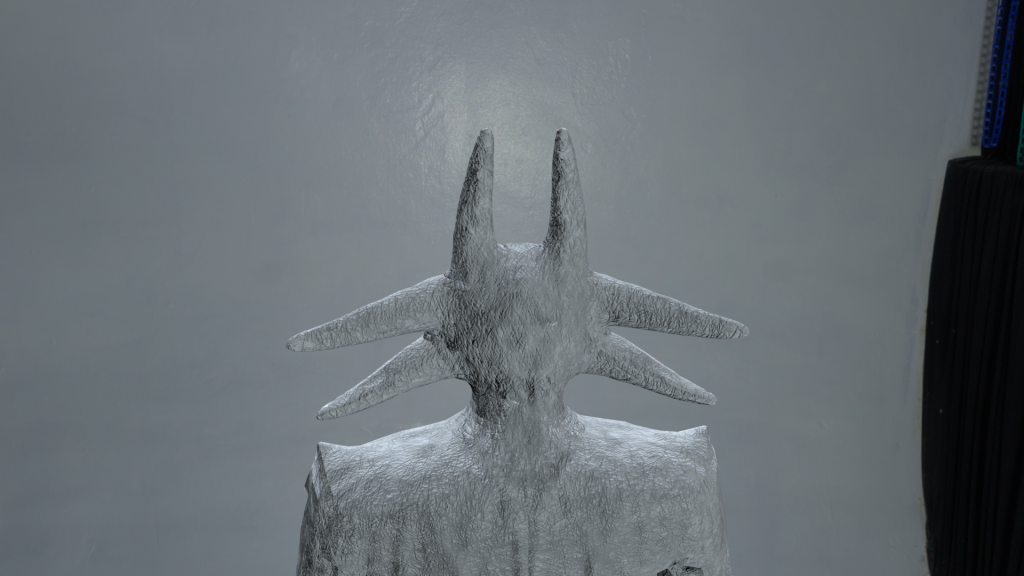
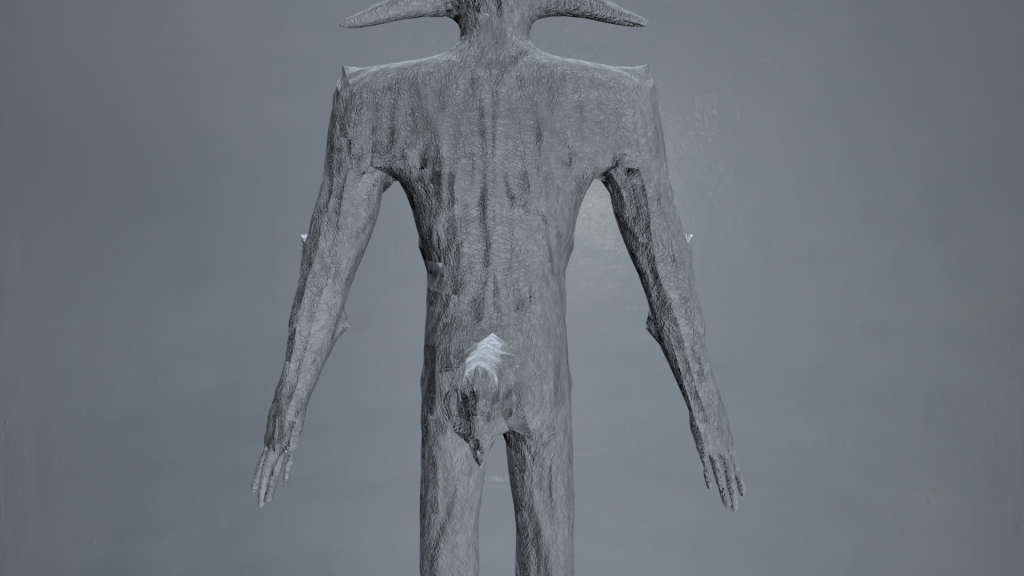
Then he was put into the A pose and I did this by using the mask soft select and then I could rotate the selected limbs. To make his shoulders look more natural I dragged them down using the masking and move tool, I could then build up the missing areas by moving the arms with the clay brush to remove the sunken-in effect.
Using primatives, I made the teeth. pill bases were used, stretched out, and pinched to make them have sharp points like teeth. I then duplicated his teeth for the full mouth. These were then their own object which allowed for easier retopology and animation for later modules.
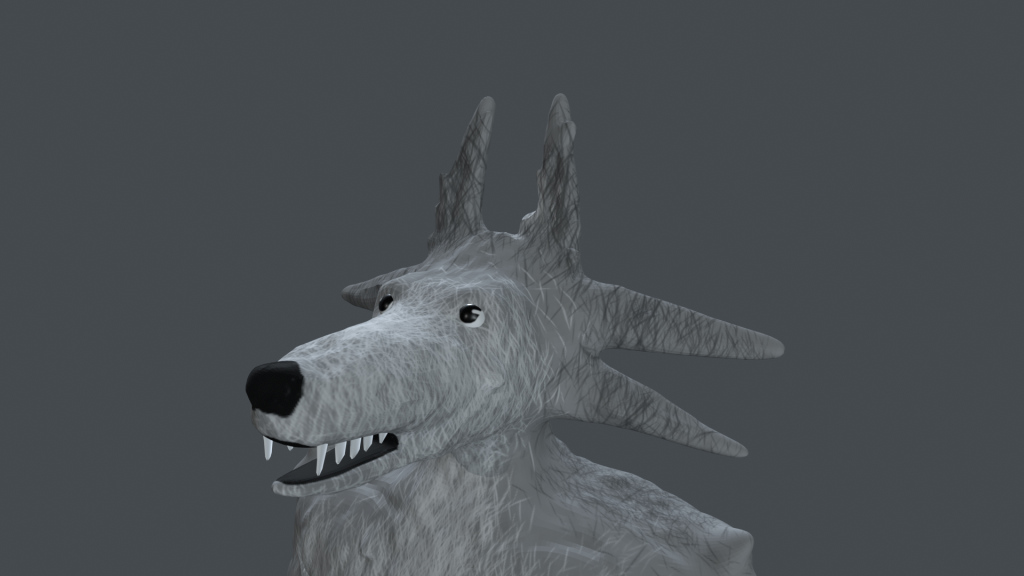
I added sphere primatives to make his eyes, then modelled eyelids to cover the top of them with clay buildup. This also gave him brow bones which helped give him a lot more personality and an expressive look. These will also be helpful with animation as they will allow me to change the expression in his eyes.

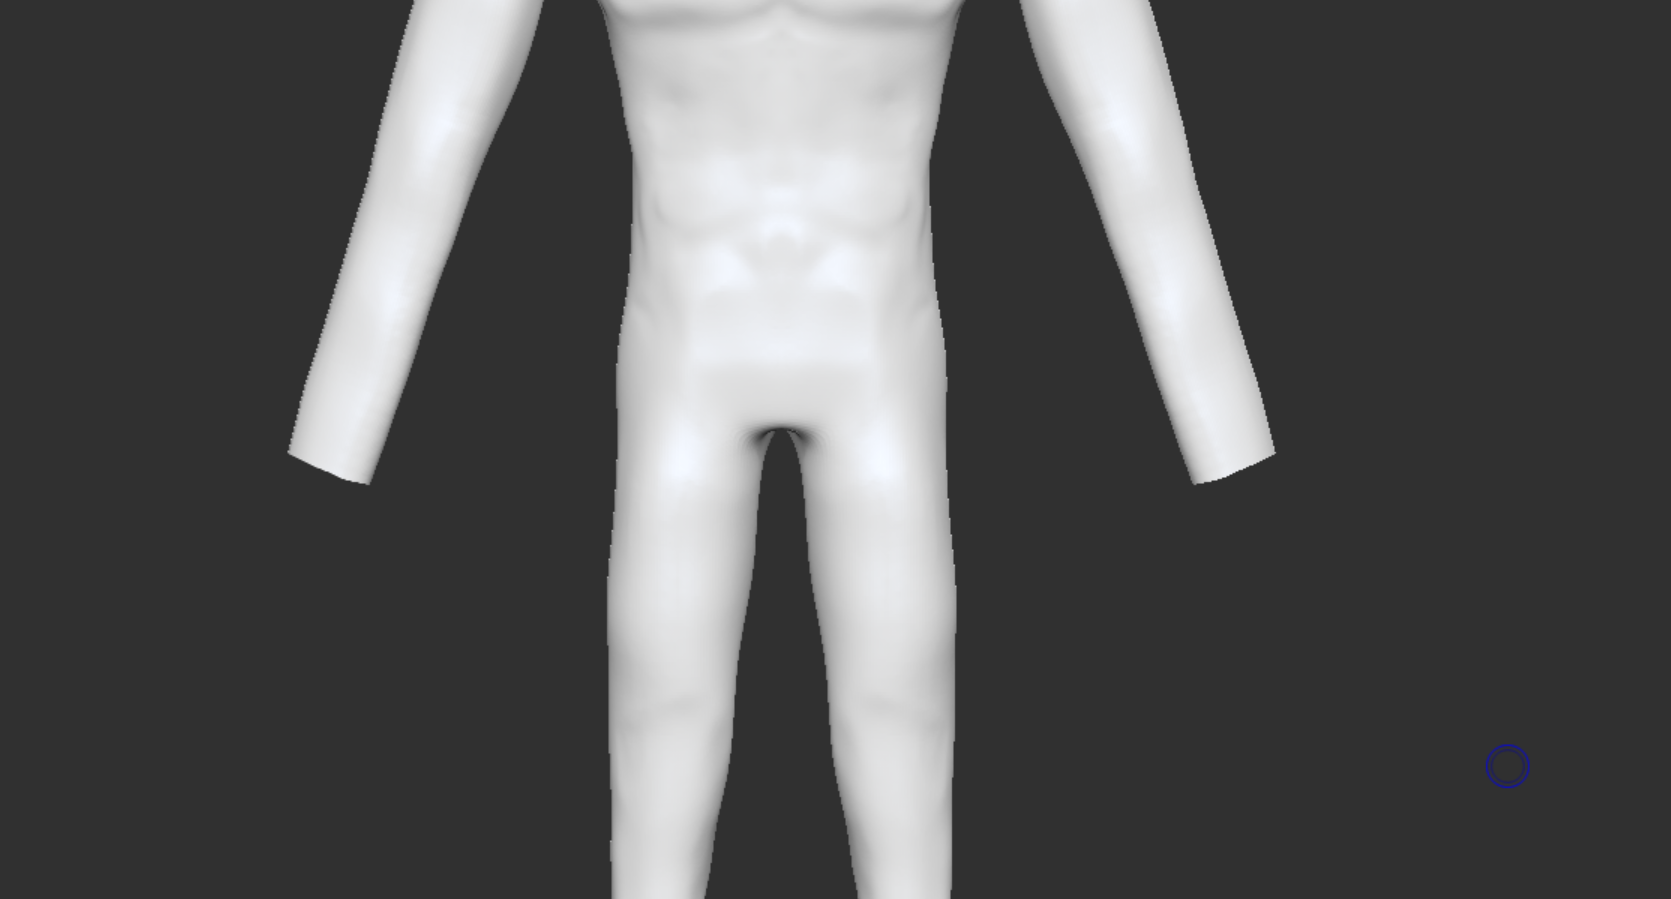
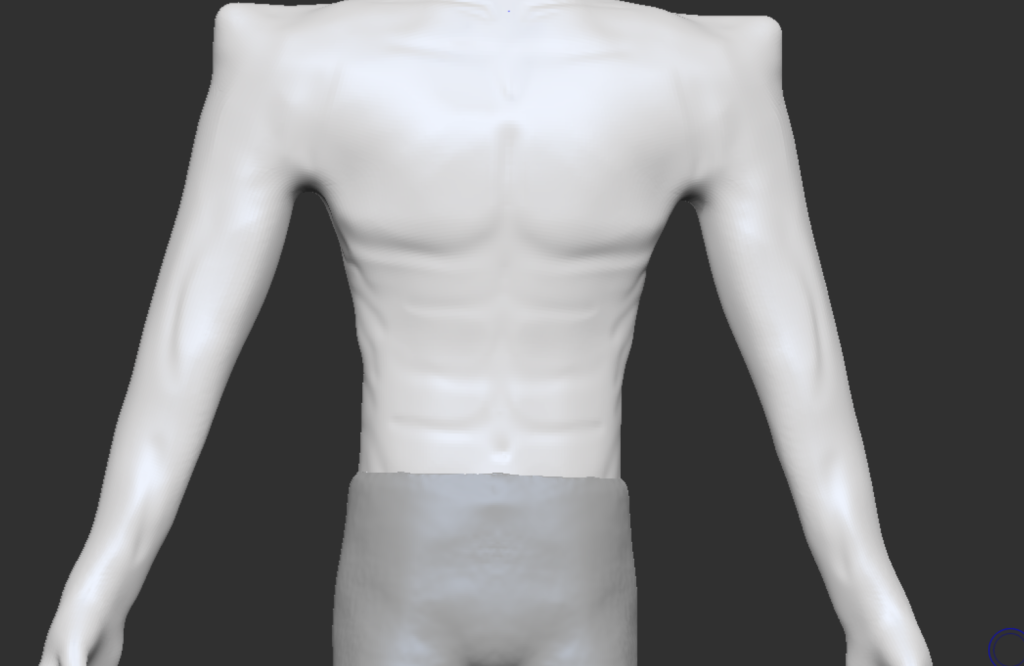
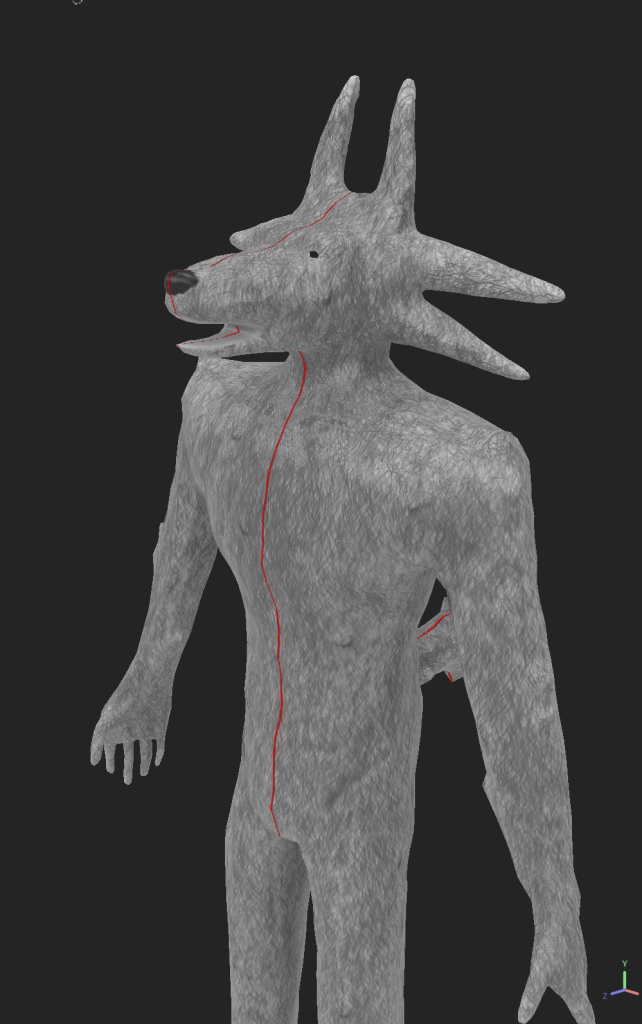
To remove the stumps where his hands should be to make them a smooth surface I used the lasso knife tool where his hands will go, this allowed the hands to be perfectly cut off so they don’t have gaping holes for his wrists. Then I added in more muscles for his body overall focusing on pecs and laterals so there would be greater definition, to do this I used the clay brush.

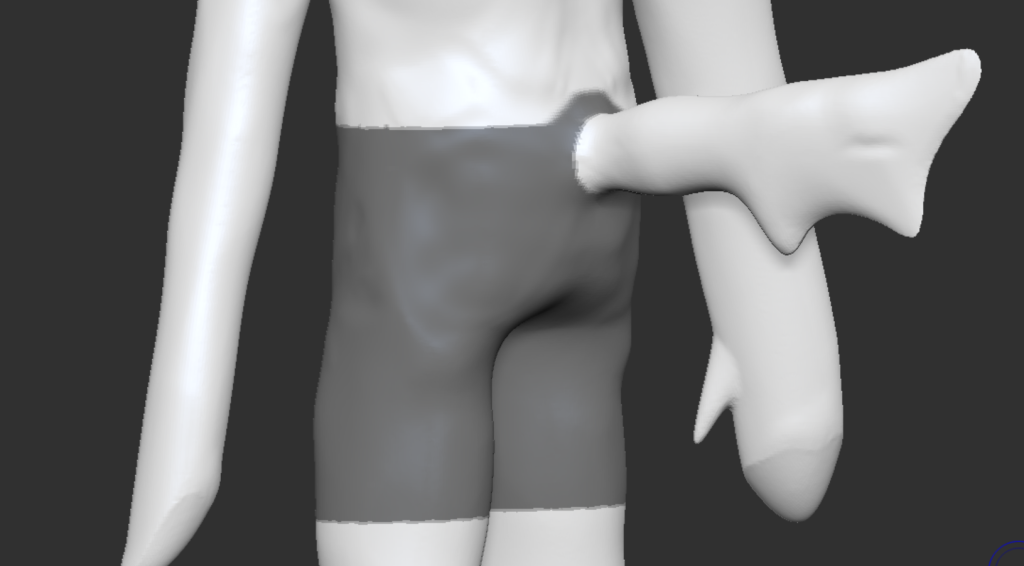
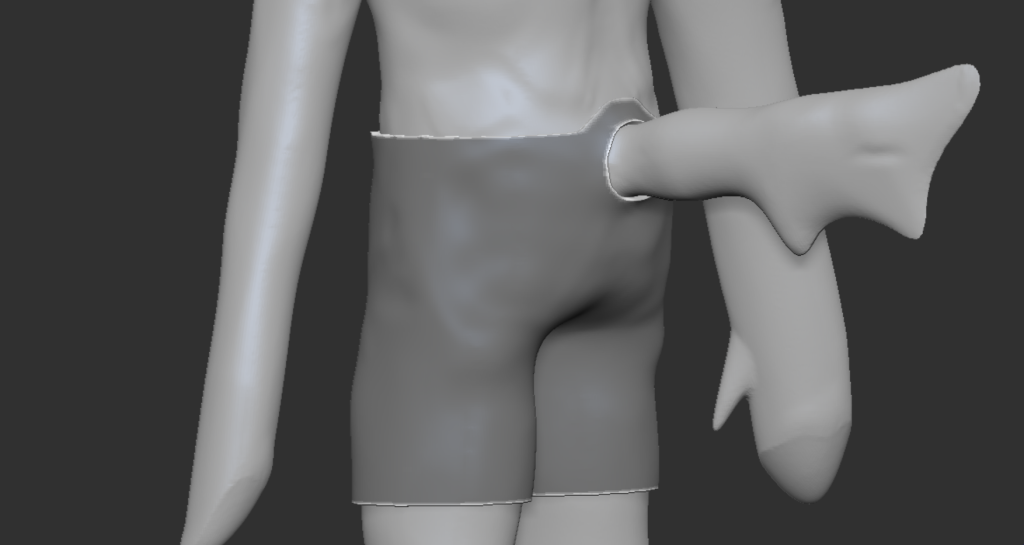
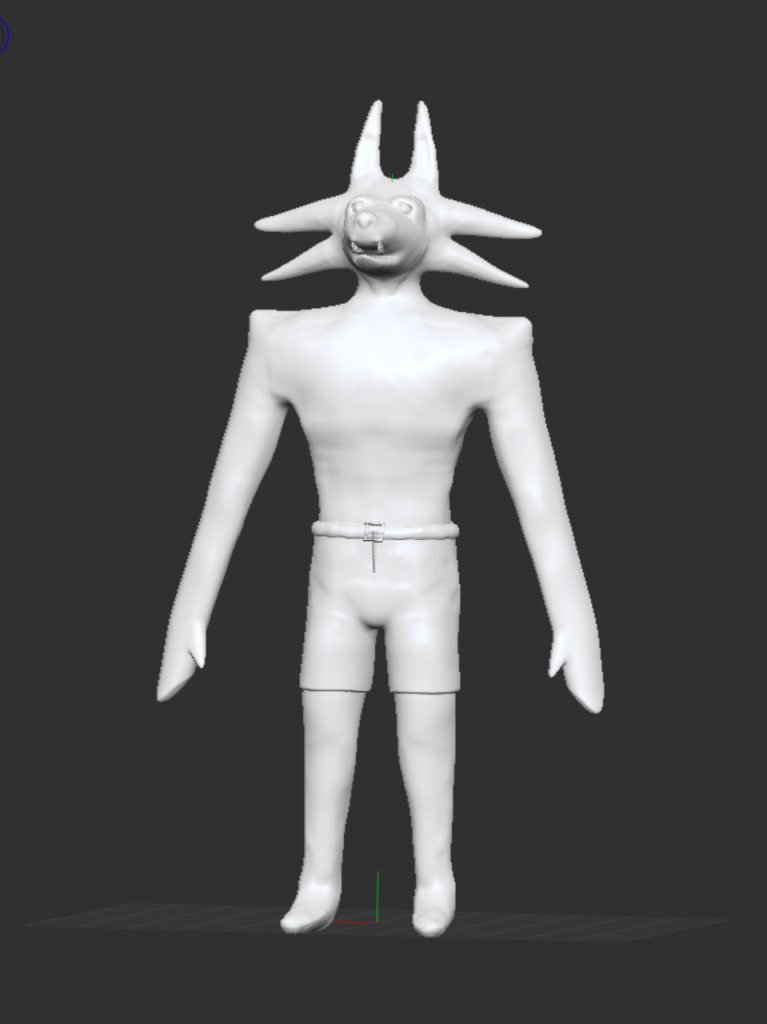
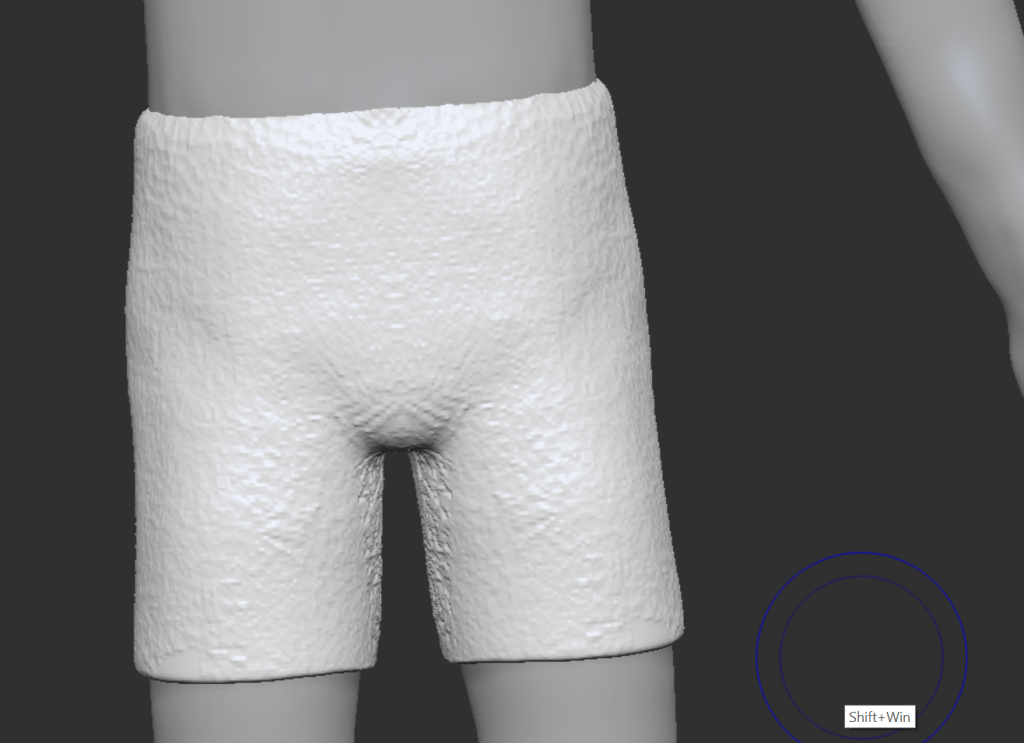
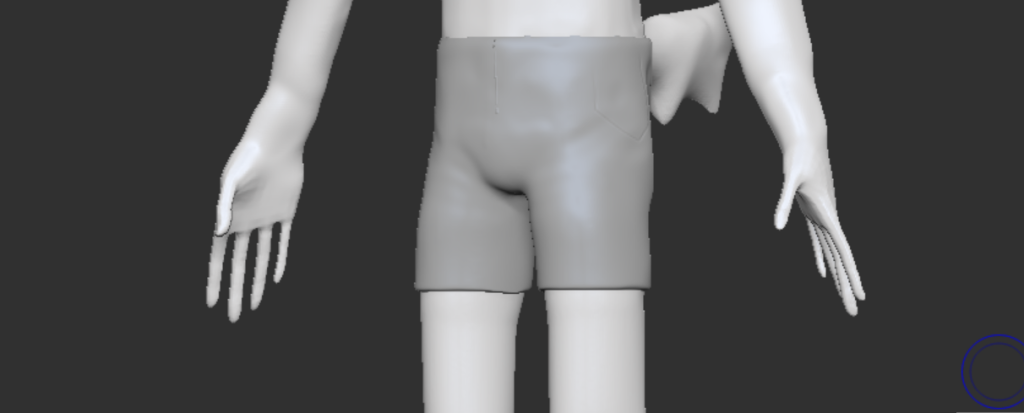
I then used the move tool to pull some mitten-shaped hands out for the purpose of blocking him out and getting his proportions better later on. I always planned to give him full hands but these made good placeholders. After some thought, I decided to give him a uniform to help make his design a little more complex and started to mask out some shorts for him and then extracted them.
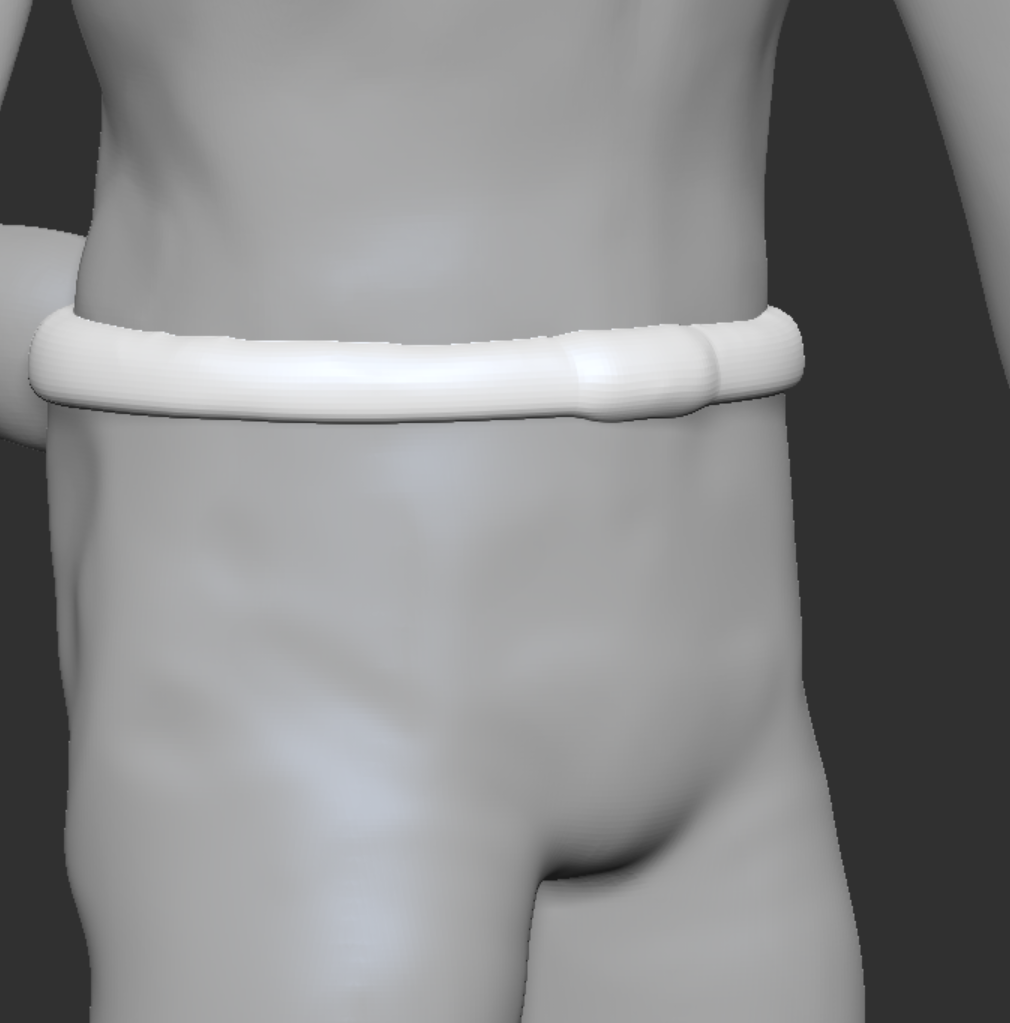
To make the belt I used the masked tool again to pull out the shape of the belt then had to smooth down the rope-like belt.
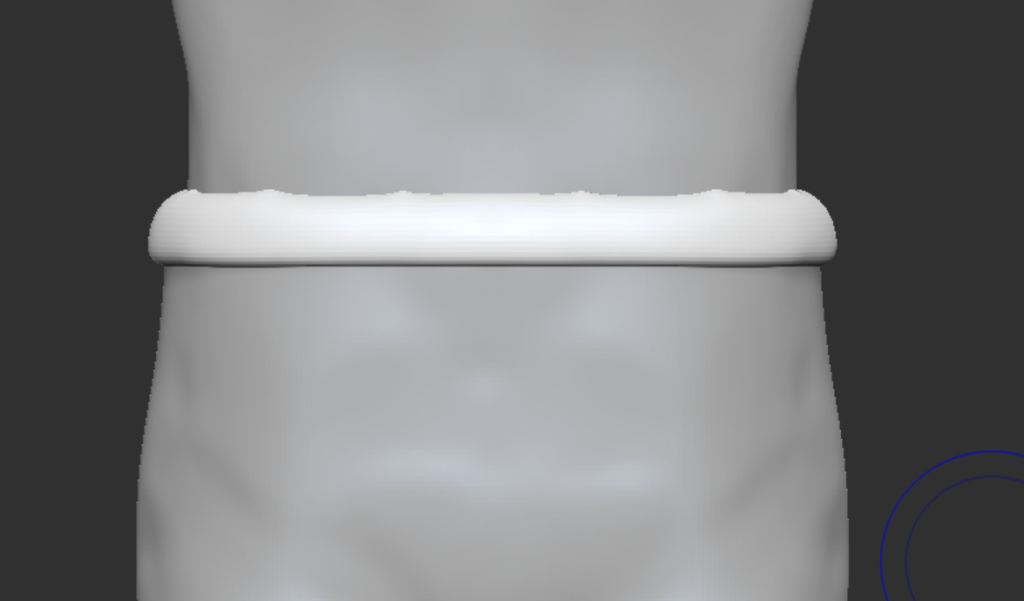
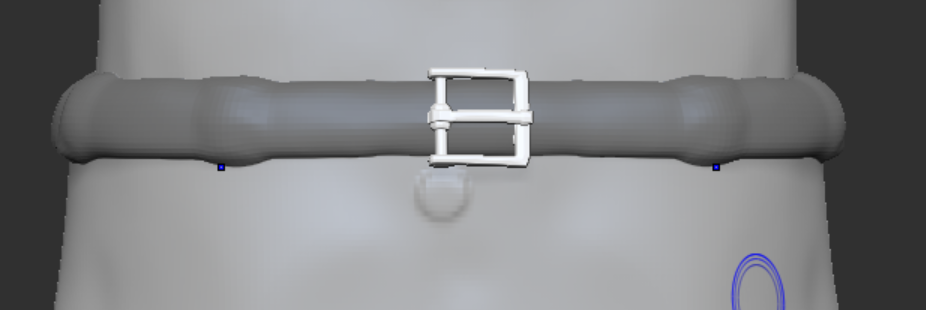
I didn’t like how this looked so I used the IMM parts brush to add a buckle and added bumps on the side for more texture onto the belt.

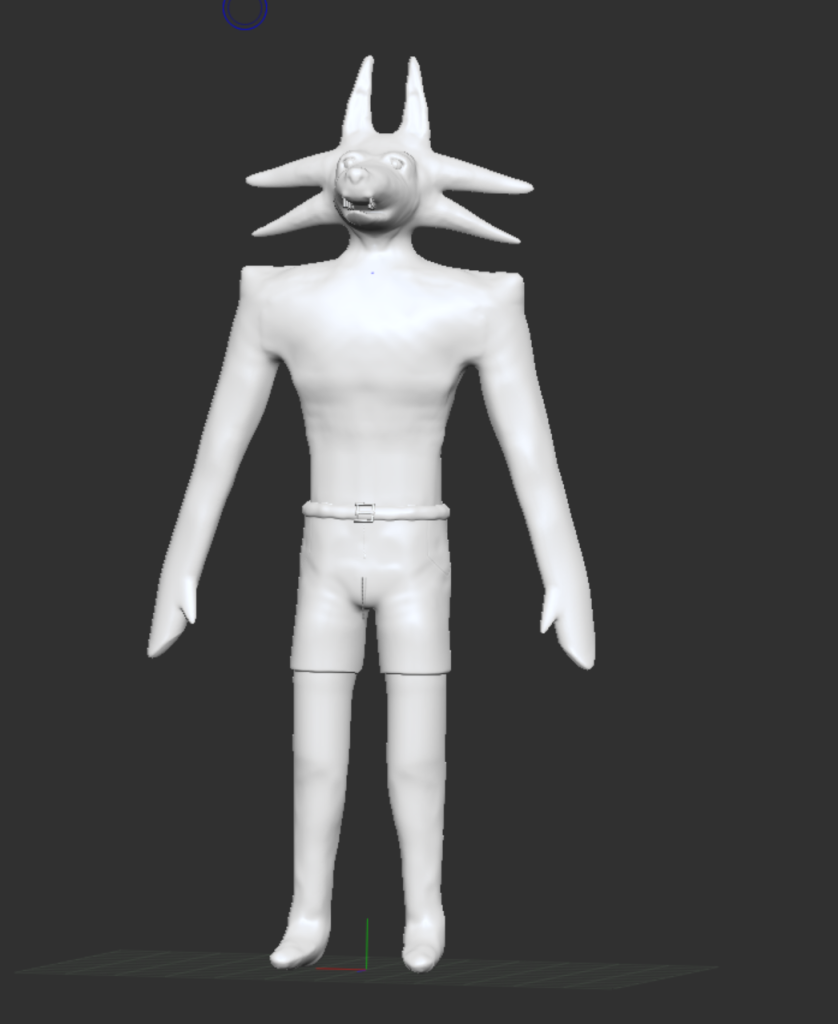
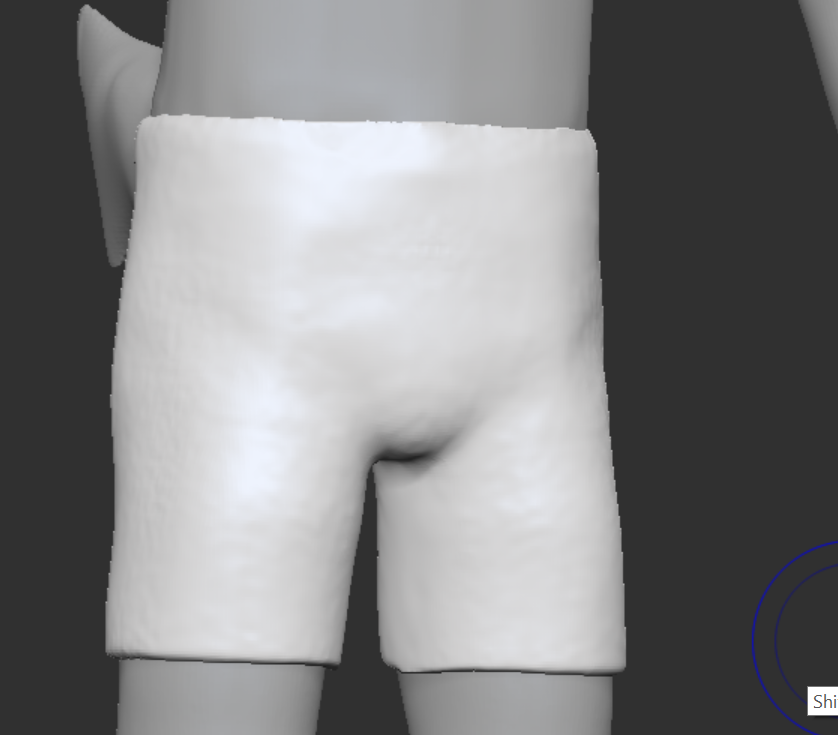
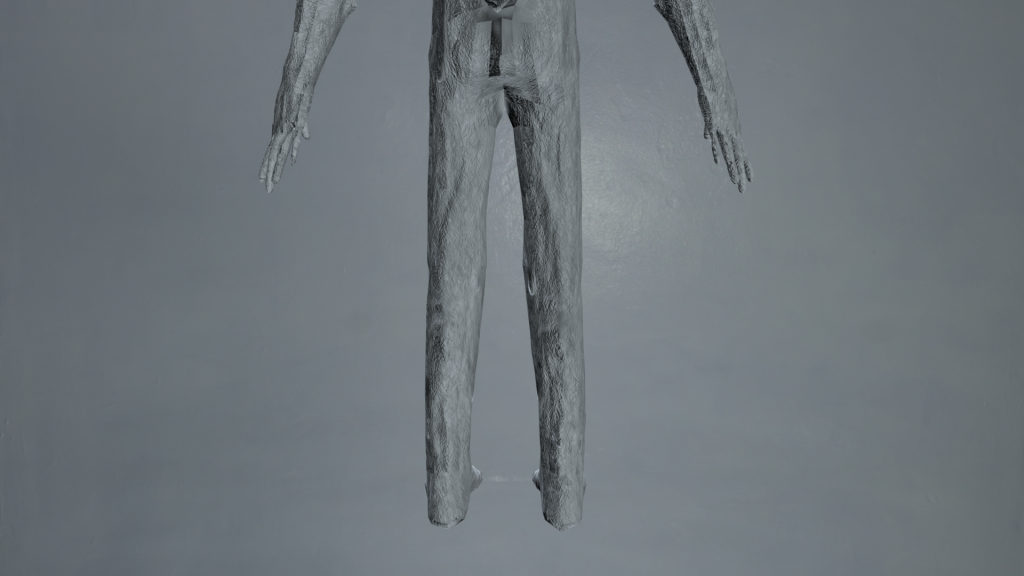
Once the pants were finished his legs looked very short and unlike the reference art so I used the mask and move tool to extend them with my reference image open on the side to get the length right.
After asking for feedback from peers I got comments on the belt looking very out of place so I decided to remove it which was simple enough as it was a separate object. This then left the pants looking very flat so I added texture to the pants with the noise brush and then smoothed it down so they had light texture on them similar to that of jeans or cargo shorts.
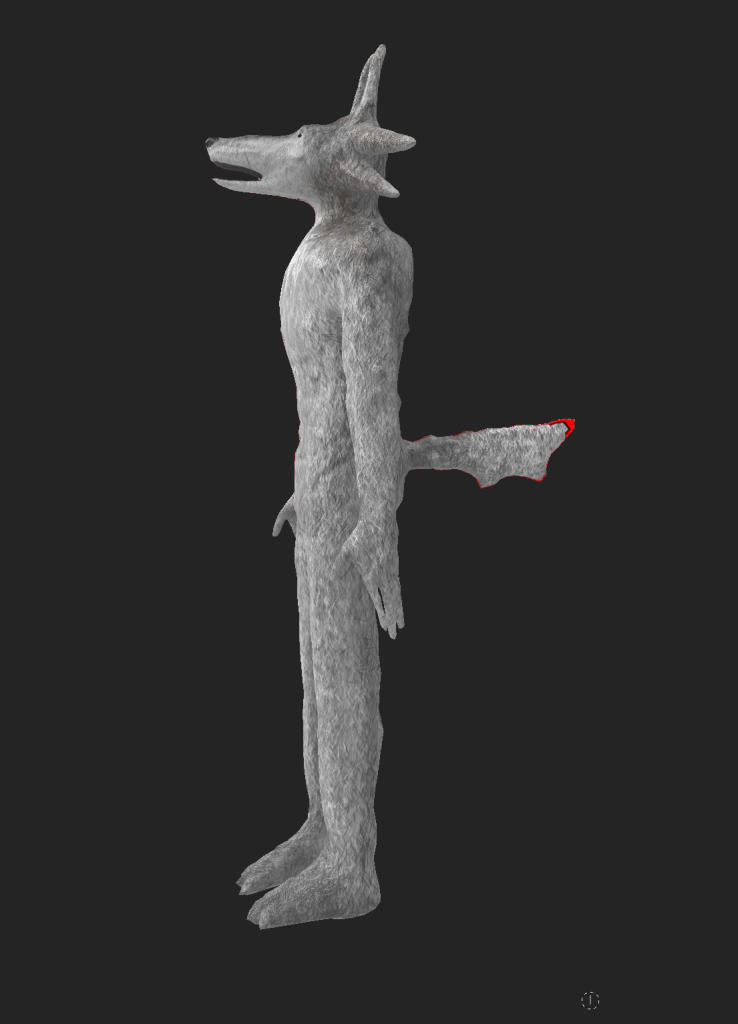
The next task was to work on the hands as the mittens were only placeholders. I masked and deleted the mittens to give myself a fresh start.
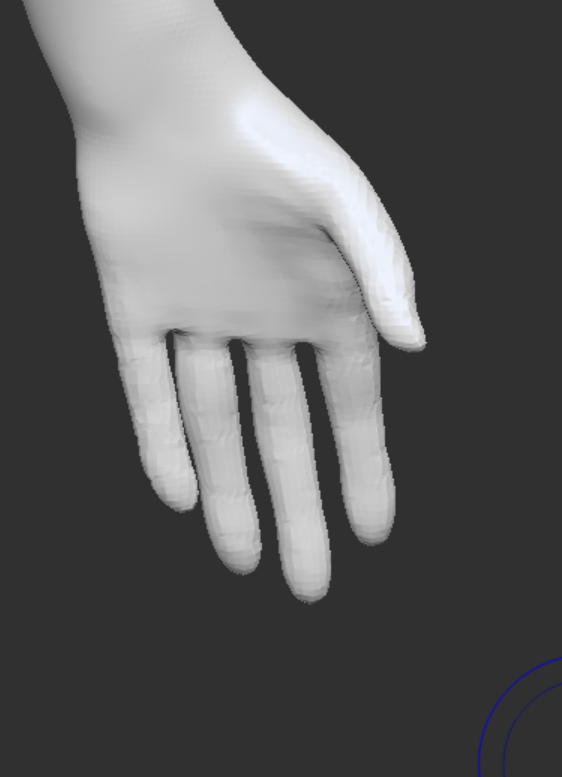
In organic brushes, I used the pre-made hands for my base and aligned them to the wrist.
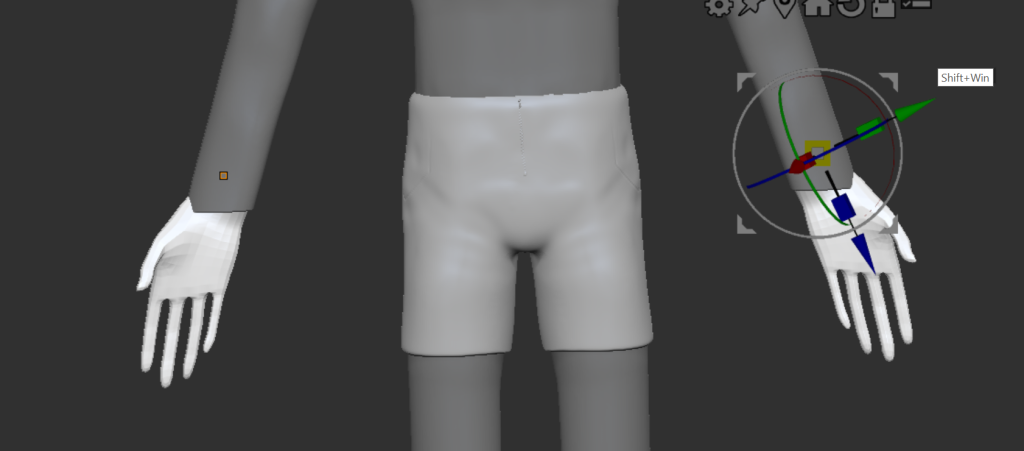
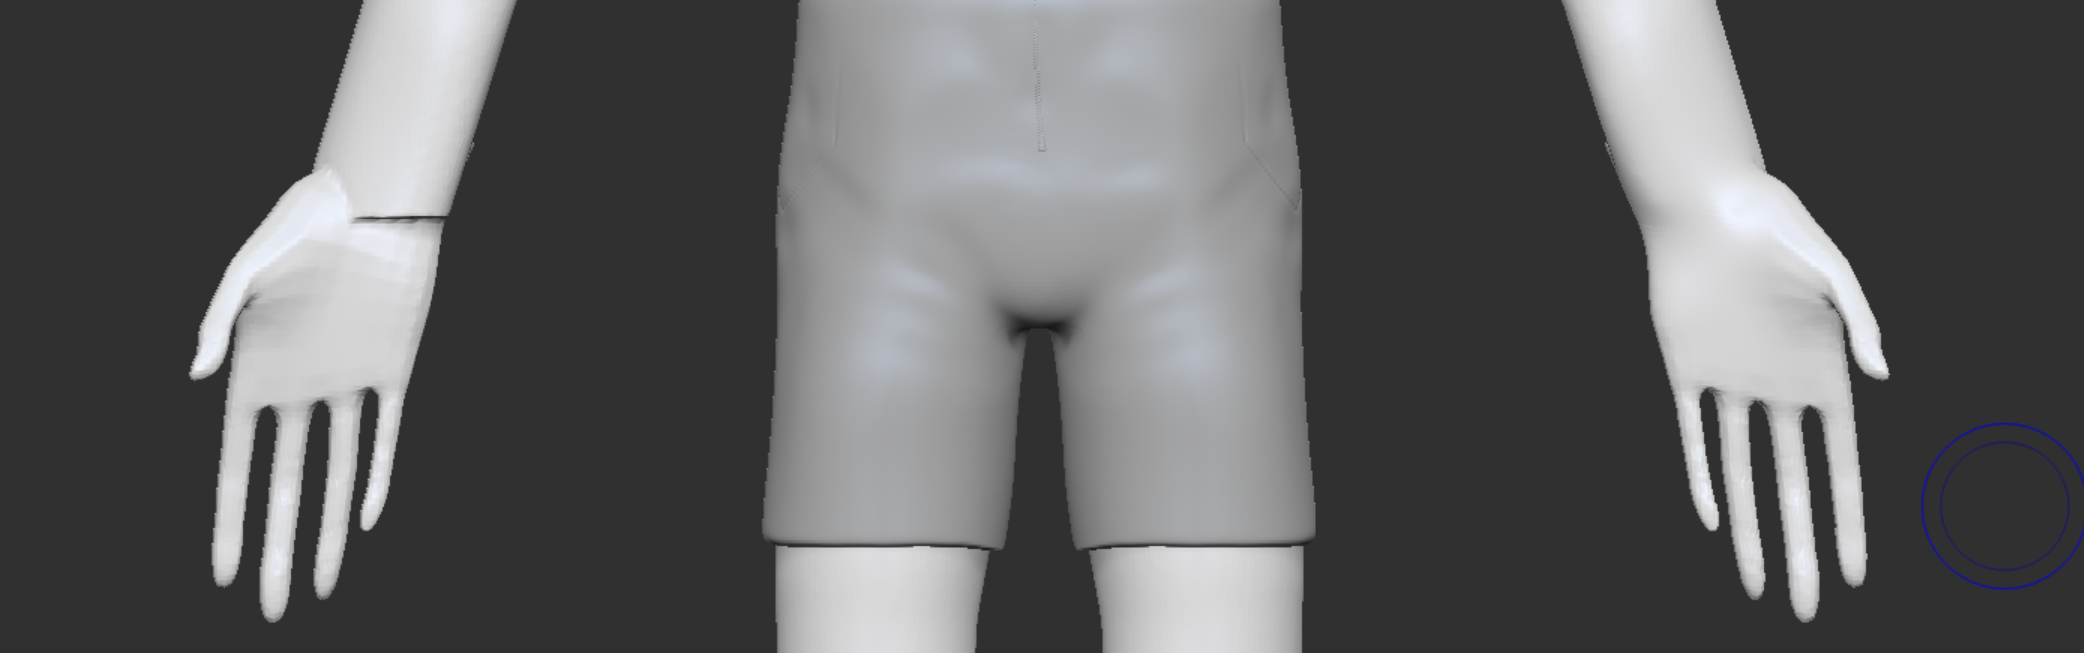
I used clay and smoothing to make the joint from the wrists to the hands cleaner then merged them in the tools menu to make them part of the main body to finish them off.
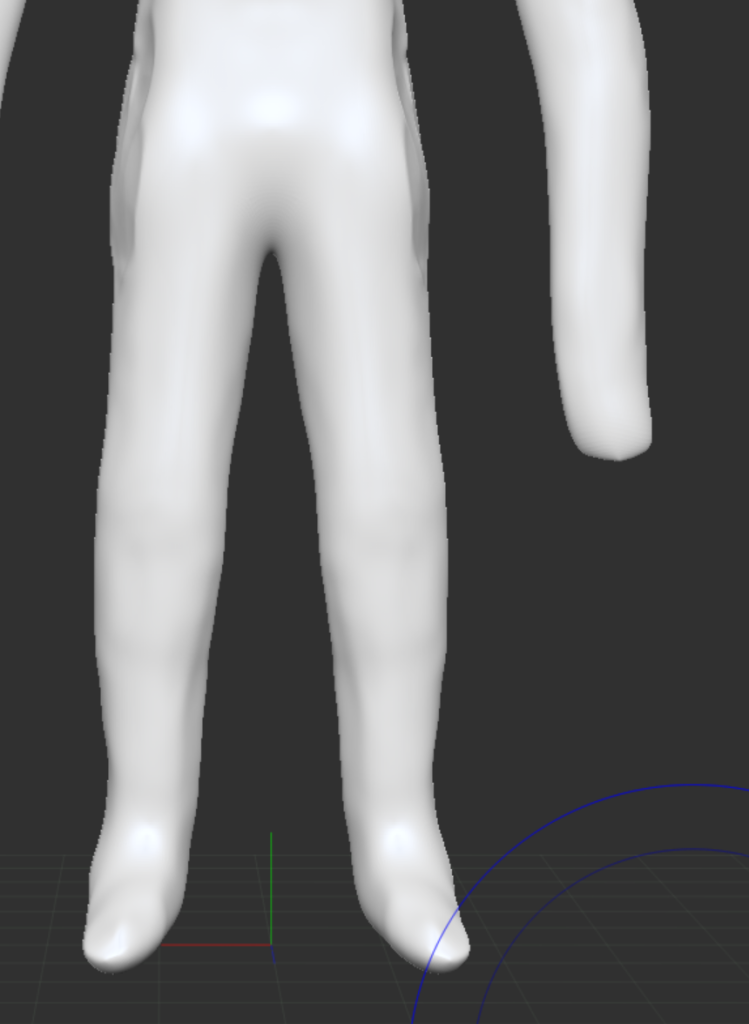
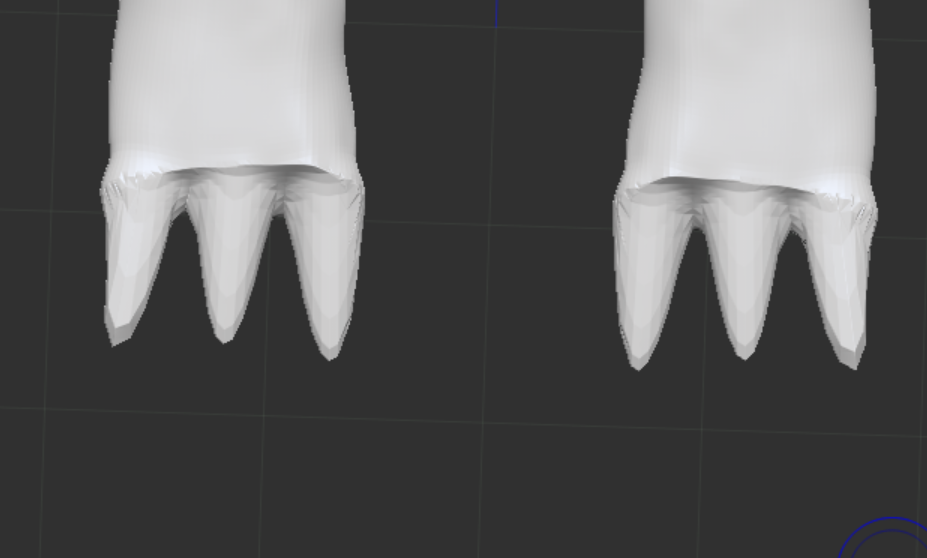
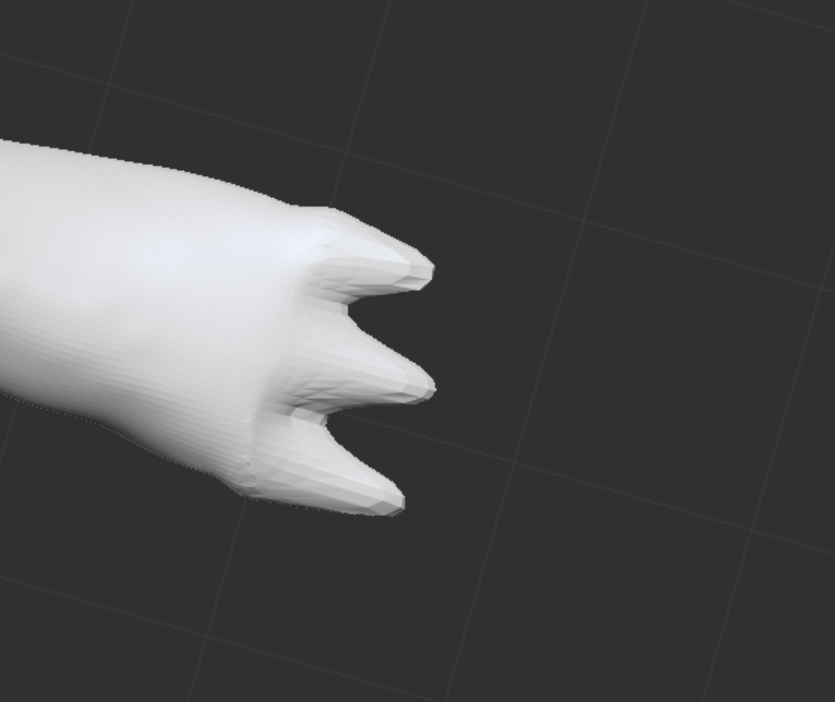
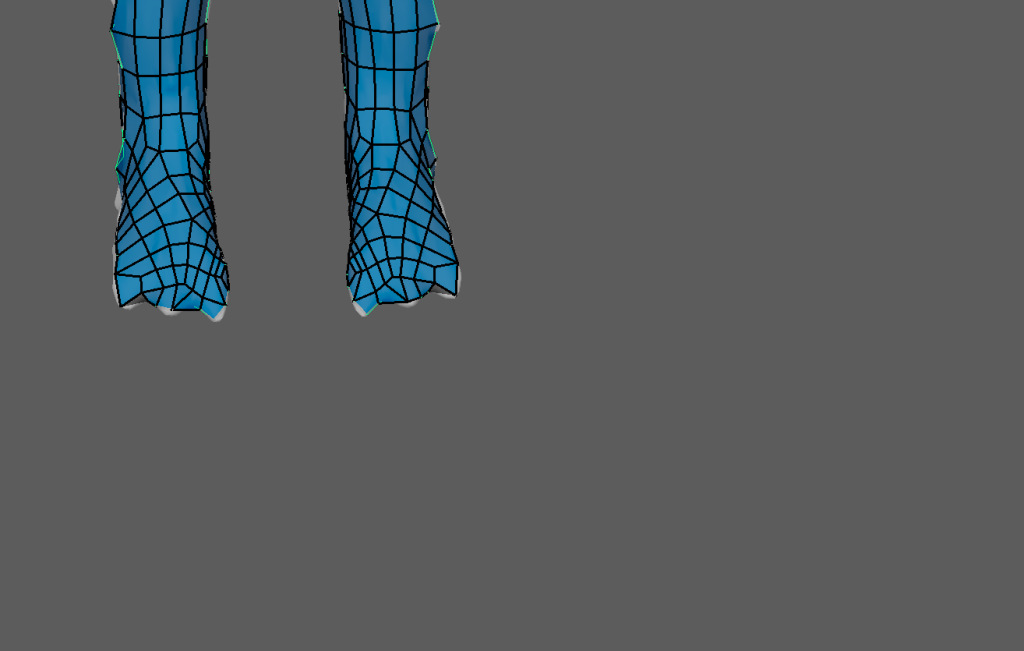
Then I started work on the feet using the same lasso tool technique as the hands to get a smooth surface.
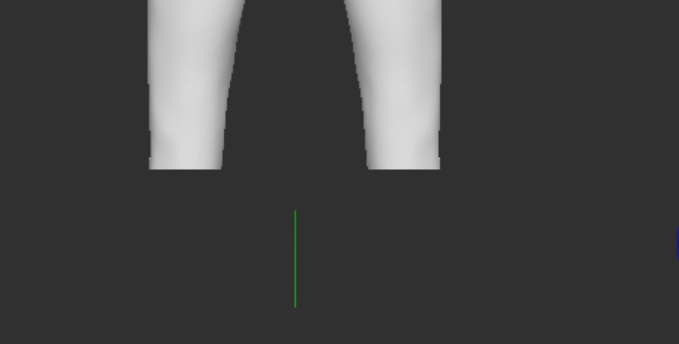
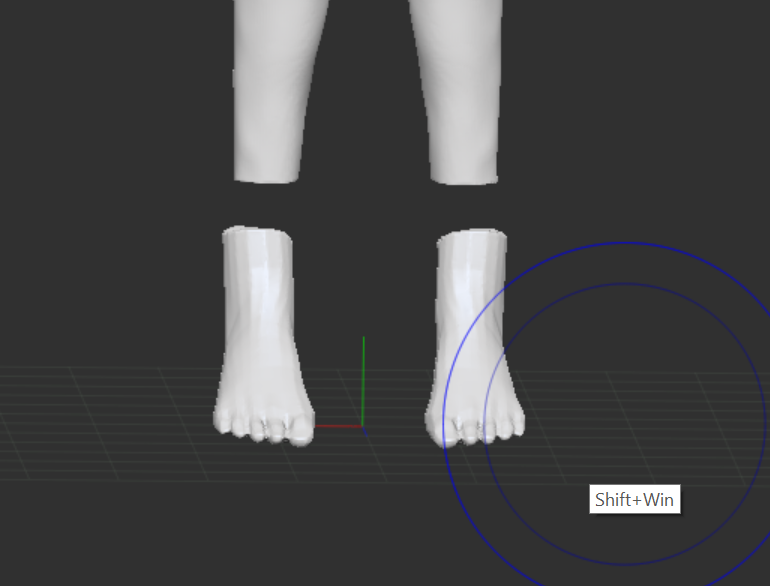
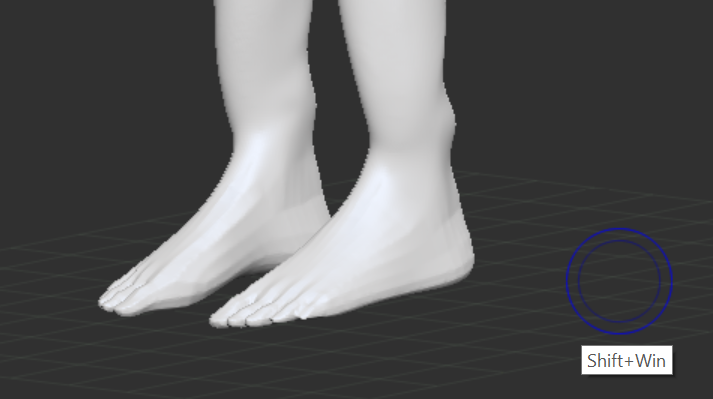
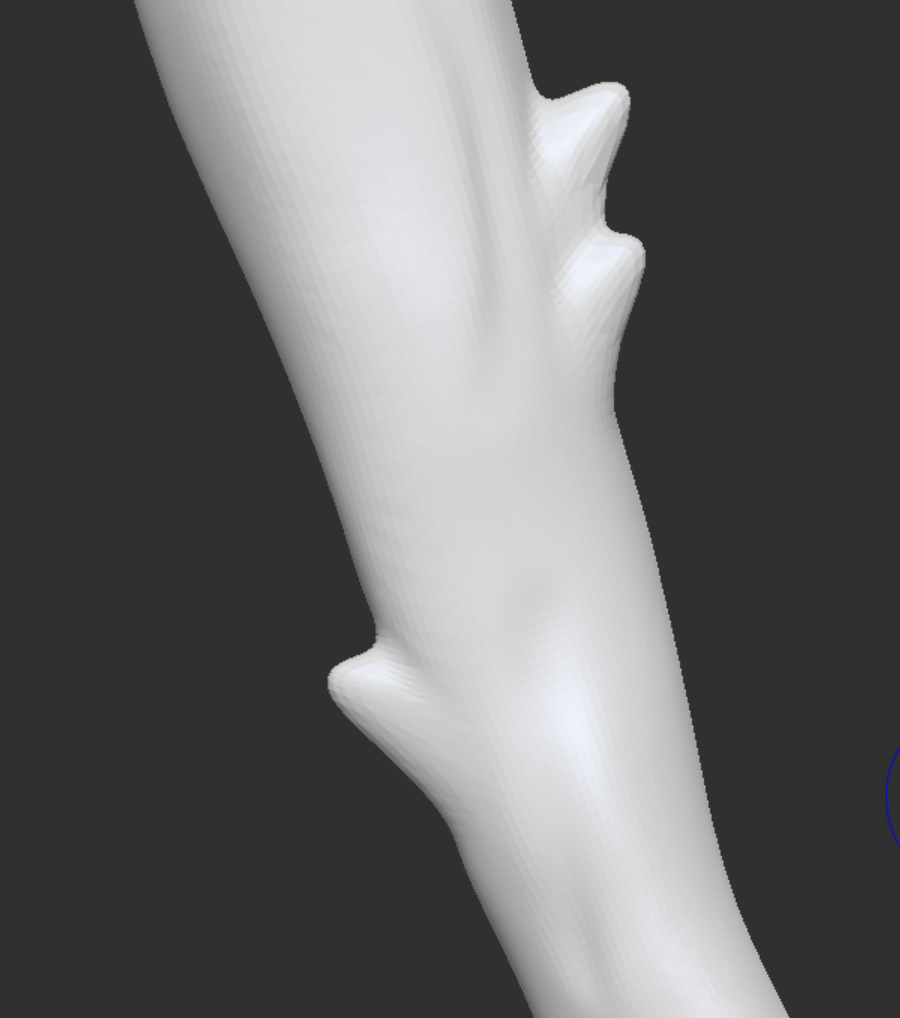
I cut off the toes with the lasso and used the pull tool to drag out three claws, then smoothed them into the foot for sharp pointy wolf toes. I also used the clay brush to add his ankles in.
Details
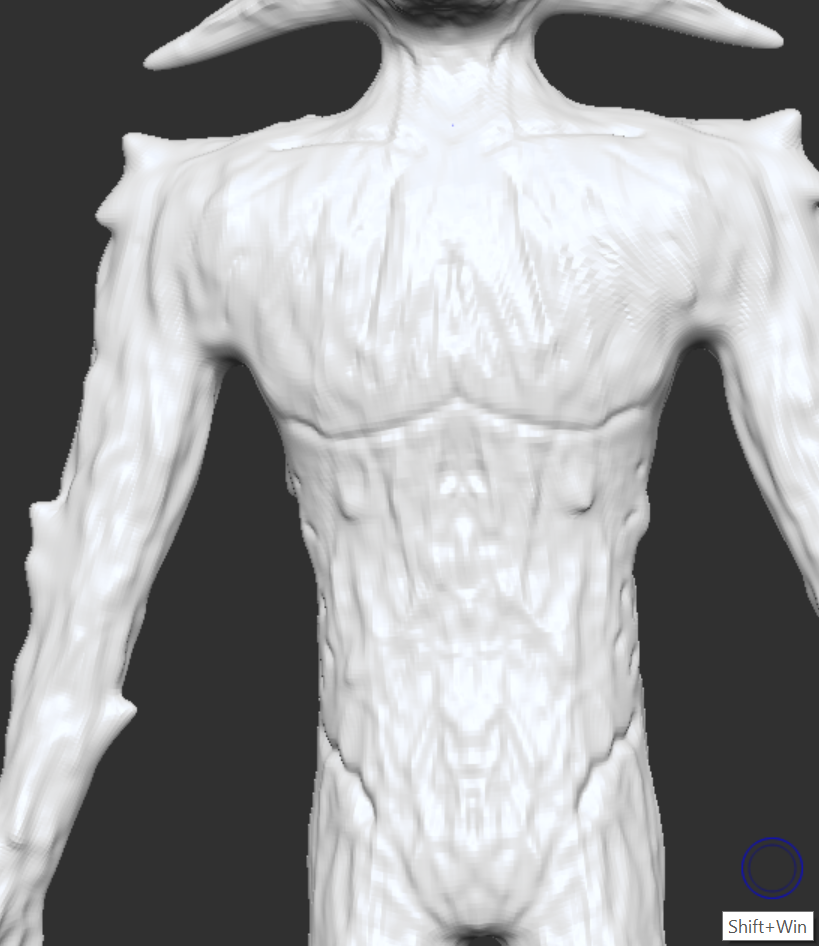
To add detail and muscle definition I used dam standard to draw in muscles using references in anatomy books for the correct placement. I focused on the pecs, abdominals and obliques as this gave him a lot of depth and would help him still look detailed with fur on him.
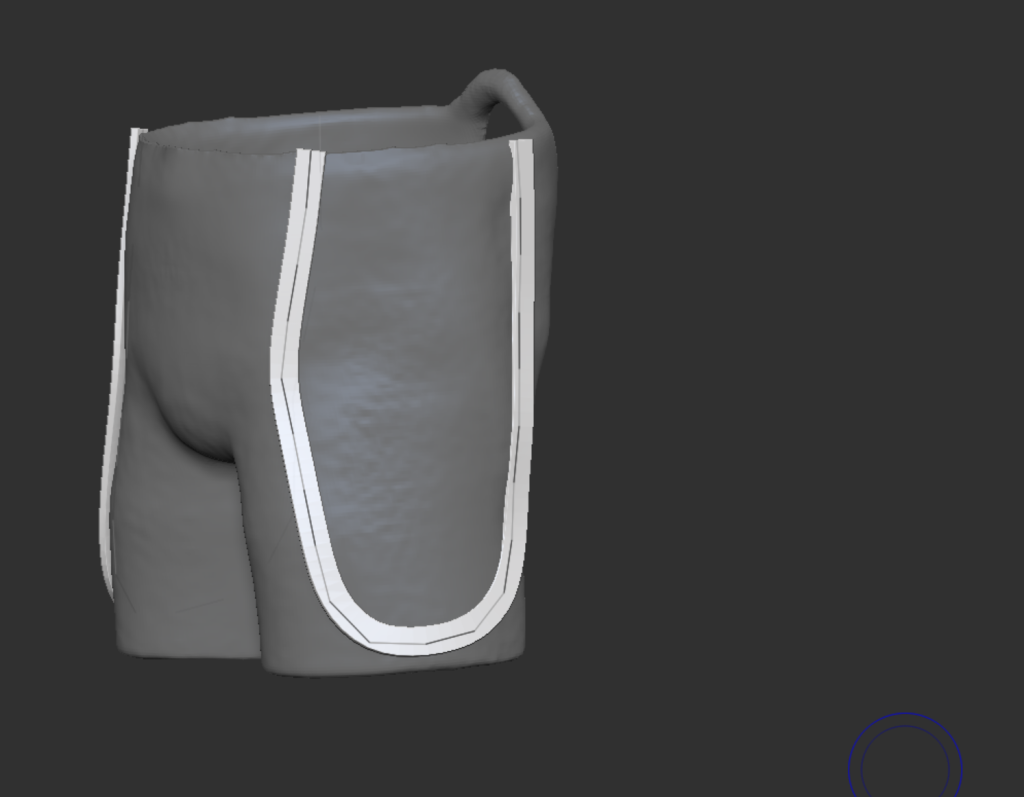
Suspenders were added onto the shorts using the straps brush and the move tool to correctly place them. This was to add another sense of depth as it made the simple model of his shorts more complex.
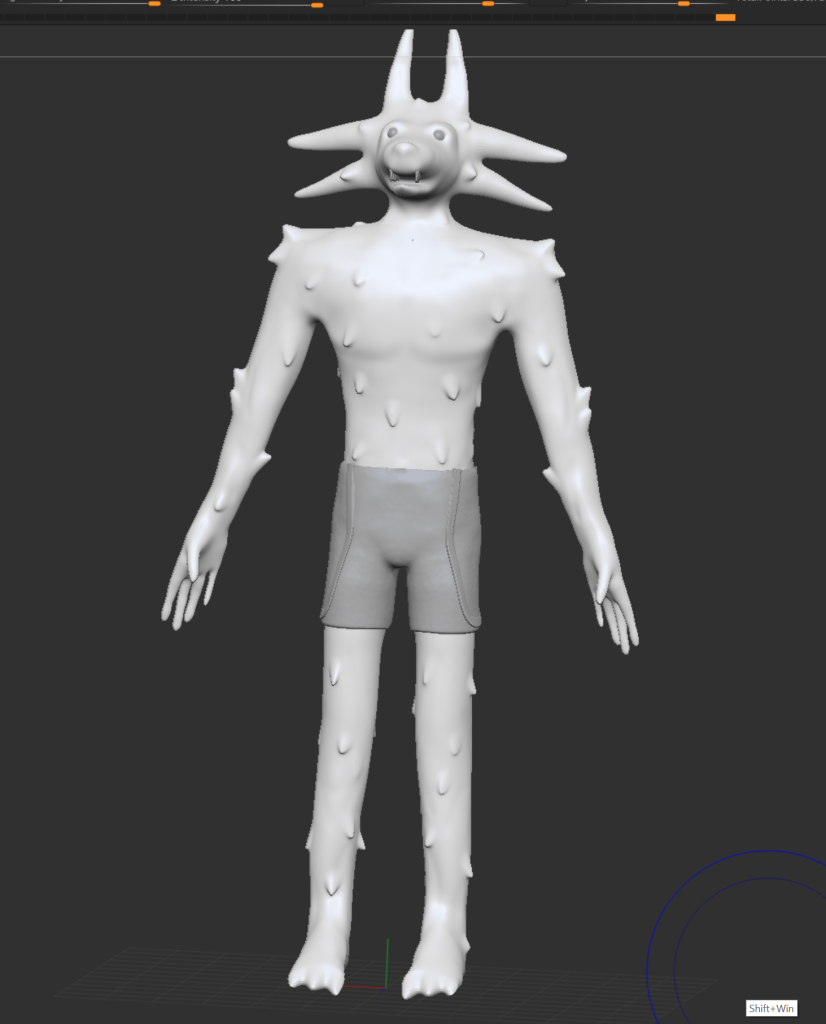
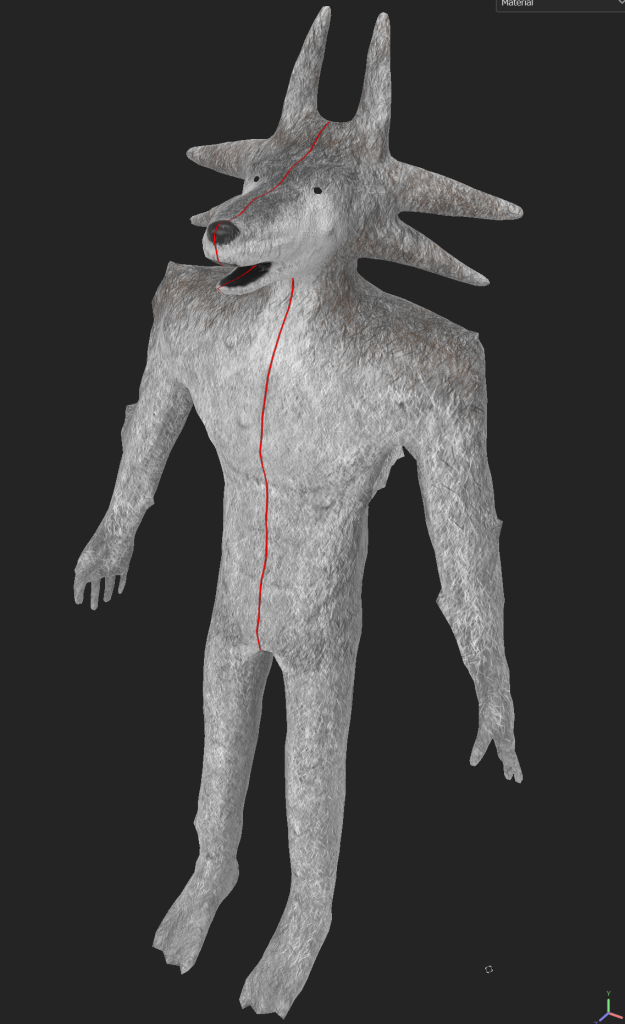
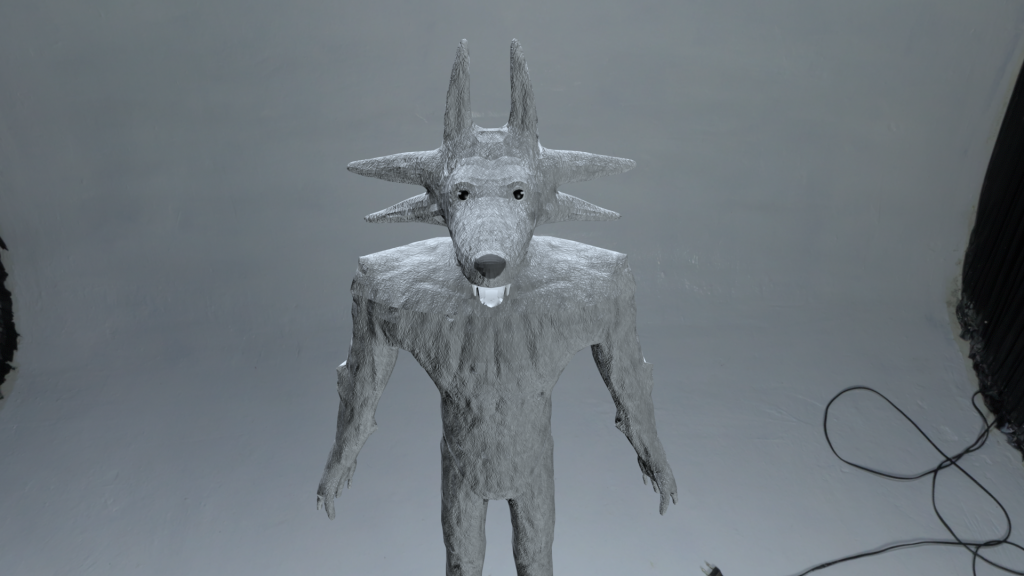
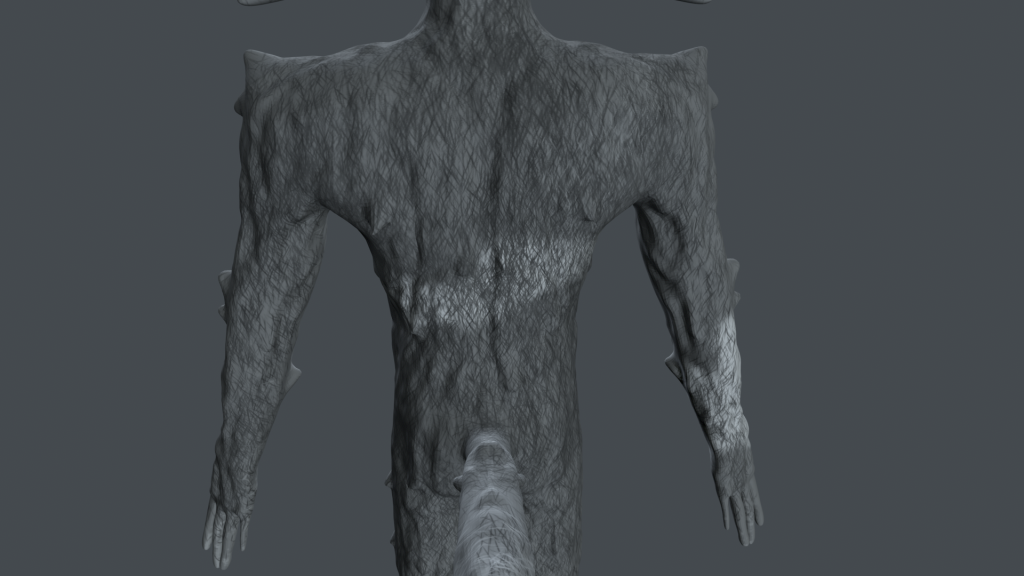
Snitch looked very flat at the moment so for more height variation I added fur tufts with the snake hook to make him have a more interesting design that is truthful to the base concept. This completely changed him from looking boring and flat to very stylized and interesting as I originally planned for him to be.
The standard brush was used next for adding and taking away lines with multiple strokes. This was to add a full body fur effect for depth. This process took a while but made him look so much better and gave him a fur-like illusion which when coloured will look very good.
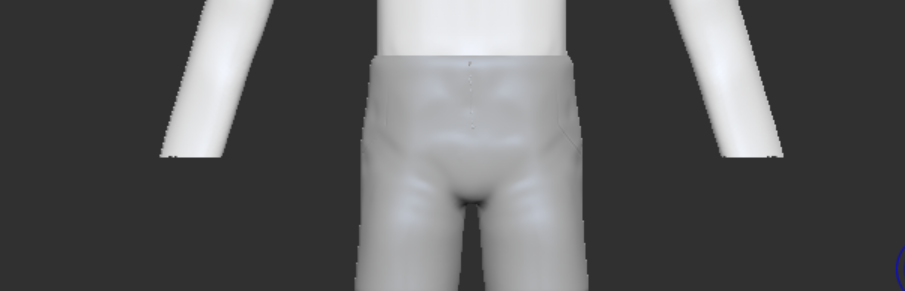
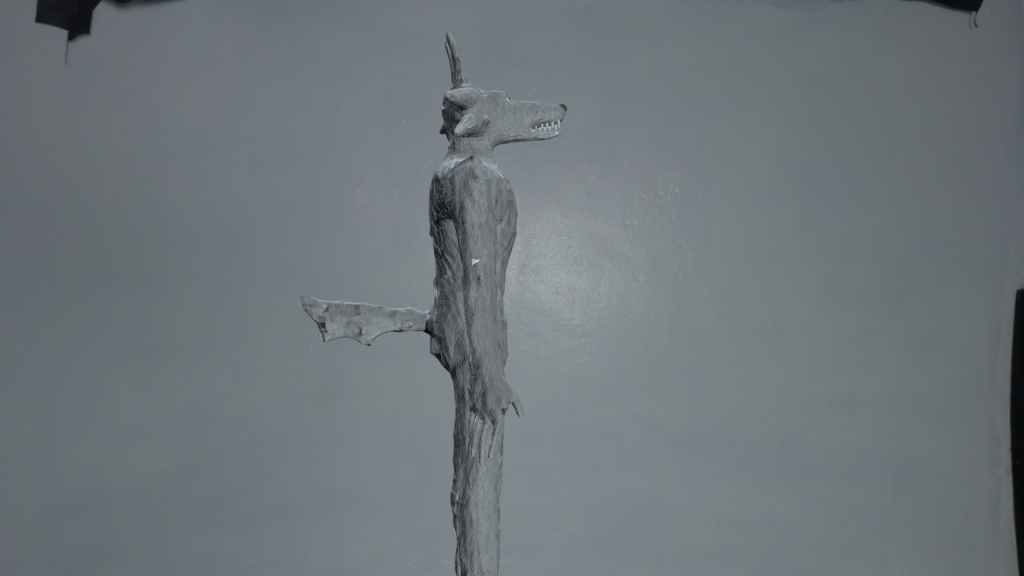
After some deliberation, I removed his pants as it looked strange for him to fully be a wolf, yet have shorts on. I also found the shorts looked very odd since I never planned for him to have them in the beginning but I wanted to test them out. The fur covering his whole body looked more realistic but I will keep my process of how I made the shorts to show that I have the knowledge.
The dam standard tool allowed me to add the muscles back in since when doing the fur it covered the sharp lines and this pulled out the detail again.
Once I was happy with the model I demolished him in Zbrush to create a low poly and saved it as its own obj file to move into Maya for the next step.
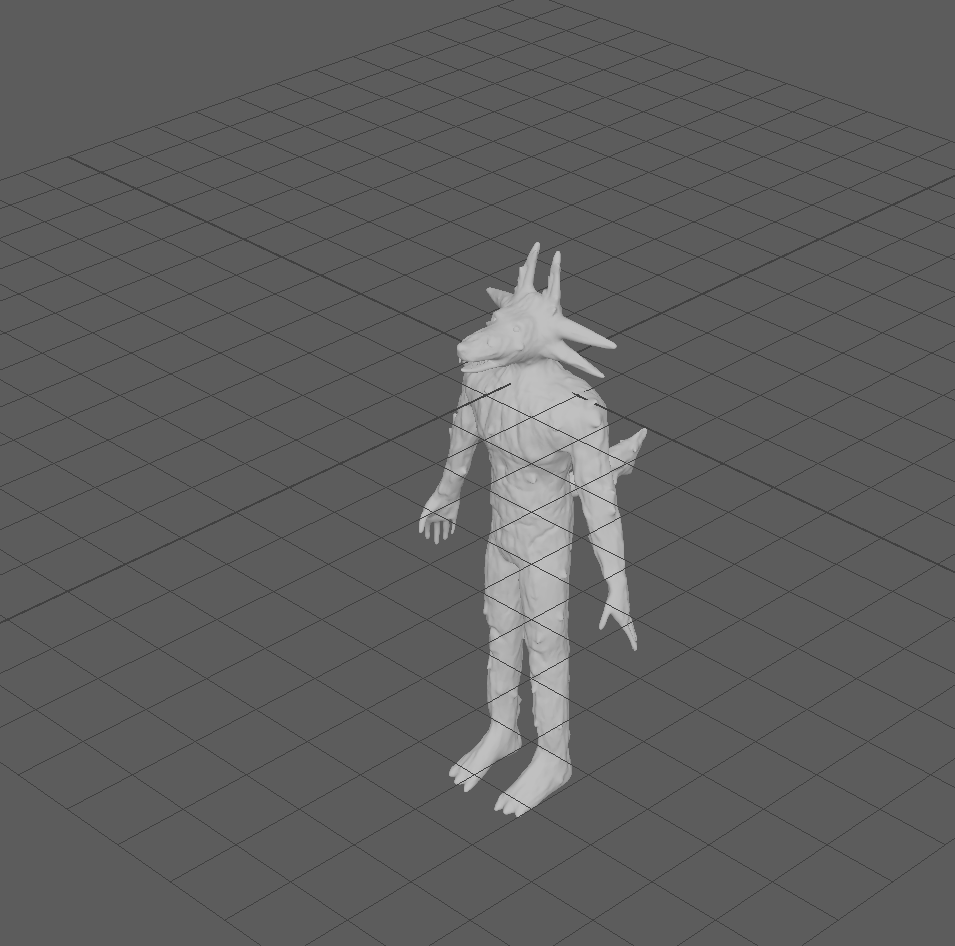
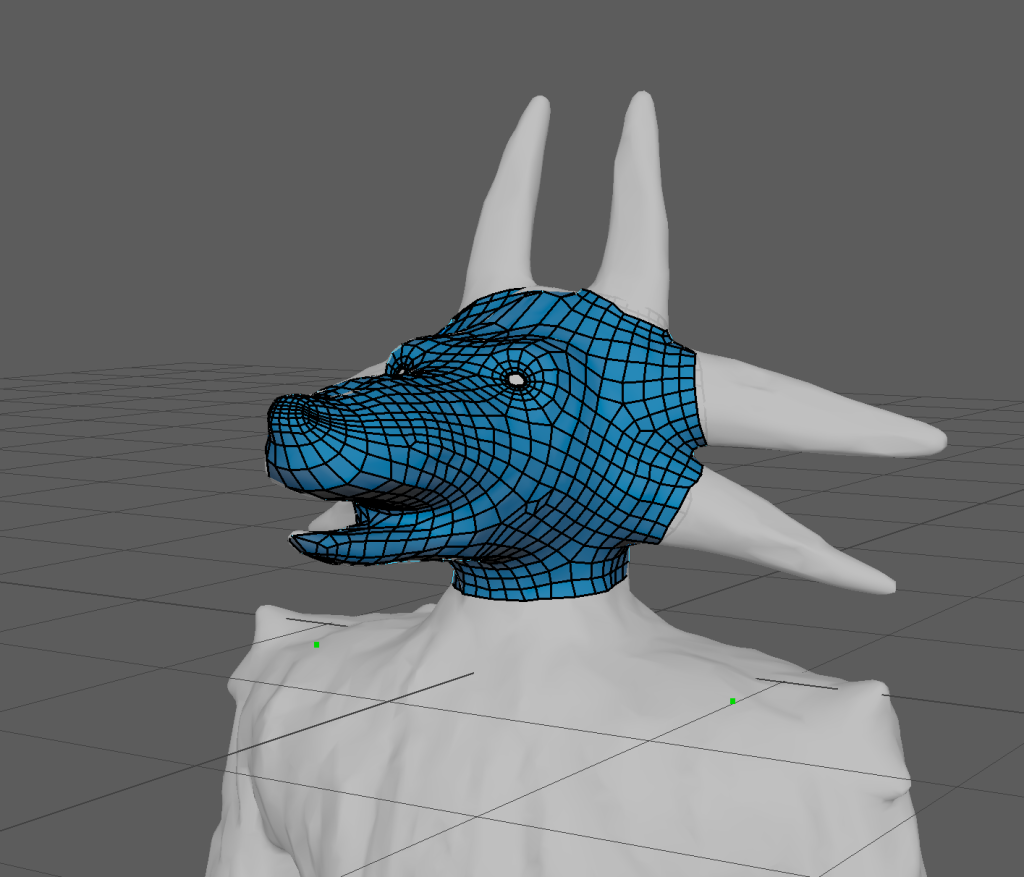
Retopology
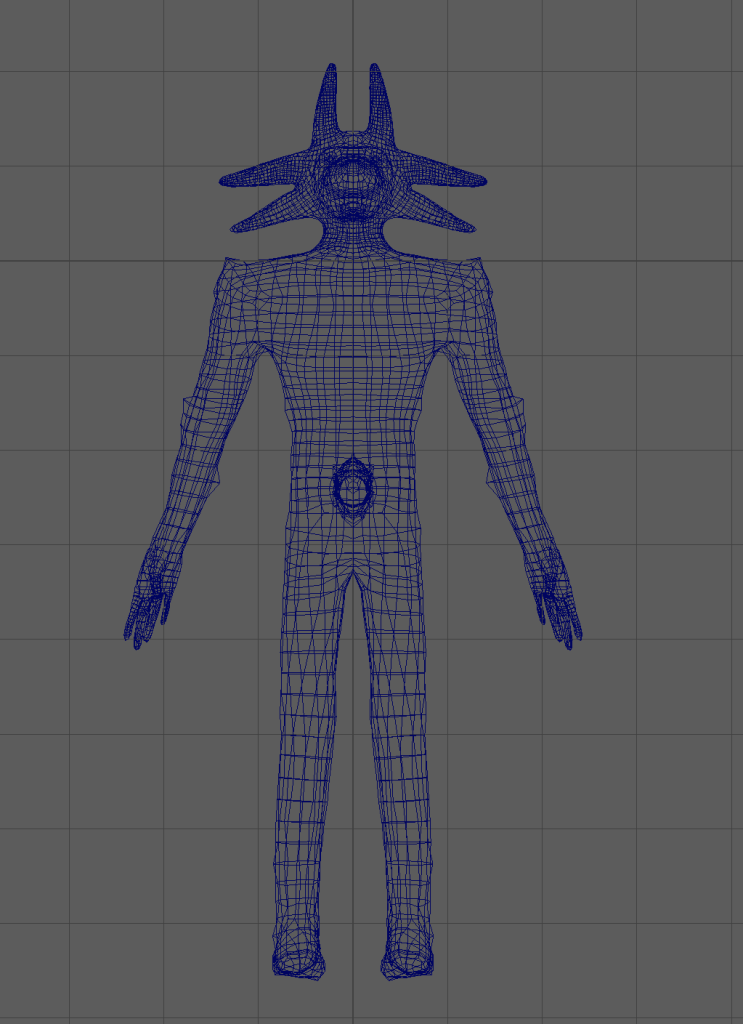
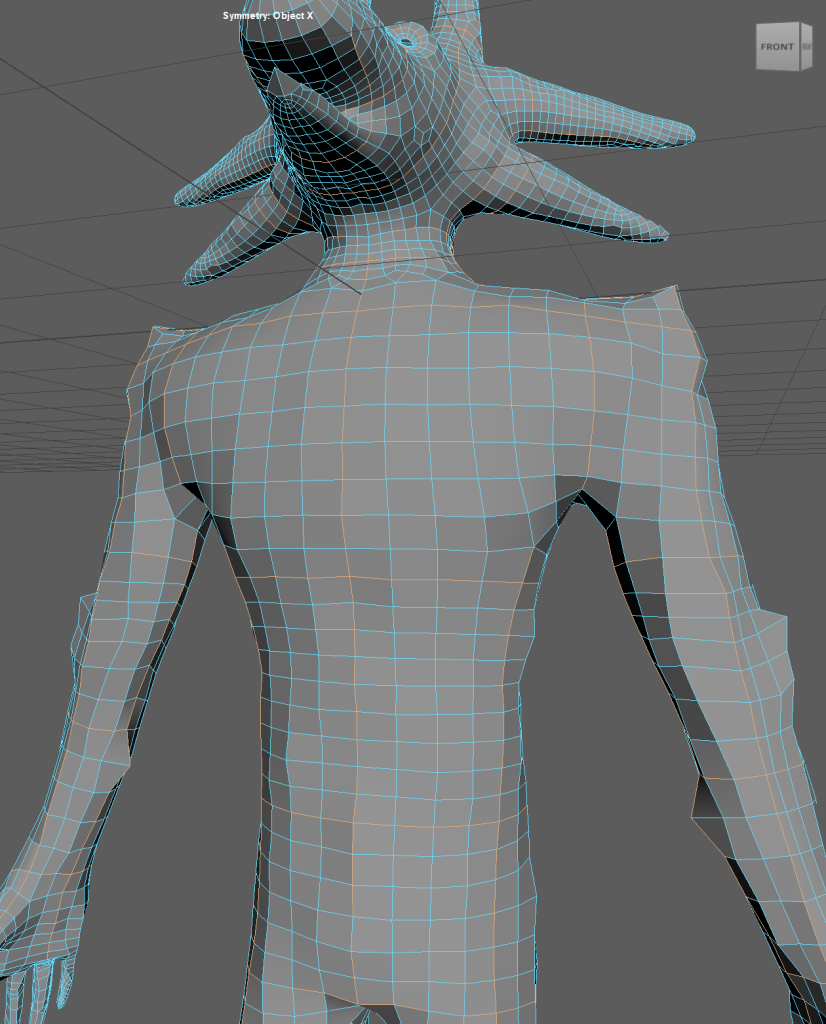
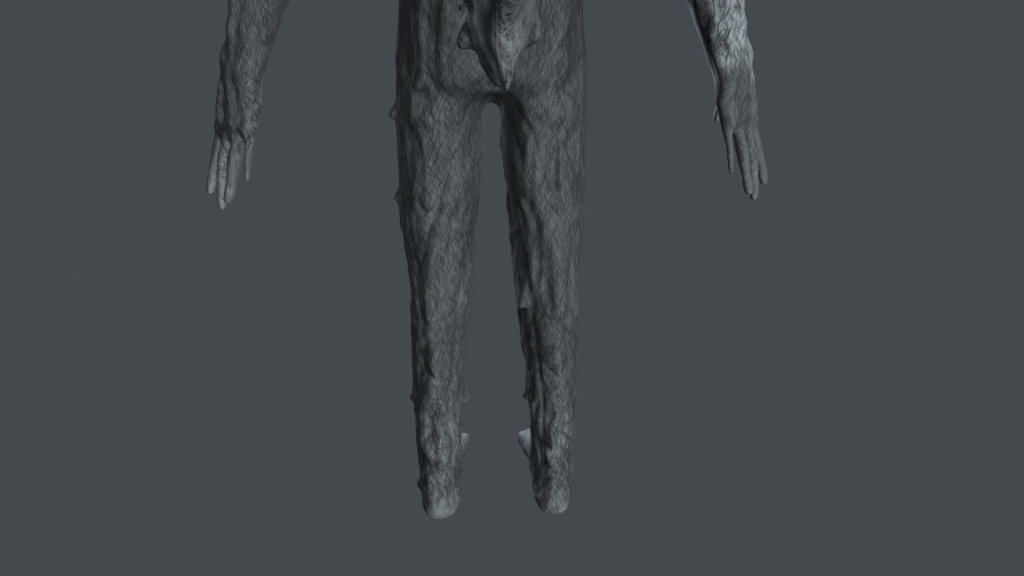
To start retopology I imported the low poly file into Maya, centered his location, and made him a live surface so I could start the topology. Then I could start using the quad draw tool and I added edge loops around the nose, eyes, ears, tuffs, arms, legs, waist, tail, fingers and finger joints. I made sure to relax my topology using the soft select tool to minimize the amount of stress on my model which I can see in UV editor with UV distortion mode on as it highlights areas of stress as red. This was a very time-consuming process but allowed for my topology to be very clean as it was done by hand not automatically, now when I unwrap my character and texture him it will also be clean and avoid any strange texturing issues.

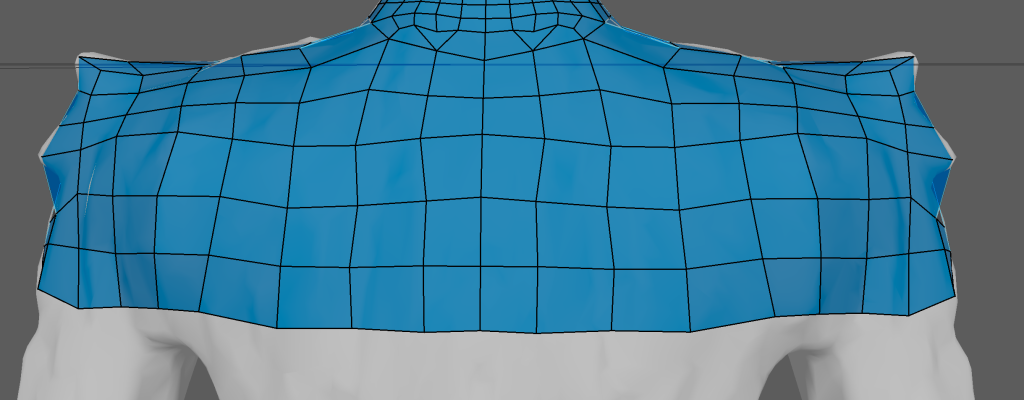
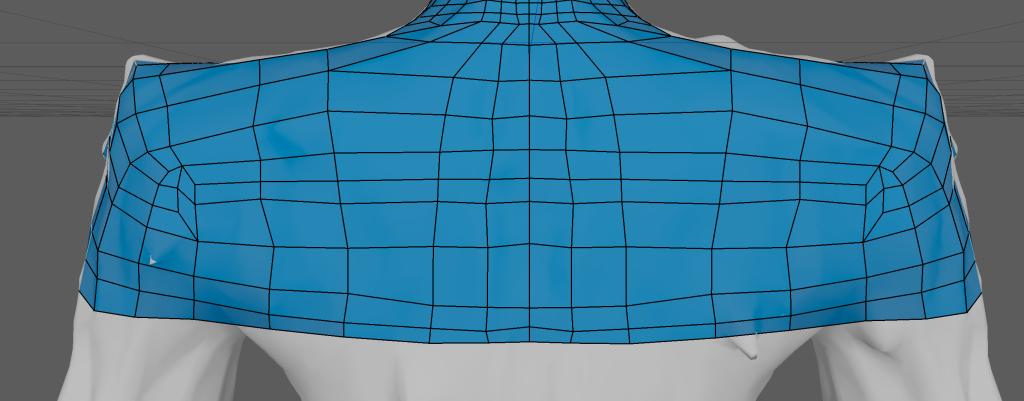
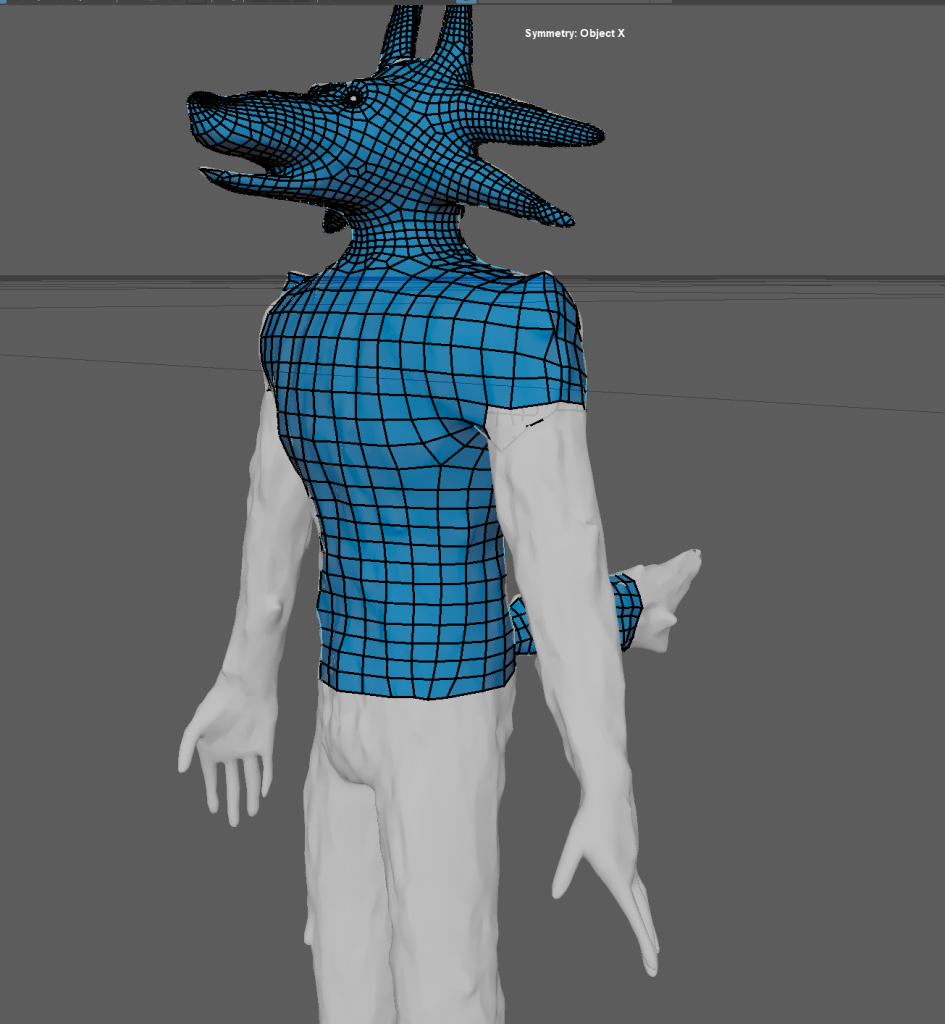
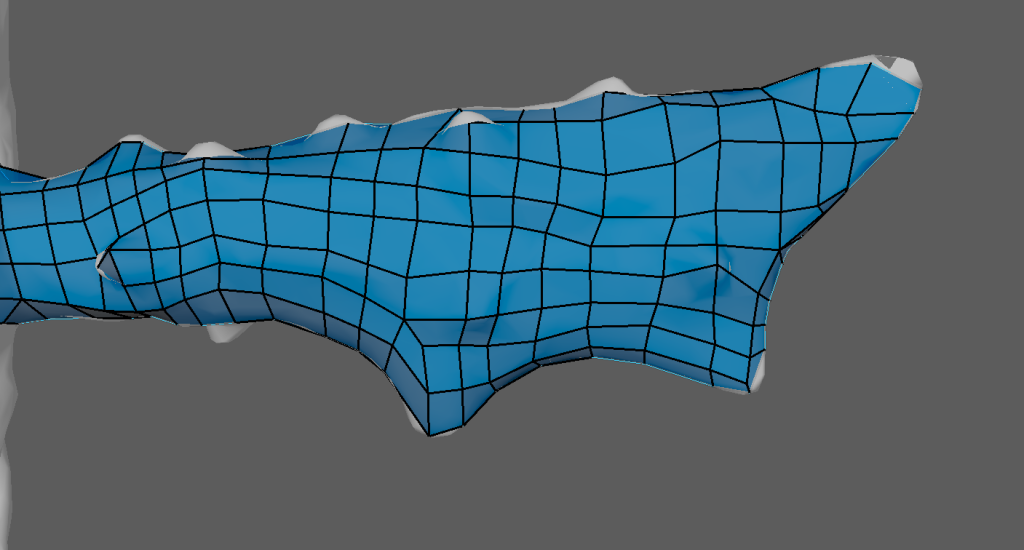
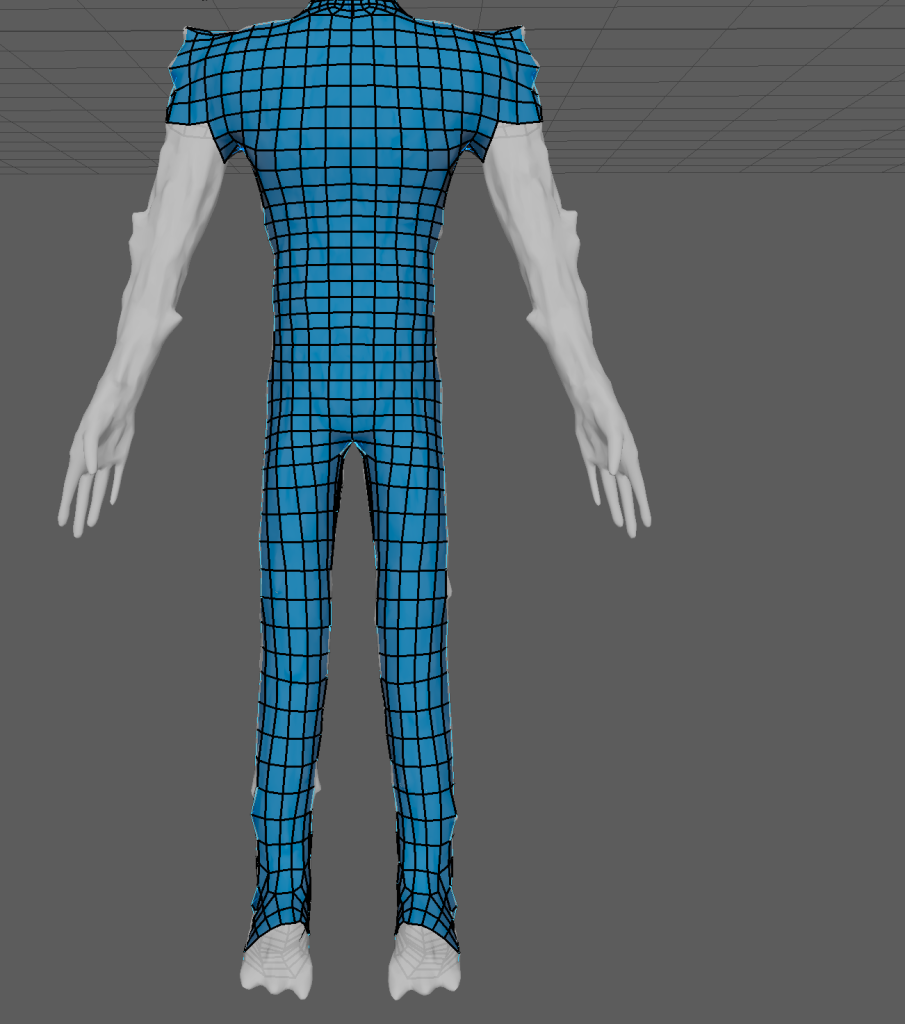
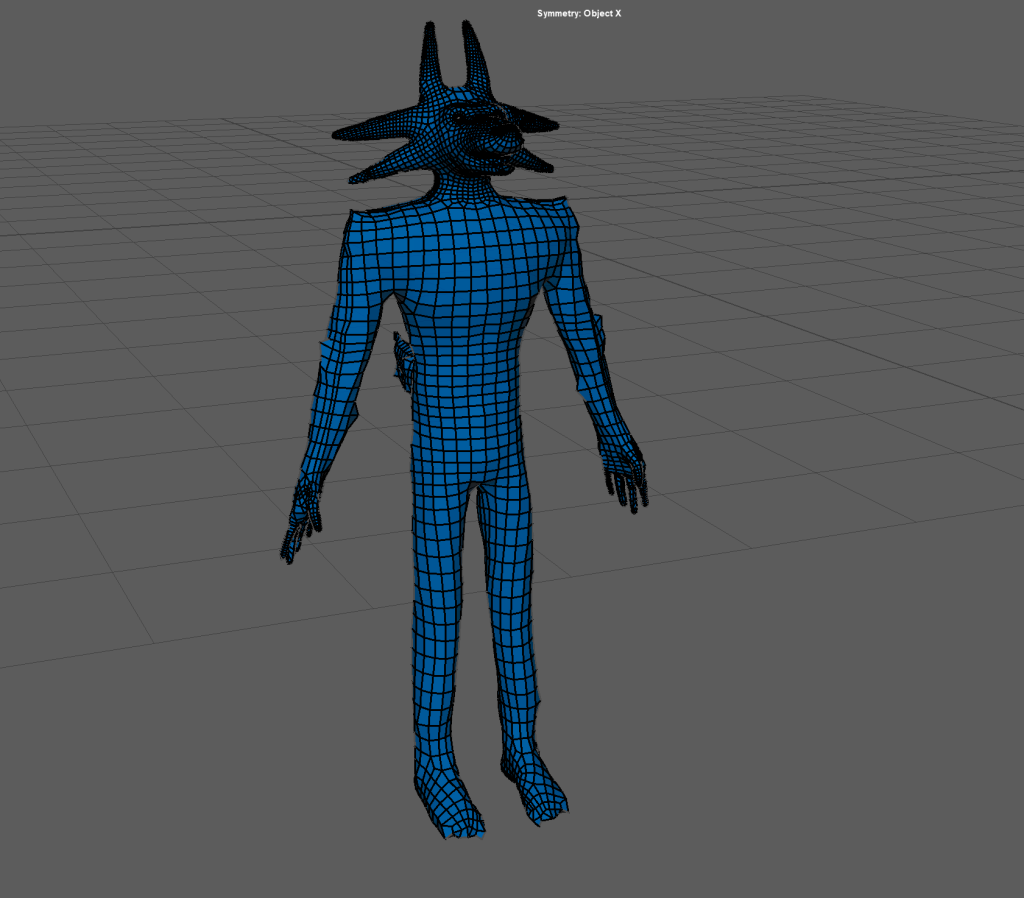
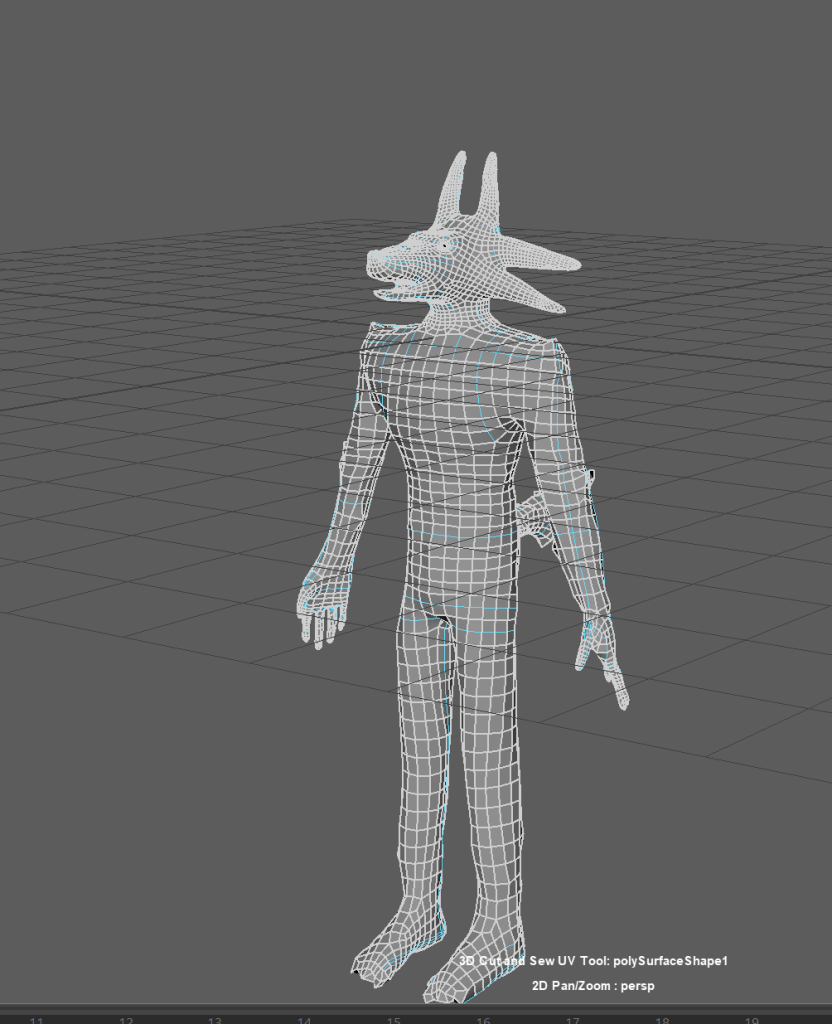
Once the retopology was done I then started to use the 3D cut and sew tool on the edge loops in places that I already made like the axilla, eyes, mouth, crotch and ankles. This is because these are areas that will be moving and I want them to follow the flow of muscles so that they do not deform when I start animating.
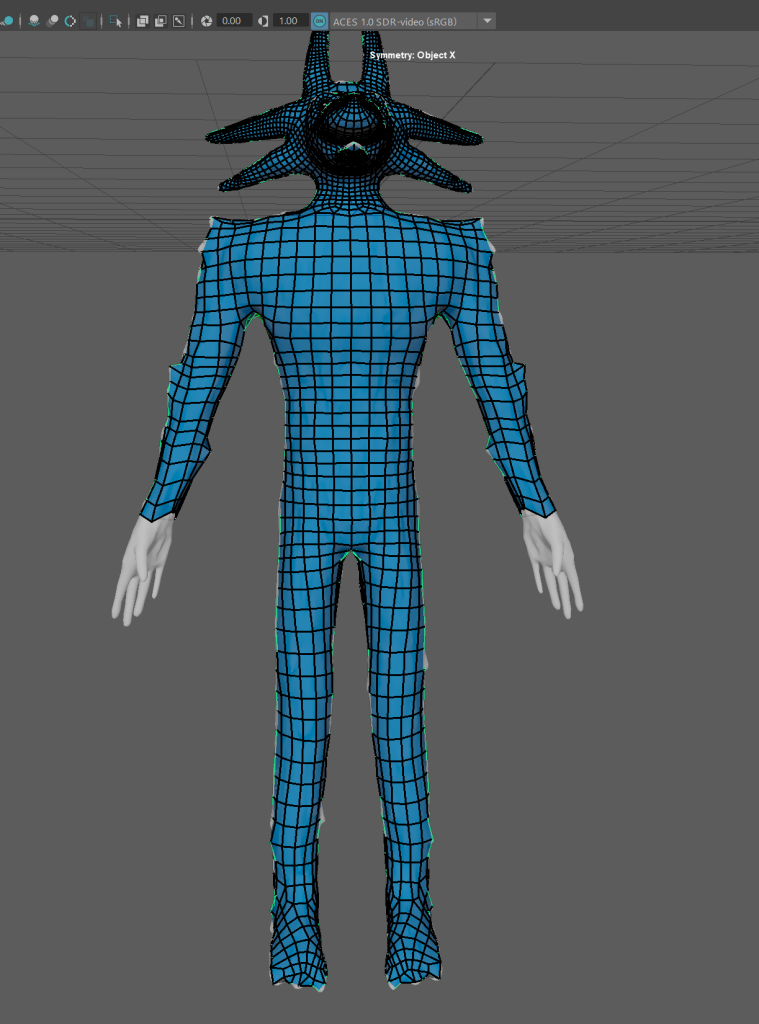
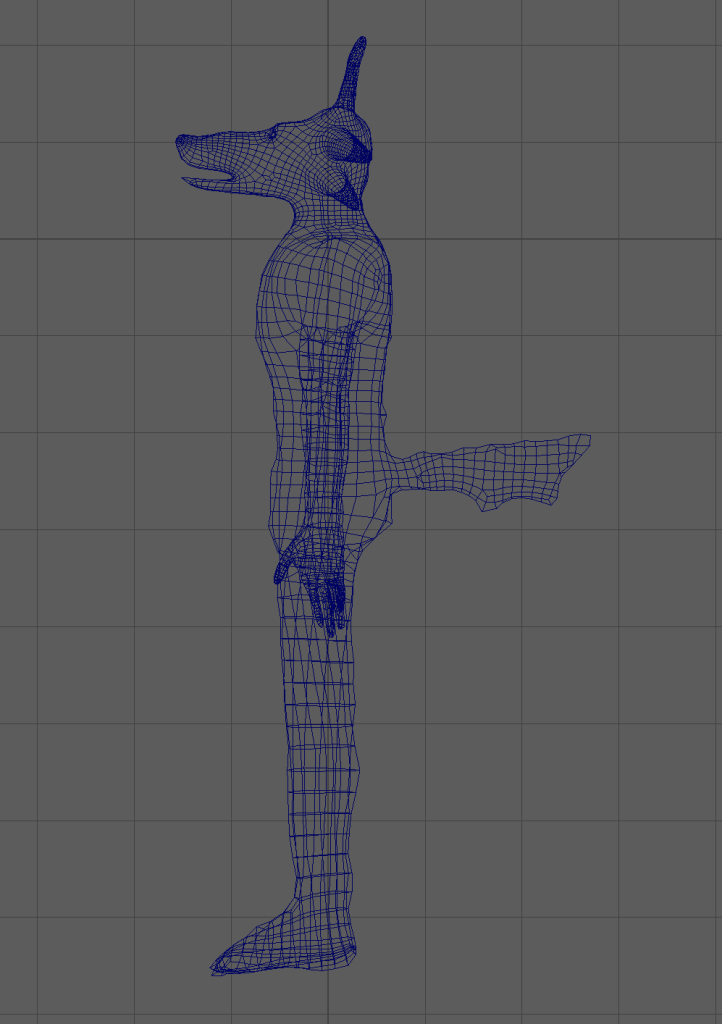
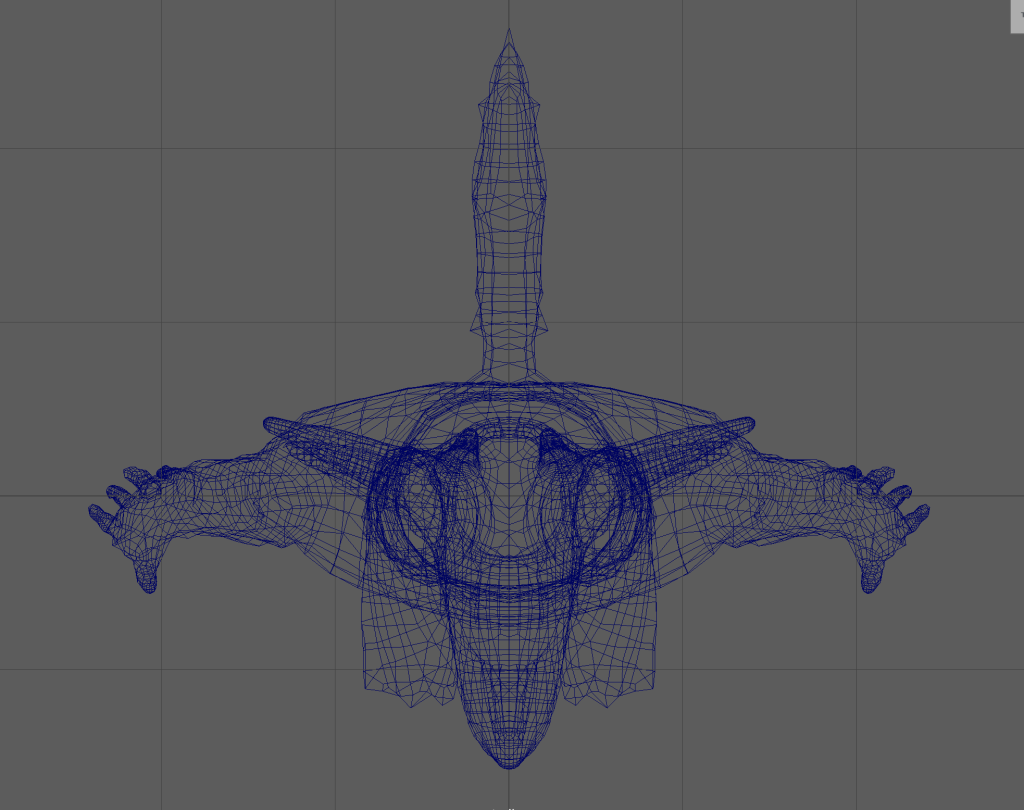
Orthographic views:
After I had the cuts in place I opened the UV editor and added a UV shell with my topology selected then unwrapped the body, eyes and teeth and went into the UV Toolkit’s Arrange kit then clicked layout and it moved them into the most optimal position.
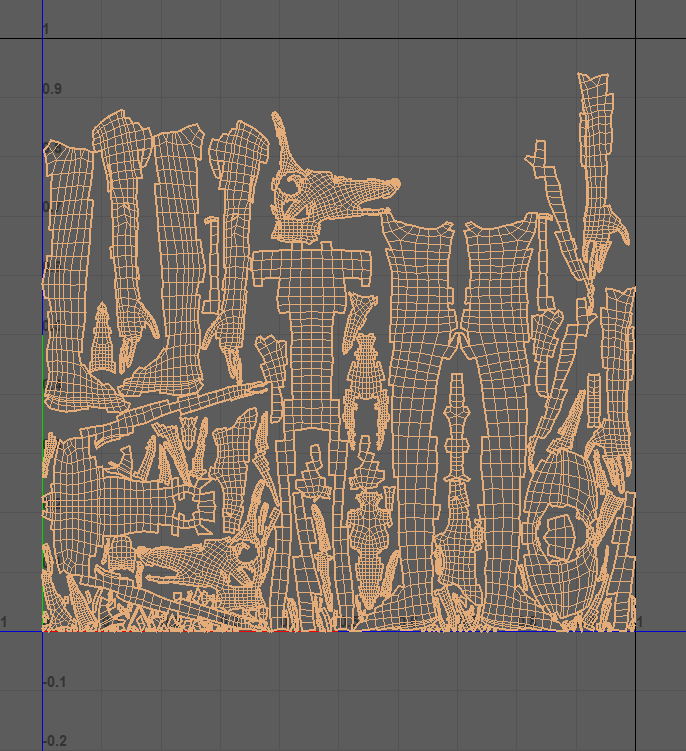
After UV unwrapping was done I then added my high poly obj model into Maya and overlapped it with my low poly as best as possible, then exported them both as their own obj file for baking in substance painter.
Texturing
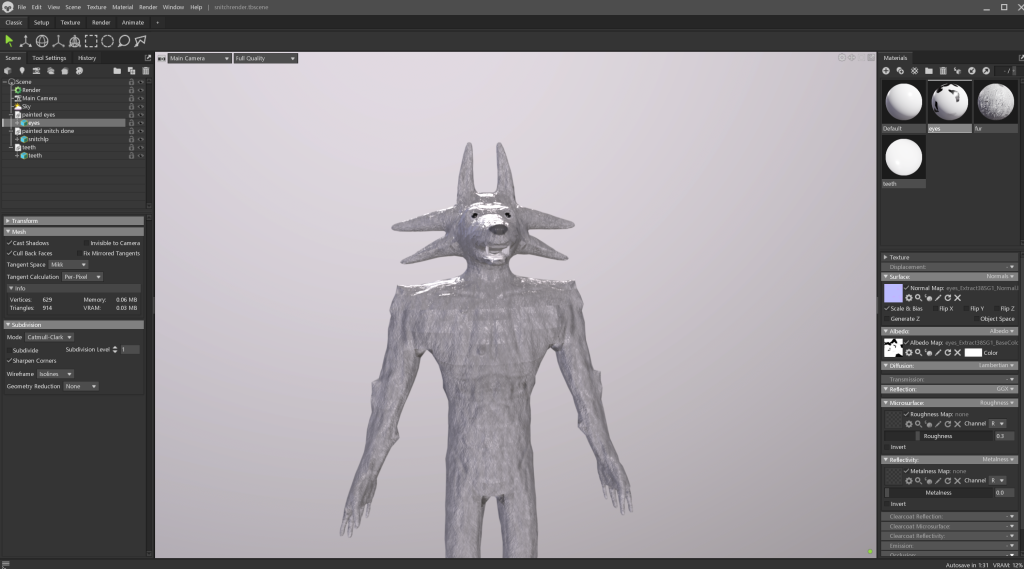
I imported the low poly into Substance painter and baked the maps of my high poly onto it for detail. This will allow for my low poly model to have detail without the high poly count.
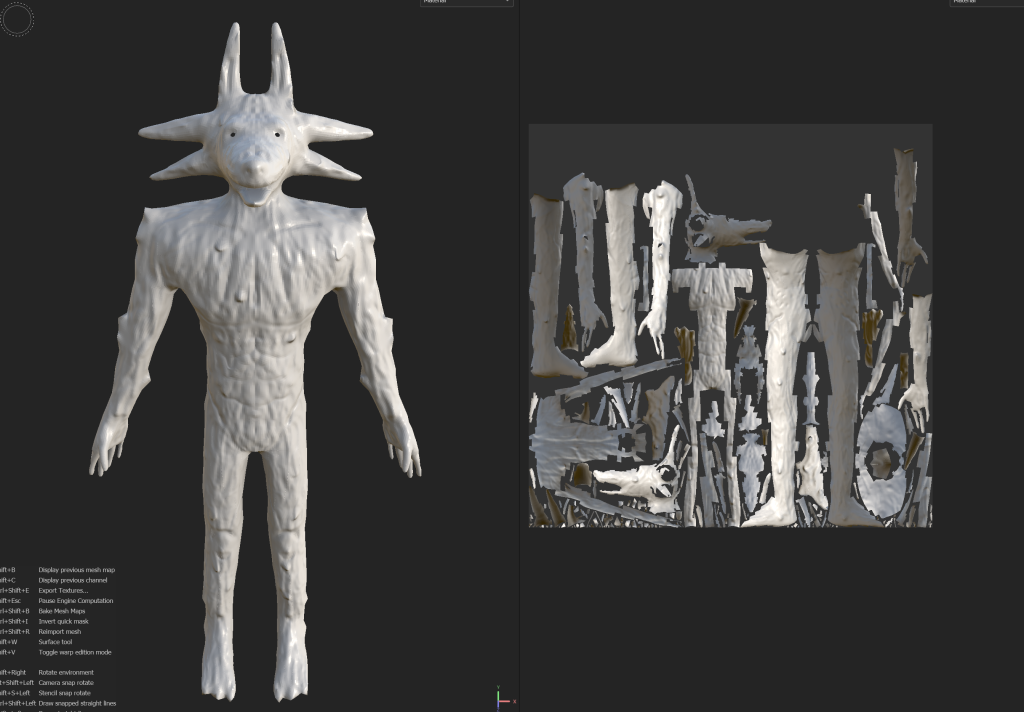
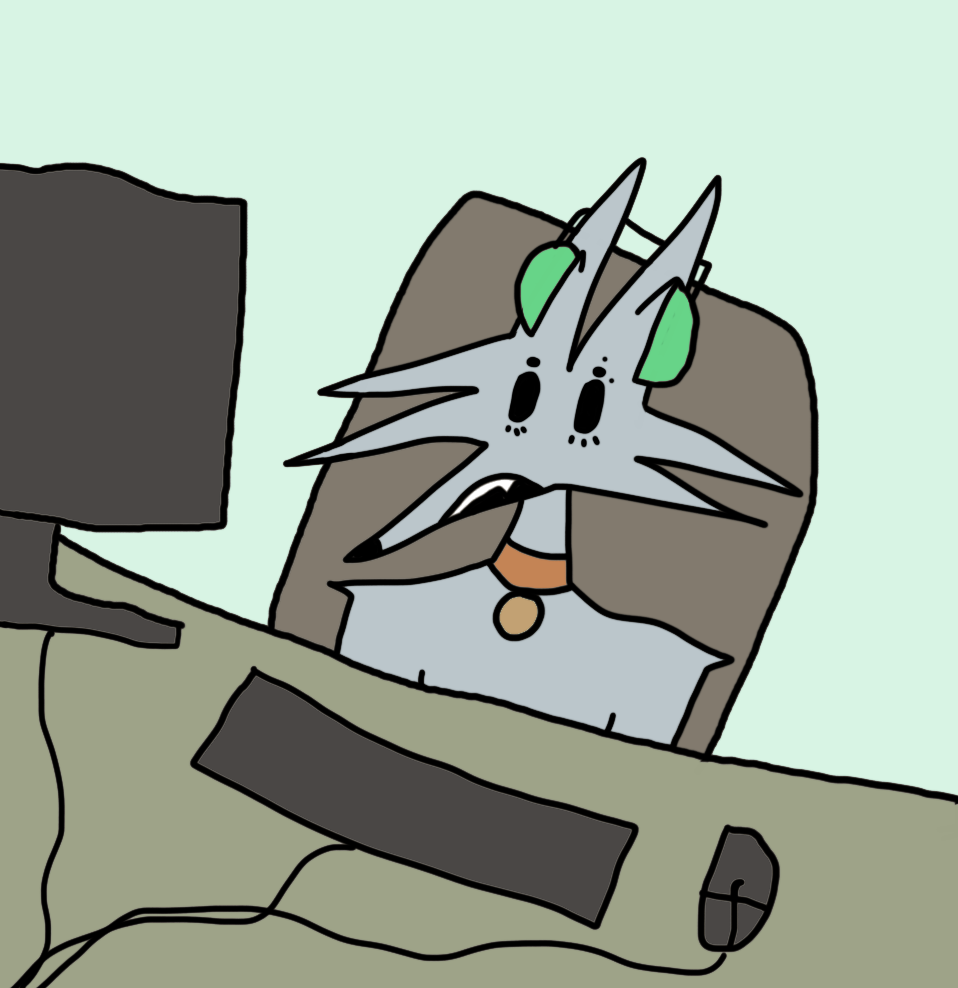
I used the fur random brush for most of the texturing as this allowed for random stroke size which gave a realistic fur effect as it also gives him depth and texture. I also gave him a white front using the same brush on a larger size which helped him not look as flat and also made his back a darker shade of grey. While painting detail in I had his reference image open to draw him as I intended.
Rendered character
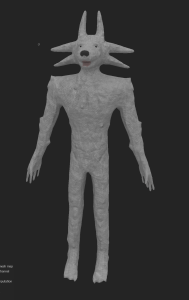
I then imported the model and textures into Marmoset Toolbox and added them as children under a turntable actor. I did not like the way this came out due to lack of detail, so I textured my high poly model as well doing rendered shots of both models. My reasoning for having renders of both models is that my baked model has my hand done retopology and is game ready due to its low poly count, but I found it lost most of the detail that I put in with the snake hook tool. I textured my high poly and rendered it as it had all of the detail with it having a high poly count, I wanted to show renders of this model as I believe it is a higher quality model than the baked and I wanted to be honest and show that.
Rendered images and video turntable of my baked and manually done retopology model in normal light and ray tracing.

Rendered images and video turntable of my high poly model in normal light and ray tracing.

Reflection
I am happy with my model as I believe it is very truthful to the original design, I can very well see my model used in a stylized cartoon game like a visual novel or RPG. The modelling process I found incredibly challenging as this is my first time modelling anything complex as my only other modelling experience was a mug set. With it being my first time using Zbrush there was a large learning curve with aspects of the interface such as movement and changing brushes and even knowing what brush does what. I found it difficult to put my design into Zbrush as, in terms of anatomy, it had more cartoony proportions with him being a werewolf and I had to figure out how to translate the 2D design into 3D while still keeping his charm and natural appearance. Overall I believe this is a good showcase of my skills with character design and modelling.
Reference list:
www.youtube.com. (n.d.). Reel Big Fish – Drunk Again. [online] Available at: https://www.youtube.com/watch?v=NYwoDEZ8hdw [Accessed November 12 2022].
www.dreamworks.com. (n.d.). The Bad Guys | Available Now on Digital, 4K Ultra HD, Blu-ray & DVD. [online] Available at: https://www.dreamworks.com/movies/the-bad-guys [Accessed November 12 2022].
Kobayashi, C., Scott, J. and Miller, L.J. (2020). Beastars. [online] IMDb. Available at: https://www.imdb.com/title/tt11043632/ [Accessed November 12 2022].