
Postproduction & VFX Assignment 1
Planning
When given the assignment the first task was to choose what we wanted our 60 second showcase to be about and I debated on different video types such as doing an introduction for a game or a cinematic shot to be used in a commercial. It didn’t take me long to settle on the idea of doing a chase scene for a game. I have always enjoyed horror movies and games so was inspired by these as I chose my theme. I wanted for it to be set in a forest with a thick layer of smog covering the ground and to have a player chased by a deer-like monster as I feel this would look very effective. Relatively soon as I had a good rough idea I went into storyboarding to help flesh out the idea. This helped me get a basis for framing I wanted and to get ideas flowing for composition.
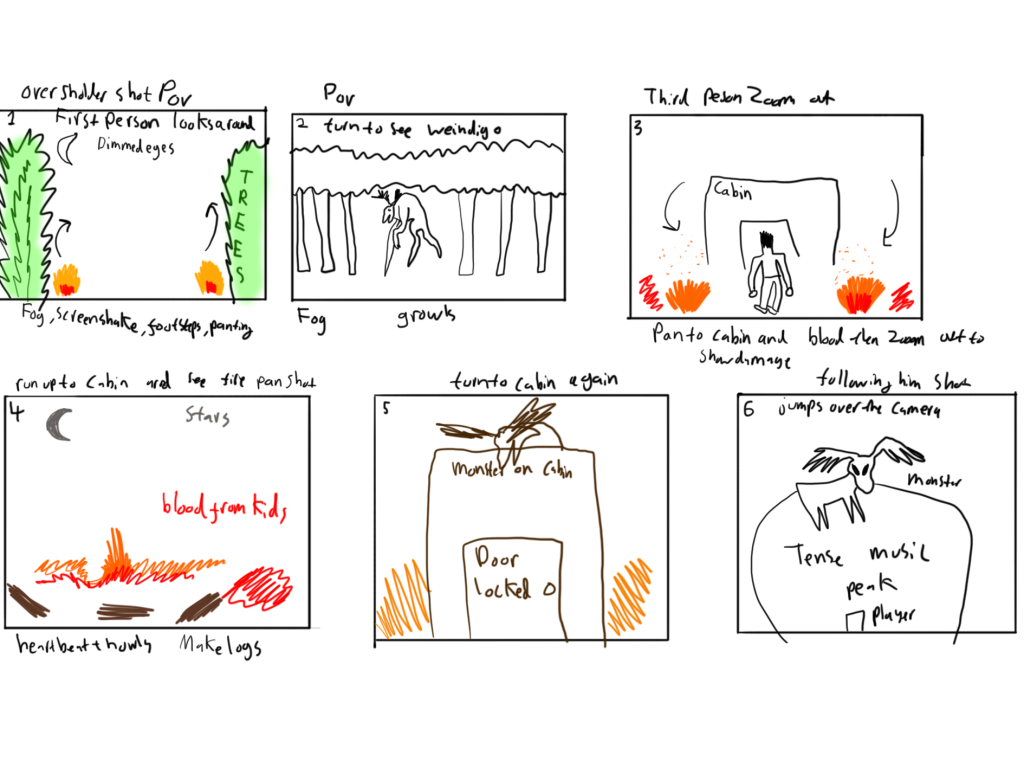
It was only very rough and basic as the goal was to help me better see the flow of my work and where the camera rigs will be in the final scene. I knew my video had to be 60 seconds long so I planned 6 storyboards to have it be 10 seconds for each scene to help not make it have too many cuts to avoid unnecessary work for myself.
After feedback from classmates we agreed that it switching from first person to third person would be very unnatural and could look very awkward so I changed up my idea to a first person cutscene of a player running from the monster in the last played area and dying in what can be used as a bad end of the game. This I believe is a much more thought out idea as it allows for better Visual Effects (VFX) placement as I can have interesting blood effects and having it follow a bad end of the game gives it a concrete ending too so it looks better in a showcase. I redid an improved storyboard of the new plan.
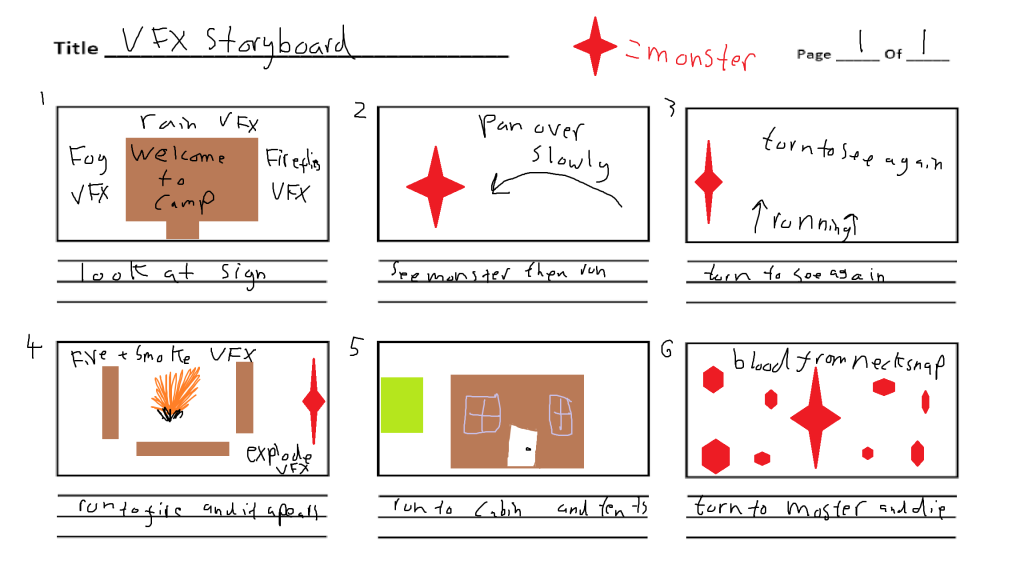
After finishing my storyboard I made a basic animatic of my storyboard with music to help me visualise my scene.
Choosing a cut scene and having that decided early on allowed me to plan with that fact in mind, I chose intense chase music and a foggy scene as these are common elements in horror game cut scenes as they help to build tension. 60 seconds for what I planned to do worked well as this is the average length of a complex scene such as a player death like I chose. I can imagine this used as either a main player death or a player recounting what happened to someone else, seeing through their eyes.
I then started on resource gathering to build a good bank of assets that can be used, using sites like sketchfab and mixamo for the models. This also helped me visualise my ideas better as I could find models that matched my vision. Whilst finding assets I made lists of VFX’s I wanted to add and chose a colour pallet I liked. I wanted to add these VFX’s: Fire, blood, fog, rain, fireflies, and an explosion style VFX. I ended up settling on a more grungy earthy tone pallet with dark blues as it is a forest environment and I believe it helps set a better horror tone; it isn’t bright so it feels more mysterious.
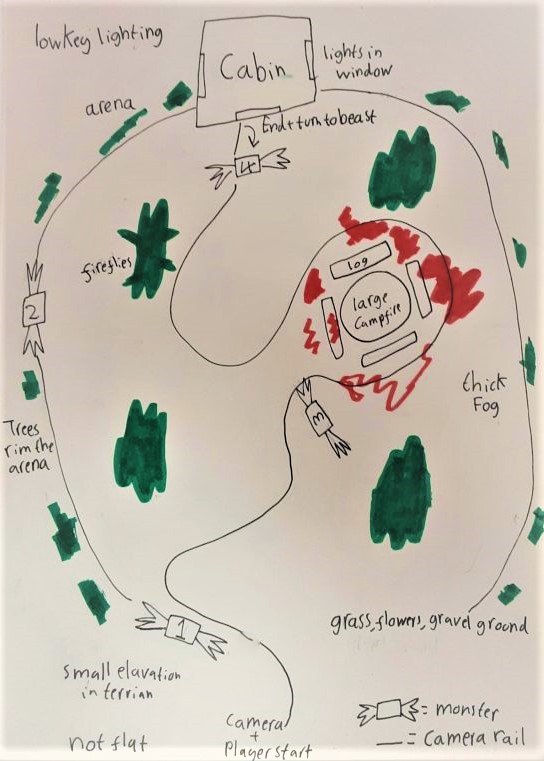
To further help visualise my plan, I made a basic map of what I want my world to look like so that when it came to making it in the Unreal Engine I had a good reference of where things needed to be. It was also helpful in planning where I wanted key moments to be, such as the monsters appearances and the path of the camera rig.
I was inspired by the look of Outlast 2 with the thick fog and forest environment. For the camera movement I also took inspiration as the camera moves very sharply to create a fearful effect as it is like a head turning quickly when scared. The colour pallet is also inspired by this game as it is very blue and muddy having a very low tone overall and when choosing my own colours I kept this effect in mind.
Building the environment
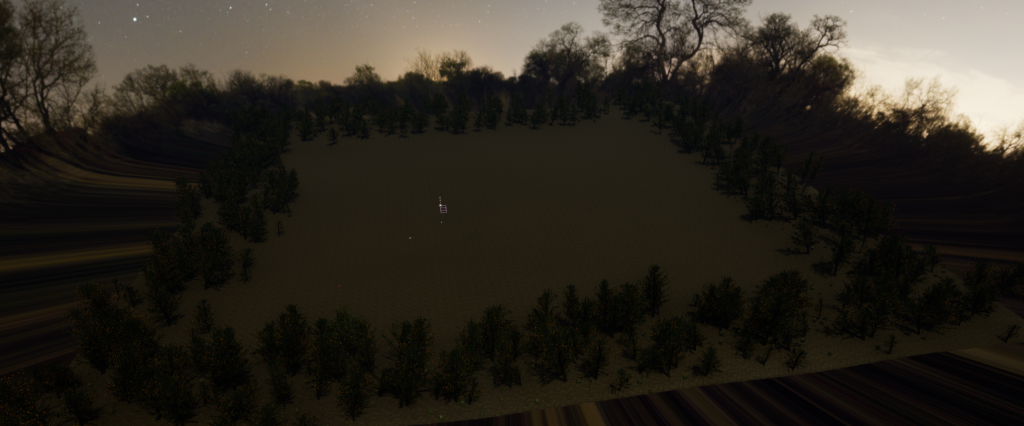
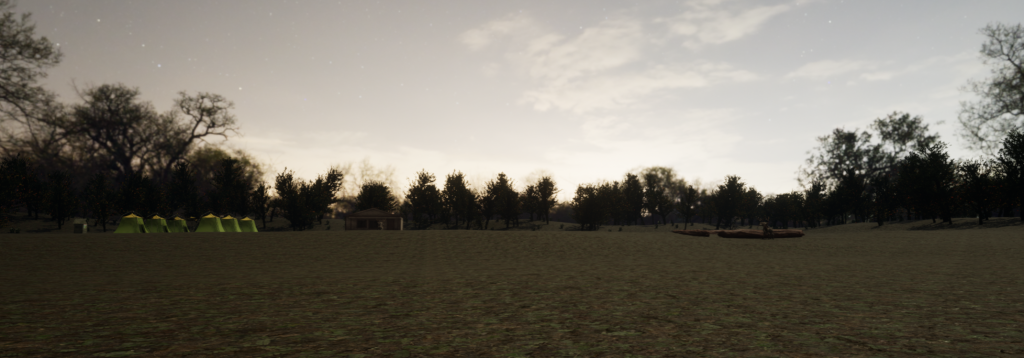
To get started I used the first person template to have the player model for scale and deleted all of the assets to have the blueprints for the player already in. I then made a long rectangle with walls and walked around the environment. It quickly felt very unnatural and would not have made a good forest environment so I deleted the walls, making a large landscape instead.
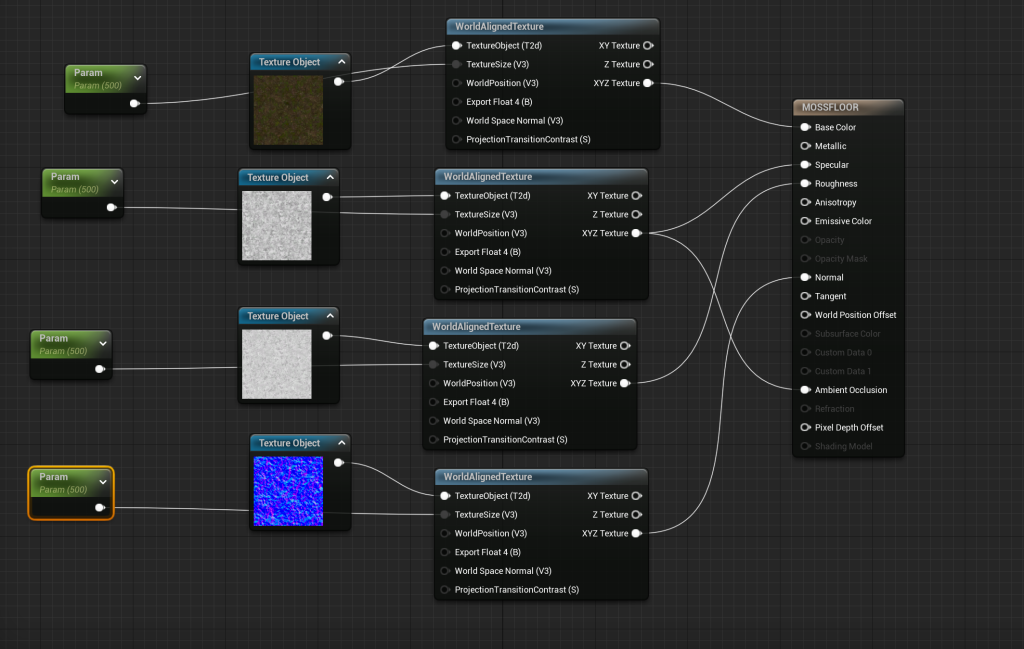
After I got a large landscape to work with I went to making a floor texture to fill out the default grey material pre added and I chose a very natural forest floor with small bits of mud in it. I chose this style of floor as it has good texture on it, and fog and other vfx will highlight it very well, creating a more realistic looking world environment. Rain will also be in my scene so a muddy floor was chosen as it is a first person cut scene with the player in a campsite, so agitated ground would be highly fitting and further aid in emersion.
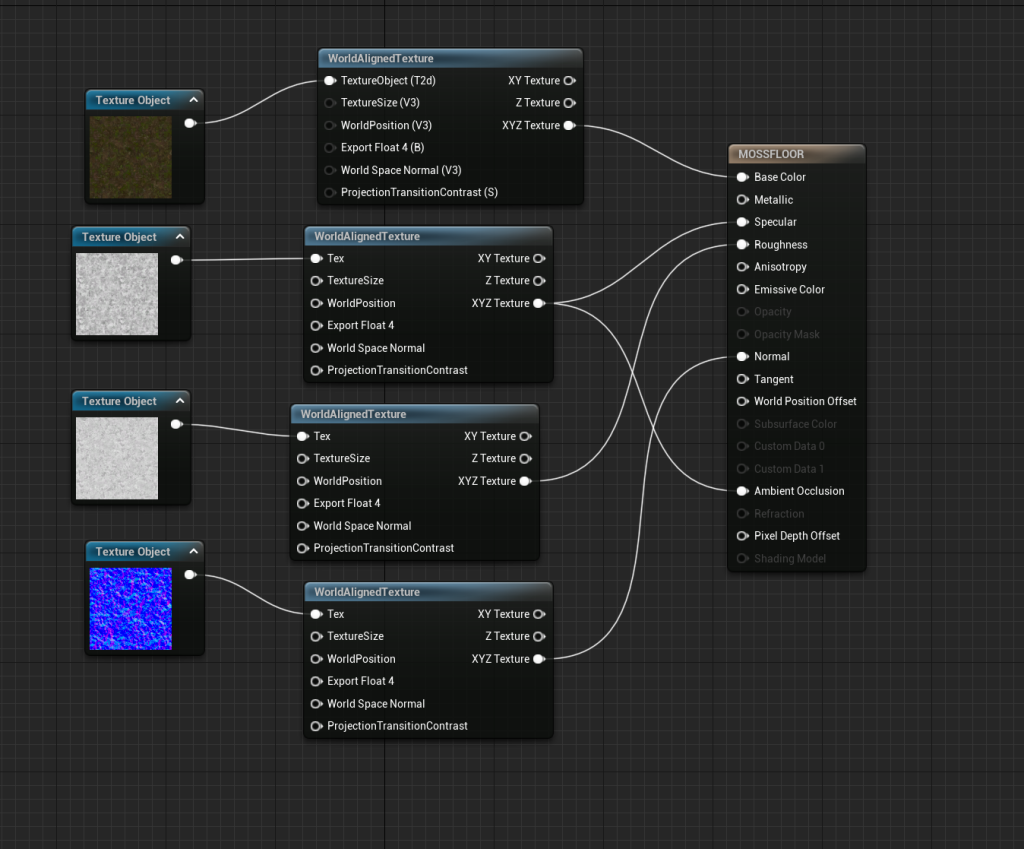
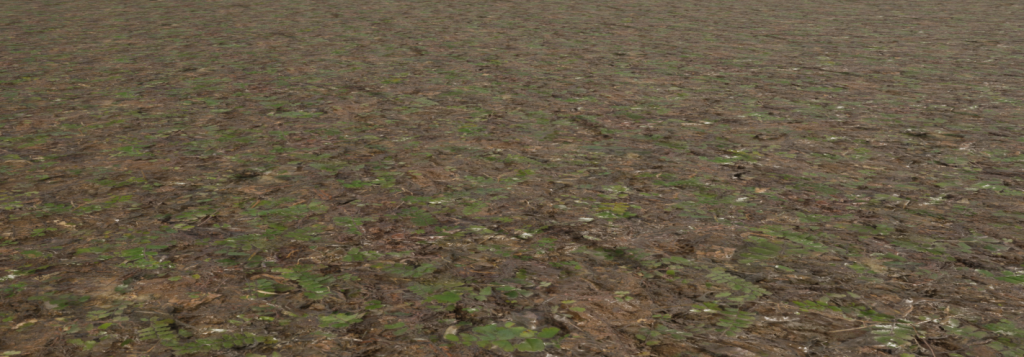
When the texture was applied it looked very small and tiled, breaking the realistic look I was going for. To fix this I used a scaling parameter within the material blueprint to make it have a natural effect of realistic sized grass tuffs and to get rid of the tiling effect on the ground.
To make it more thematic I turned down the temperature on the main light and made it grey instead of white. This helped change the mood of the scene into a more uneasy feel, which works for the horror game cut scene as temperature is often used to make the player feel cold and afraid. Having a grey light also has the effect of making it harder to see which was a conscious choice as it limits what the player can see at any point making my landscape feel bigger and more full then it is.
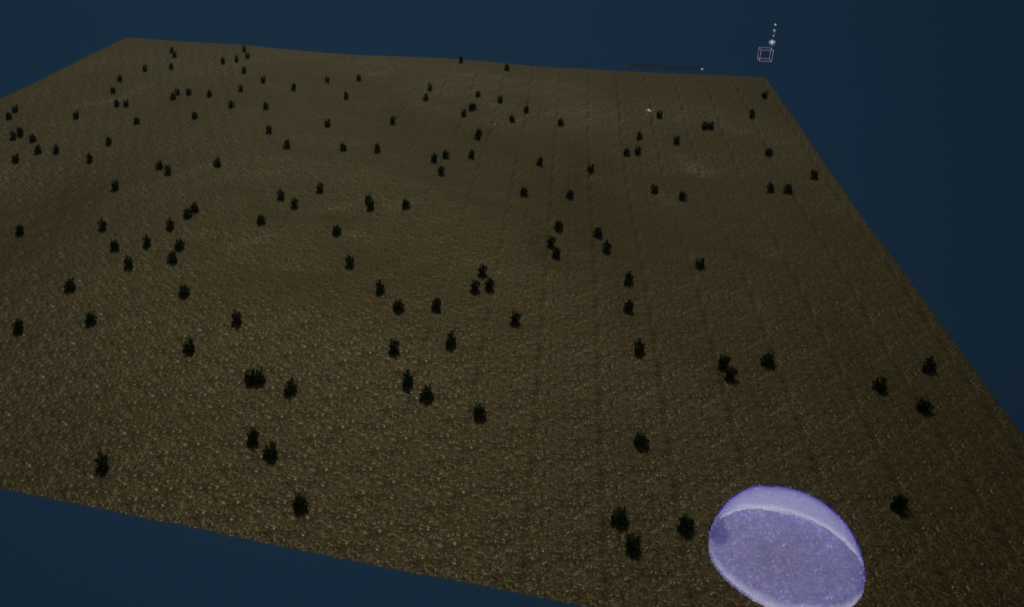
I imported the foliage of choice from Quixsel Megascans straight into Unreal Engine and then went into foliage mode and selected the trees to change the density to be higher and paint them into the landscape, and to make it look natural I had random sizing on between 1 and 2 so that they did not all appear the same.
Once happy with the trees, I went into landscape mode and used the sun damaged brush tool with a large brush size and did gentle strokes over the land to give it natural texture concurrent with forests. This again helps achieve that more realistic look that I have planned.
Once I was happy with the landscape I added a HDRI map from Megascans using the built in HDRI tool in Unreal Engine. This was invaluable as it filled out the sky giving a striking lighting effect onto the landscape and gave more tree height variation to fill out the skyscape. I was aware this was a bright HDRI map but I changed the temperature of it later, keeping it bright while working so I could see what I was doing better.
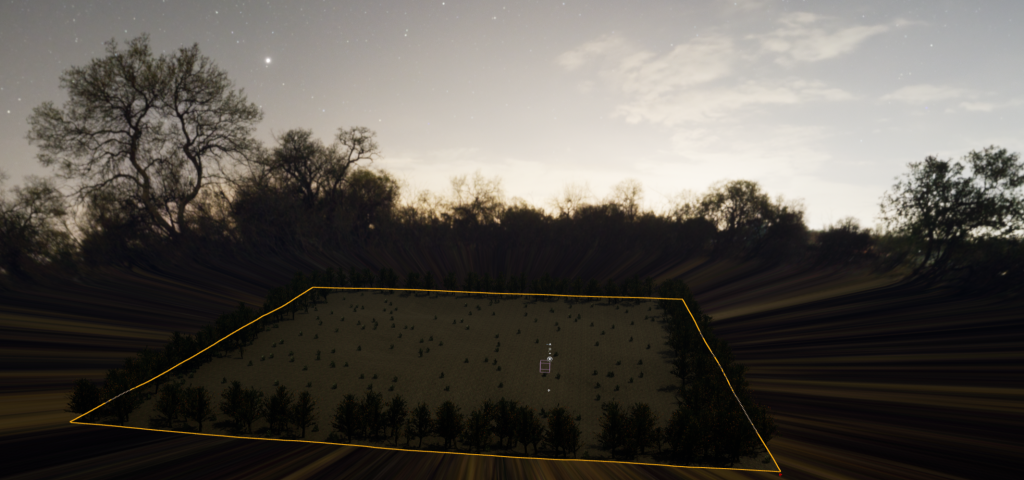
The HDRI made the landscape look small so I went back into landscape mode and added more land and applied the texture to the new planes. Having a bigger landscape also allowed me to have more movement options with my camera, and I found this also gave the player a good sense of scale as the intent is to make the player to feel very trapped and large spaces can produce this sensation.
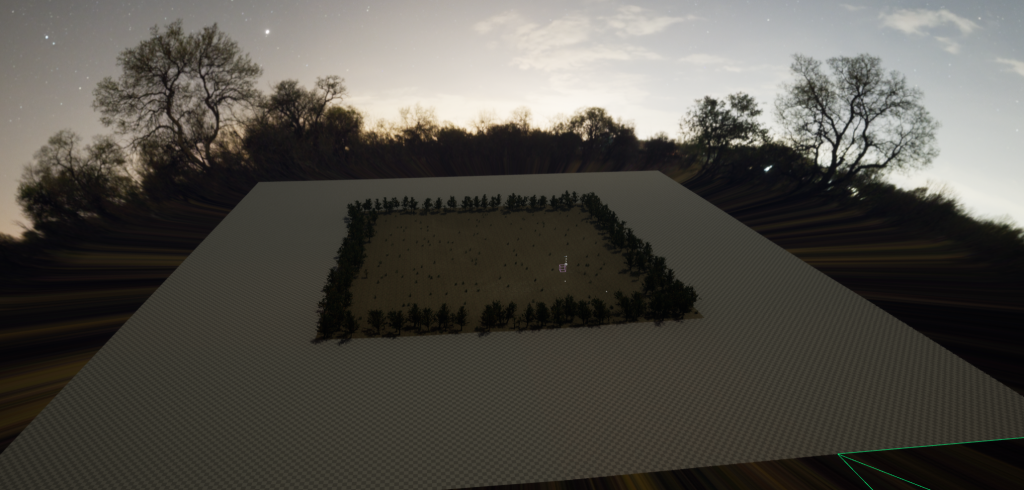
The next step was to add assets in the scene, referencing to the map for placement. during this process having a drawn map was instrumental as it allowed for quick placement and because the composition had already been planned, I knew they would work where they were placed first time. This allowed for me to quickly build my scene so I could move onto the VFX as soon as possible.
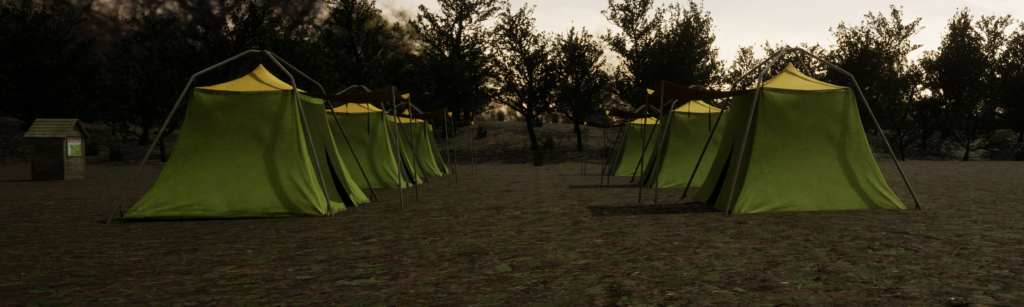
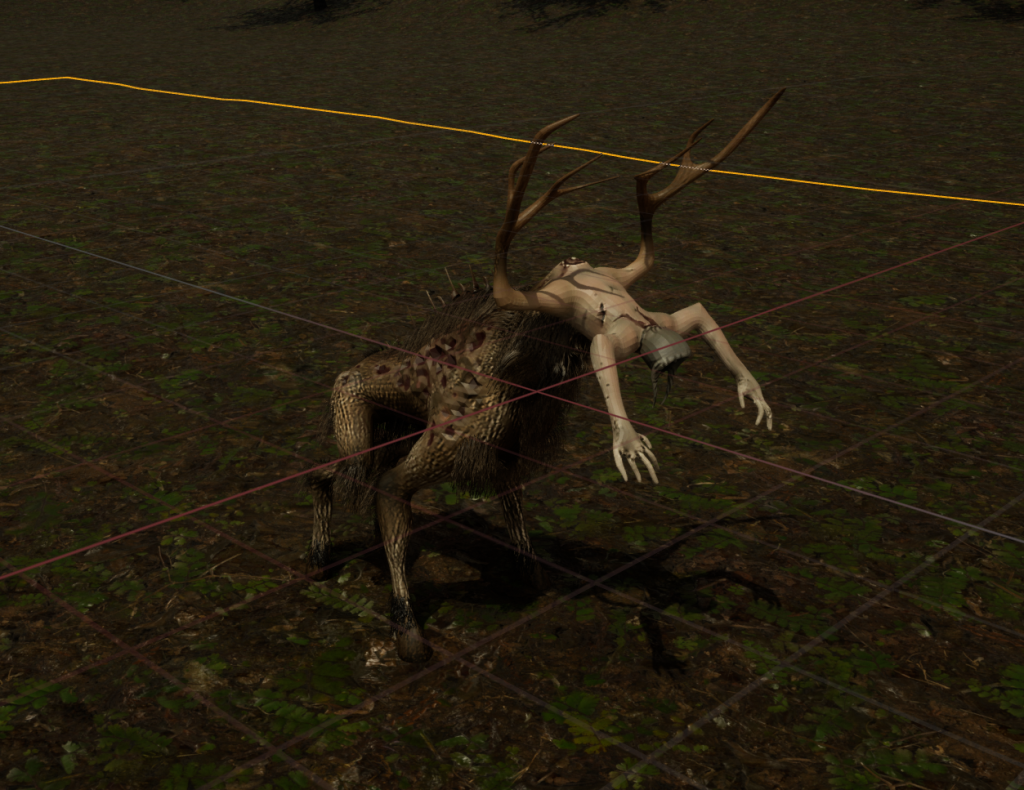
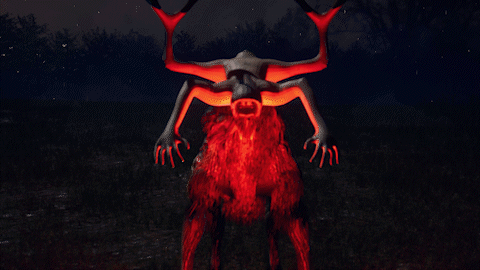
After assets were added I then placed in my monster model in the 4 spots as marked on my map. Later when doing my video, to have a sense of movement, I will toggle the visibility of each monster as I need it for each shot and will use transform on them to have some basic movement such as dropping through the floor and moving in straight lines.
This was my environment without having any VFX in, it looks rather empty but after adding fog it will fill out the scene and give it the alone and empty tone that aids in the horror aspect. As well as this, I want the main focus to be the VFX so having a non busy environment aids me in this.
VFX
Fog VFX:
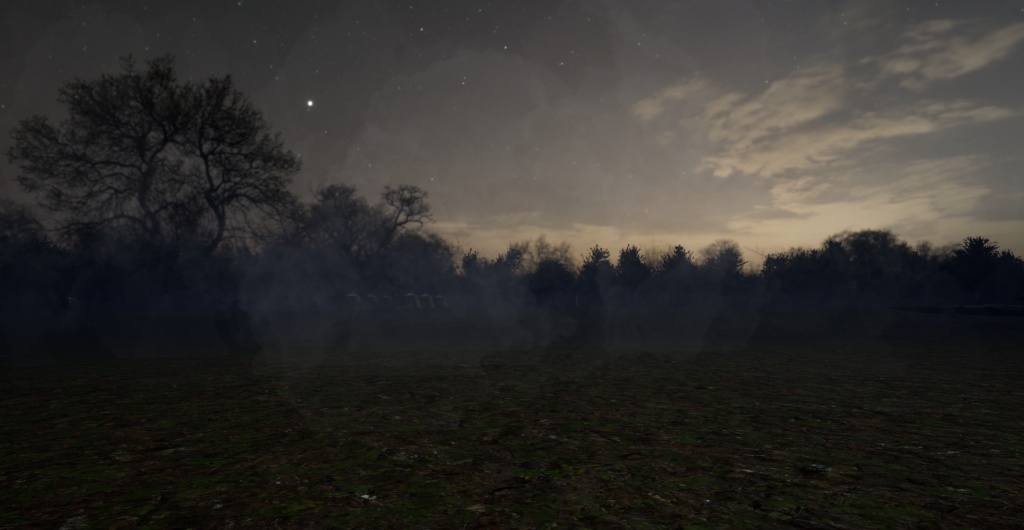
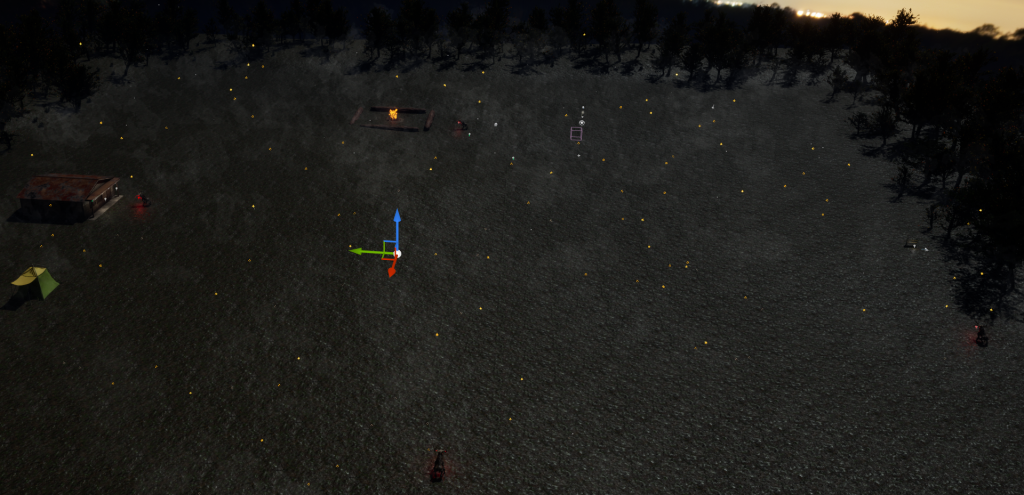
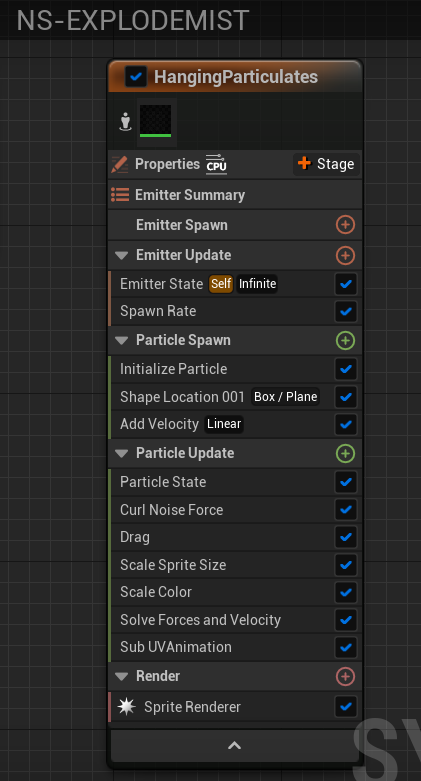
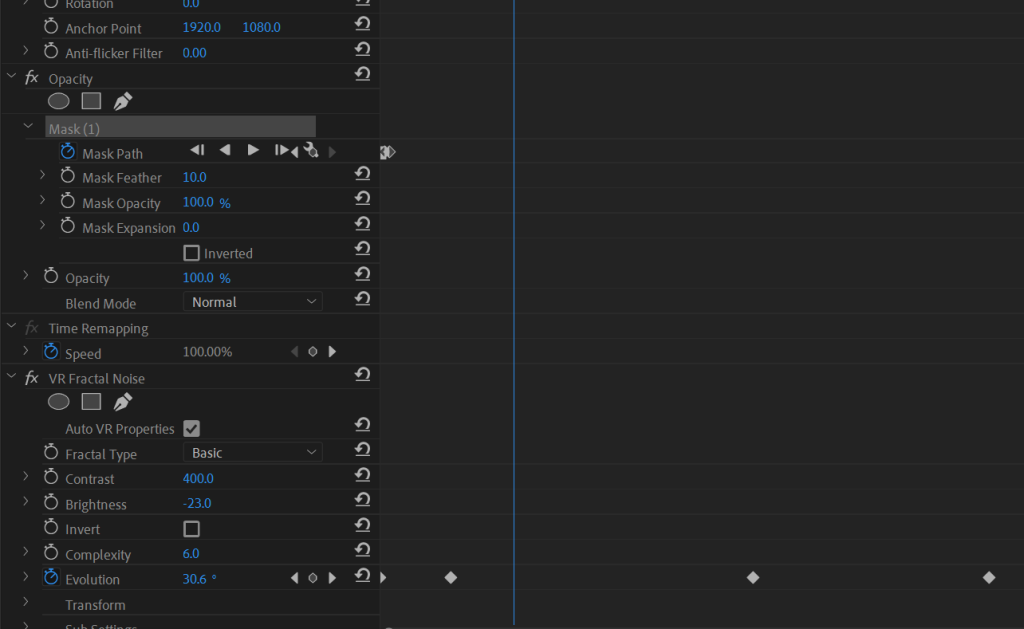
The first VFX on the list is fog as this will fill out my scene and is a key part of my idea. I used a hanging particle base as this already had a foggy effect to it so would take little tweaking for me to get right. I changed the lifetime to be longer so the fog did not have a flashing effect and deleted the velocity. Online, I downloaded a smoke material and edited it to have very low opacity then updated the scale within the vfx to make it larger and changed the spawn rate to be higher as this made the fog look alive as it had slight movement.
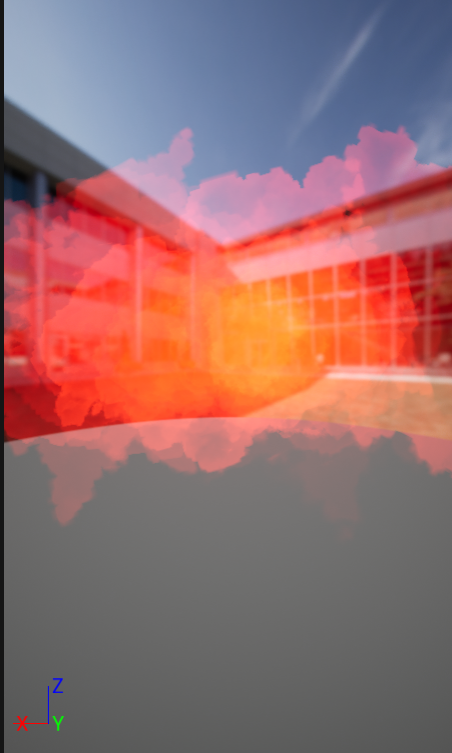
My reasoning behind a thick fog VFX is that it helps hide the rest of the map so it seems larger than it is and it also allows for there to be a better sense of temperature as fog indicates a cold night and this further helps with world building. After making the fog, I layered it which gave a very realistic looking landscape and made my world look full. To add to the fullness I added a fog emitter and turned its opacity to low and made it blue to make it even harder to see.
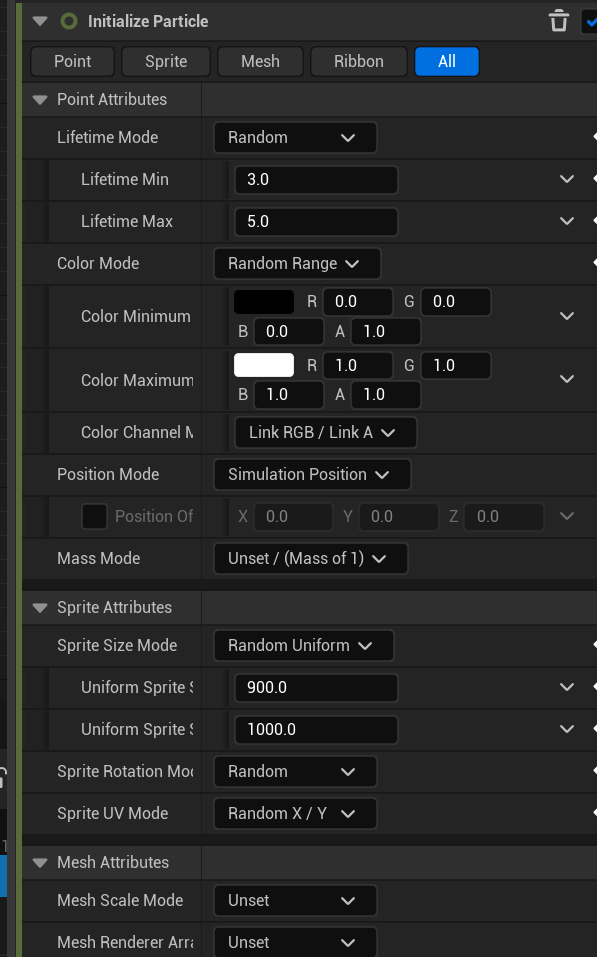
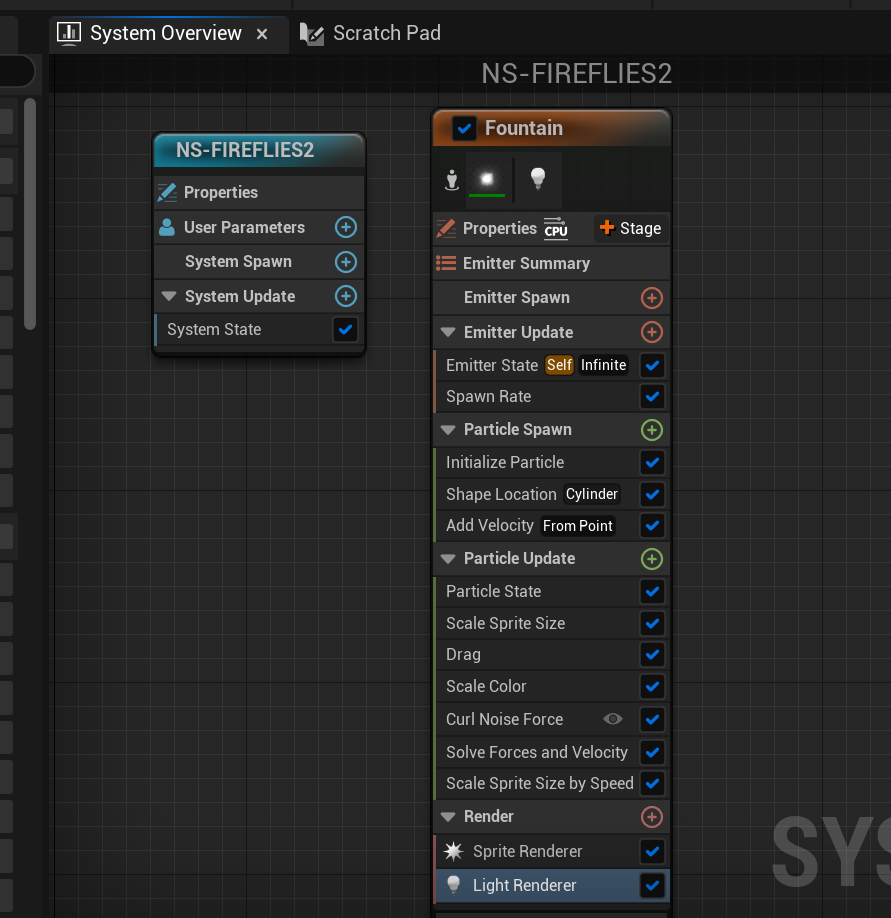
Fireflies VFX:
To add depth to my fog, fireflies was the next VFX. The base was a fountain emitter then for the material I used a glowing light material that was in the starter content. I turned the lifetime up and decreased the spawn rate to have a reasonable amount of fireflies. I added a low amount of velocity so they moved slightly to look alive and added a sprite and light renderer so they gave off light and had a small animation.
The fireflies made the world look like a living environment with fireflies buzzing about to give depth to the thick fog. Another purpose was the fact that they give off a small amount of light to fill a otherwise very dark landscape with small speckles of light.
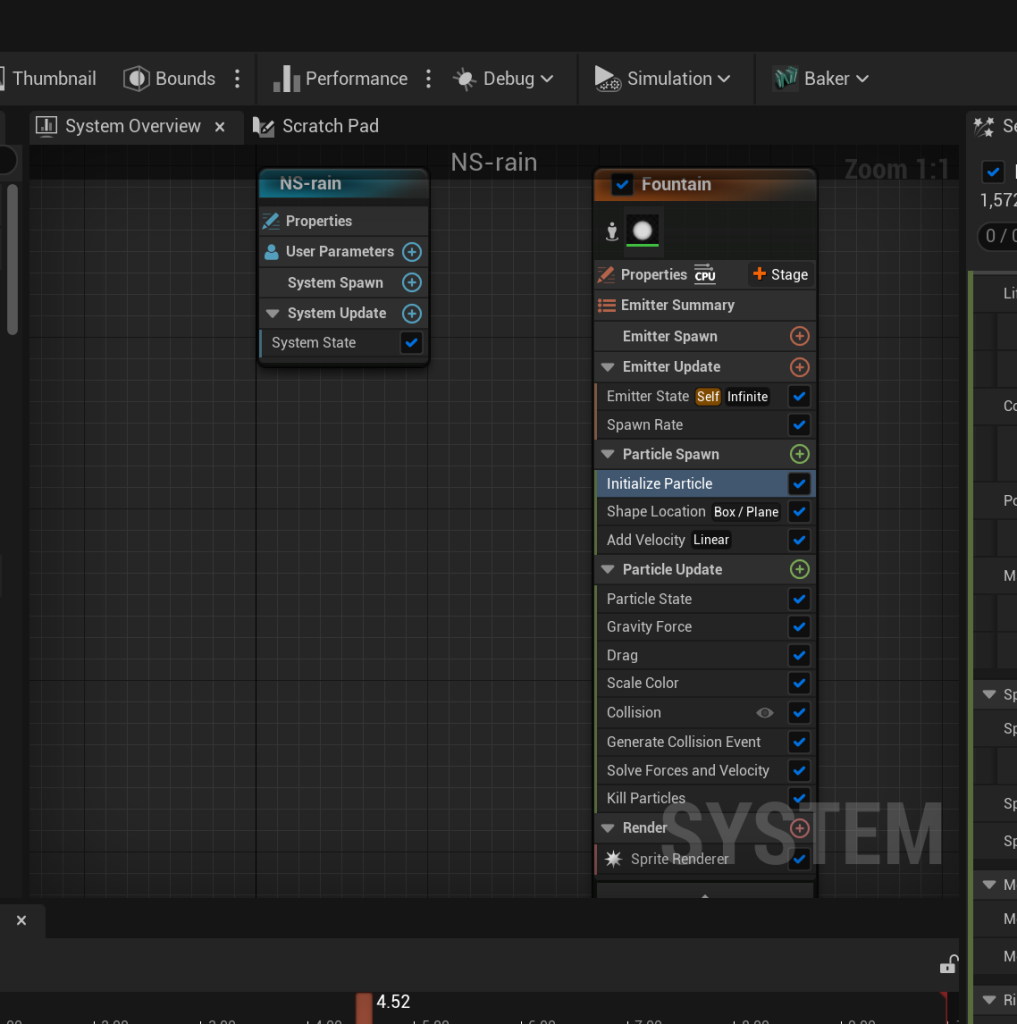
Rain VFX:
My rain has a fountain emitter base with increased velocity so the rain falls relatively fast. I used the base white material as if I chose blue it would be impossible to see the rain at all, so using white allowed a stylized look and allowed it to be visible. I had to make the shape location very large to cover the entire forest and added gravity force and drag for the final touches. Having rain mixed with the fog looks very effective, creating a thick atmosphere for the forest and making it look alive which is the purpose of my VFX’s, to create life and movement within the scene.

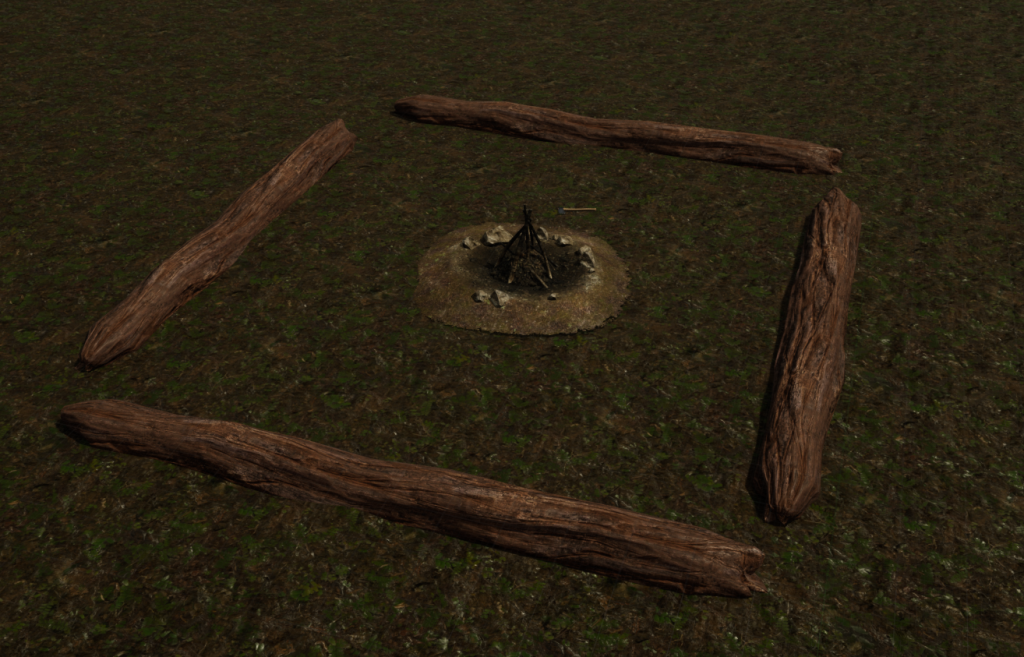
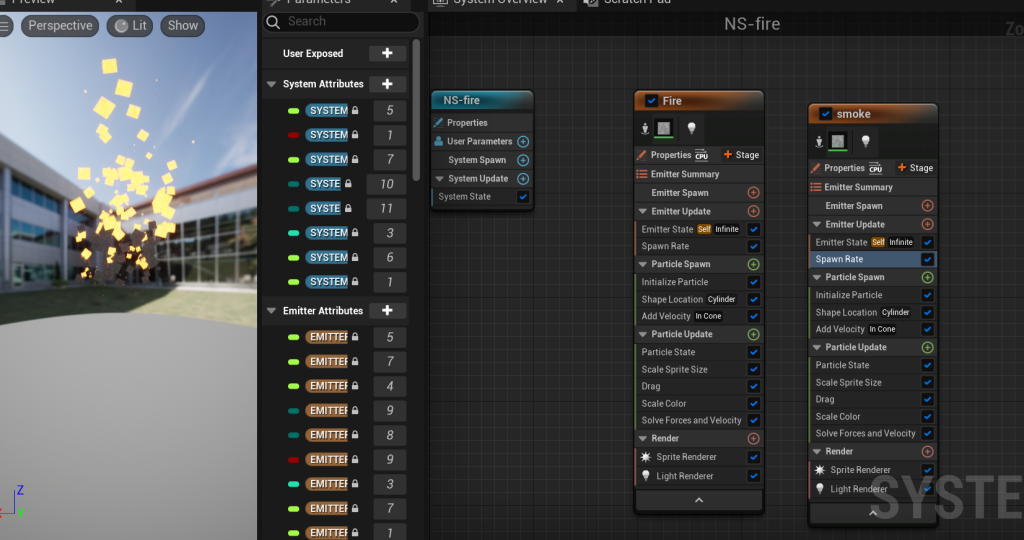
Fire VFX:
Fire was a simple VFX to make using simple sprite burst for the base and made two systems: one for smoke and one for fire, making the smoke a much smaller effect. I enjoy the stylized look of the fire over hyper-realistic as it stands out in a good manner, looking highly effective in the scene. I have light emitters on both to have a glowing effect, so when the fire is in place on the logs it has light shining on the surrounding area.
Explosion VFX:
The explosion was used twice in my final shot, once for the cabin burning and once for the monster phasing through the floor. It was a hanging particle with an orange colour hue change and I sized up the sprite size and high spawn rate to make an explosion effect. I wanted this to be a bright burst of light as I will toggle the visibility in the scene editor later when doing the camera work.
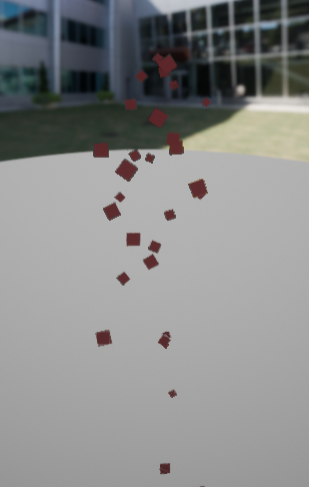
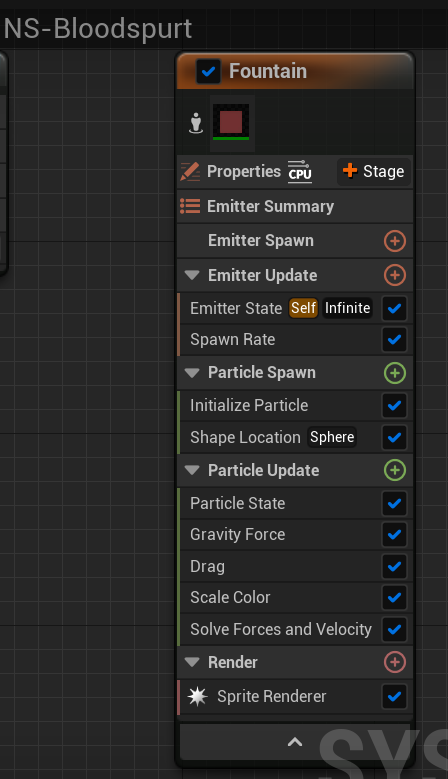
Blood vomit VFX:
This was my last VFX used in the sequence as blood shoots from the creatures mouth in the final shot of it. I used a hanging particle and changed the colour hue to red and turned up the spawn rate to be more viscous and give a blood splatter appearance. I also added more velocity to the particles as I wanted them to fall quickly. Once made, I dragged the effect onto the monster and grouped them for easy animation later on.
Camera
After making the scene I added three Cine Camera Actors, using the map to place them into their respective spots based on where I could make clean cuts between them without the player realizing. I went into the master sequence after making one and added all of my cameras and monsters into the sequence.
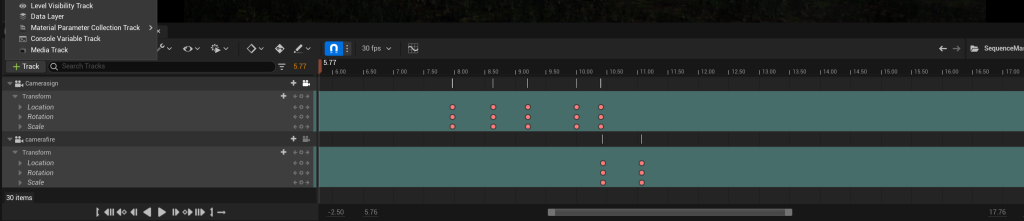
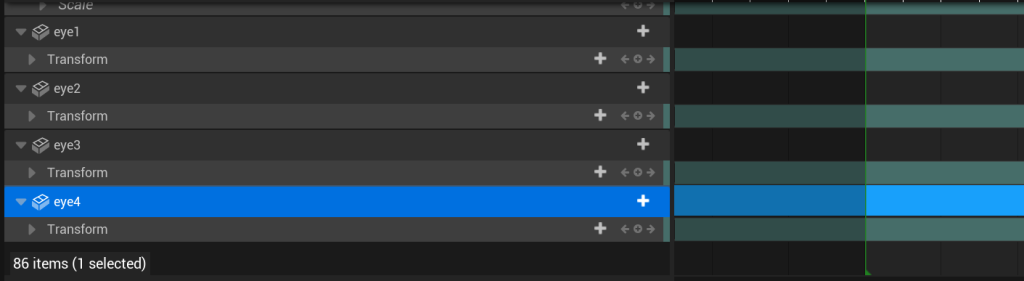
I added a layer for each monster and added a visibility transform to make the monster visible whenever necessary. I did 20 seconds each per camera, giving me three cameras for each major scene to make it easier to manage and animate. This also allowed me to have three different shots and for the transition between one and two I had a smooth transition from looking down to up that had a subtle cut to allow me to switch cameras.
Using the storyboard helped me move the camera through the scenes while getting the timing right as I had already figured out that each segment needed to be around 10 seconds in length. This meant I had no issue hitting the 60 seconds time limit as the brief stated since it was already preplanned to account for this.
After finishing the camera work I played through the sequence and noticed some parts that needed altering and I went in and did some last edits, like adding more trees and making the smoke darker as you could see too far, ruining my desired effect. Once I had all my cameras sufficiently placed and was happy with the world and effects, I rendered the video in 4k. My first render came out blurry so I turned off motion blur and this fixed the issue so I rendered it again.
After effects
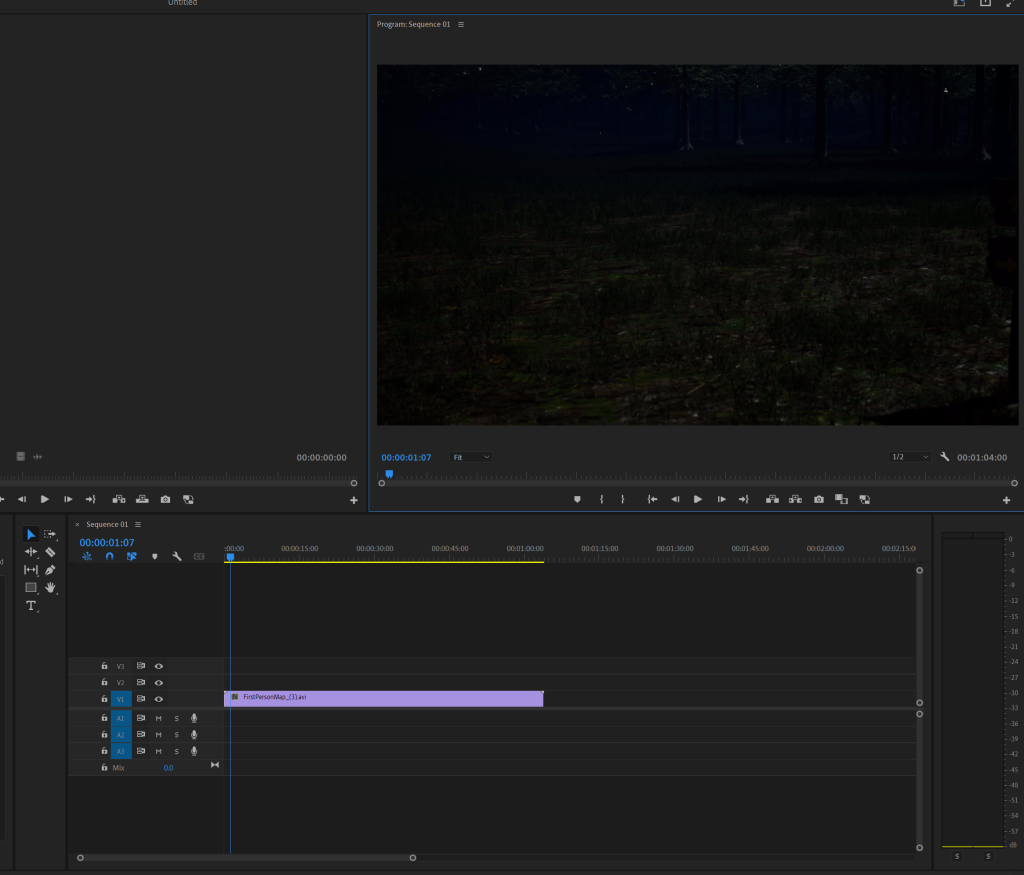
After rendering I put my video and audio into Adobe Premiere Pro to add the audio and did some colour correction on the lenses. I already had a audio track that lined up with the neck snap and first seeing the monster which added impact. The main after-effect I made was adding a blood splash effect when your neck is snapped by the monster.
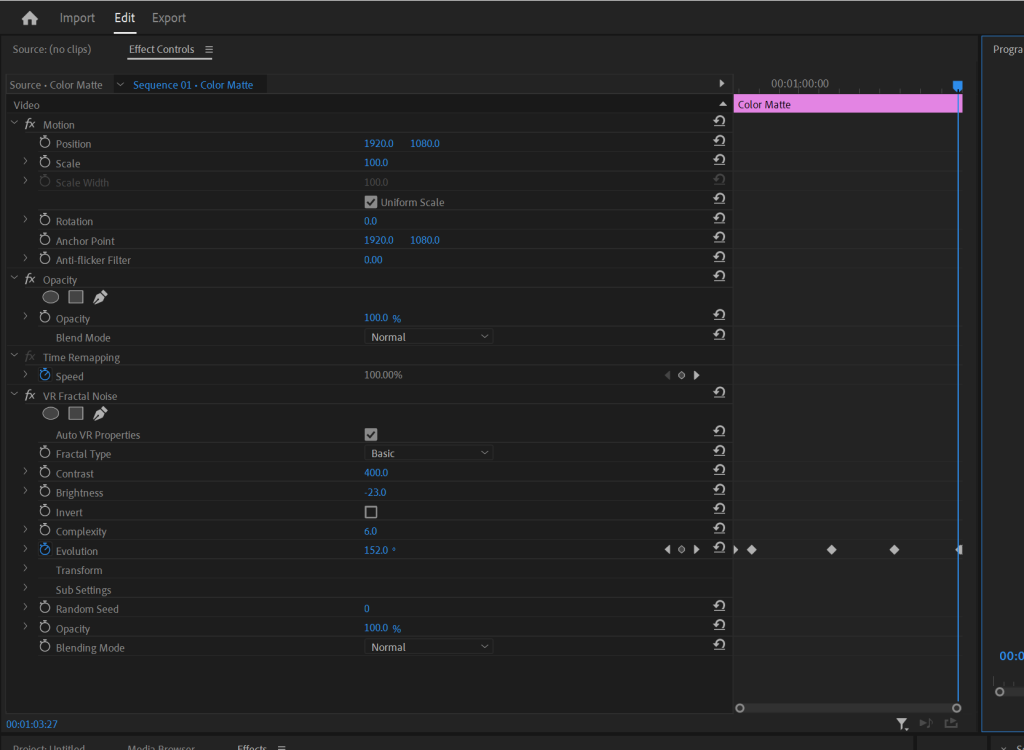
I added animation to the blood using a colour matte and made a splatter effect using masking and opacity layers, making a timeline with keyframes to add movement to the effect. I feel as though this was highly effective in adding another layer to the project as the blood grows over time slowly enveloping the screen which you see commonly used in horror game deaths.
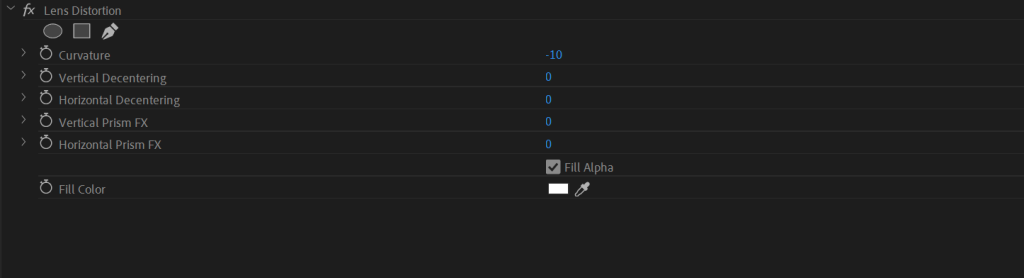
Then I added some lens distortion as it made it feel more like looking through the eyes of a character running and not a camera moving through the scene.
I also added noise to give it a grainy effect to feel more dark and dirty then also added a dark blue tint with low opacity. My last effect was an edge roughen with low opacity for an insanity effect of the world creeping in darkness around the players eyes.
Once happy with the effects I exported it as a 4k video and uploaded it, enjoy!
Rendered video
Reflection:
Overall I am very happy with my outcome, I enjoy the rain and fog effects and the use of HDRI map. Doing this again I would have liked to have added animation for the monster walking if I had the time and also having sound effects that worked with my soundtrack play over the top like walking and flame sounds. This is a comprehensible cut scene for a horror game that meets my imaginative brief of exactly that.
Asset list:
www.fesliyanstudios.com. (n.d.). On The Run by David Fesliyan – Royalty Free Music Download. [online] Available at: https://www.fesliyanstudios.com/royalty-free-music/download/on-the-run/39 [Accessed November 11 2022].
sketchfab.com. (n.d.). oak trees – Download Free 3D model by DJMaesen (@bumstrum). [online] Available at: https://sketchfab.com/3d-models/oak-trees-d841c3bcc5324daebee50f45619e05fc.[Accessed November 12 2022].
Cilliers, R.T., Rico (n.d.). Jacaranda Tree Model • Poly Haven. [online] Poly Haven. Available at: https://polyhaven.com/a/jacaranda_tree.[Accessed November 12 2022].
Quixel Megascans. (n.d.). Quixel Wild Grass And Ferns. [online] Available at: https://quixel.com/megascans/home?category=surface&category=soil&assetId=sglhagnk[Accessed November 12 2022].
Unreal Engine. (n.d.). Landscape Pro 2.0 Auto-Generated Material in Materials – UE Marketplace. [online] Available at: https://www.unrealengine.com/marketplace/en-US/product/landscape-pro-auto-generated-material.[Accessed November 12 2022].
Zaal, G. (n.d.). Dikhololo Night HDRI • Poly Haven. [online] Poly Haven. Available at: https://polyhaven.com/a/dikhololo_night [Accessed November 12 2022].
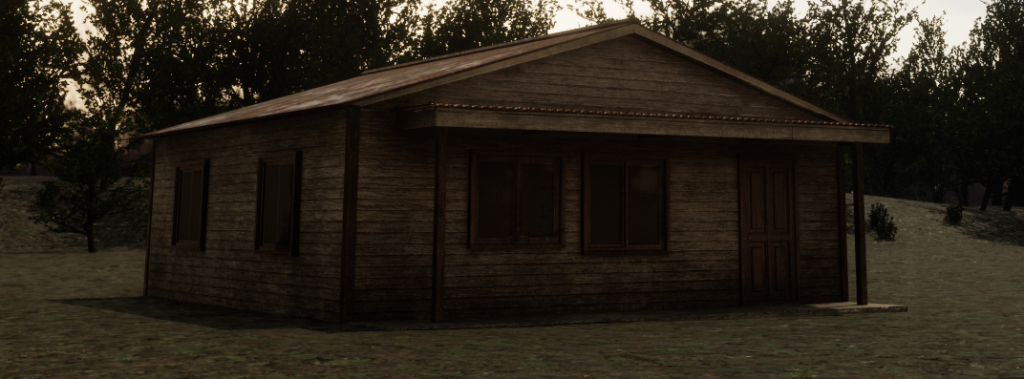
Unreal Engine. (n.d.). Edith Finch: Sam Room in Environments – UE Marketplace. [online] Available at: https://www.unrealengine.com/marketplace/en-US/product/ef-sam [Accessed November 15 2022].
sketchfab.com. (n.d.). Jötunn inspired by ‘The Ritual’ – Download Free 3D model by Lukas Hahn 3D (@specter). [online] Available at: https://sketchfab.com/3d-models/jotunn-inspired-by-the-ritual-ef809b1d0f7248f7b98b7aa034fec812#download [Accessed November 15 2022].
sketchfab.com. (n.d.). cabin – Download Free 3D model by 打螺丝 (@youoyouyou). [online] Available at: https://sketchfab.com/3d-models/cabin-f9159874daad499492cc0a488e06b489 [Accessed November 15 2022].
Reference list:
Red Barrels. (n.d.). Outlast 2. [online] Available at: https://redbarrelsgames.com/games/outlast-2/ [Accessed 4 November 2022].
Marty (2015). Storyboard Template For Kids + Free Template | Imagine Forest. [online] Imagine Forest Blog. Available at: https://www.imagineforest.com/blog/free-storyboard-template/.[Accessed 7 November 2022].
www.youtube.com. (n.d.). 3 Fast & Easy EFFECTS you can do in Premiere Pro (Tutorial). [online] Available at: https://www.youtube.com/watch?v=WUqi54Z6VZ8 [Accessed 4 December 2022].
www.youtube.com. (n.d.). How To Make Rain | Niagara Rain Particle System – Unreal Engine Tutorial. [online] Available at: https://www.youtube.com/watch?v=s_UQYuM1RWU. [Accessed 4 December 2022].
www.youtube.com. (n.d.). Unreal Engine 5 Interactive Fog Particle System. [online] Available at: https://www.youtube.com/watch?v=8gZMkuTSZX0 [Accessed 4 December 2022].
www.youtube.com. (n.d.). Unreal Engine 5 Mist Particle System. [online] Available at: https://www.youtube.com/watch?v=C_soSQb11fc&t=0s [Accessed 10 December 2022].