Character Animation
PLANNING
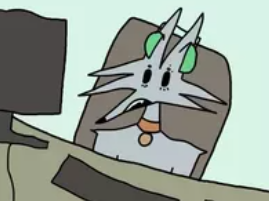
After reading the brief I started to brainstorm different ideas I could animate that would last around 15 seconds in length. I had to think of three different actions that fit my character, are around 10 seconds long and are creative. With my character being a skinny build werewolf I fought it would be funny and fitting to have him fake shadow boxing as I would be able to use squash and stretch on him to exaggerate the movements with his long limbs. Another idea that I thought of was him sleeping on the floor then getting startled and make this a looping idle animation, since he is a werewolf this works as he’s sleeping on the floor like a dog and also good to have a looping animation that could be used in a game. Lastly since he is an dog I have him scooting on the floor like a dog with an itchy butt as he is a comedic character so this fits him well.
With his punches I plan to use arcs with the FK rigs to create a smooth sweeping motion that is very pleasing to the eye. Anticipation is used for the jumping in the boxing animation as just before the release of his jump he holds the frame to create this. With his waking up animation I use exaggeration when he is startled with his shocked flailing arms as they are not realistic but help further push the pose. His tail and ears serve as the secondary actions most of the time as they are animated to be moving out of sync with the other actions as humans don’t move everything all at once. The timing is present through but especially in my sleeping animation with the timing of his sliding along the floor as he scoots with his legs needs be on point or else it will look off.
References
I recorded my own references as I enjoy truly being able to control them and get multiple angels that I struggled to find online. I know these will help me when I start animating as I can use the frames in the video to match the pose to ensure that my timing is correct on key movements such as jumps and arm movement.
RIGGING
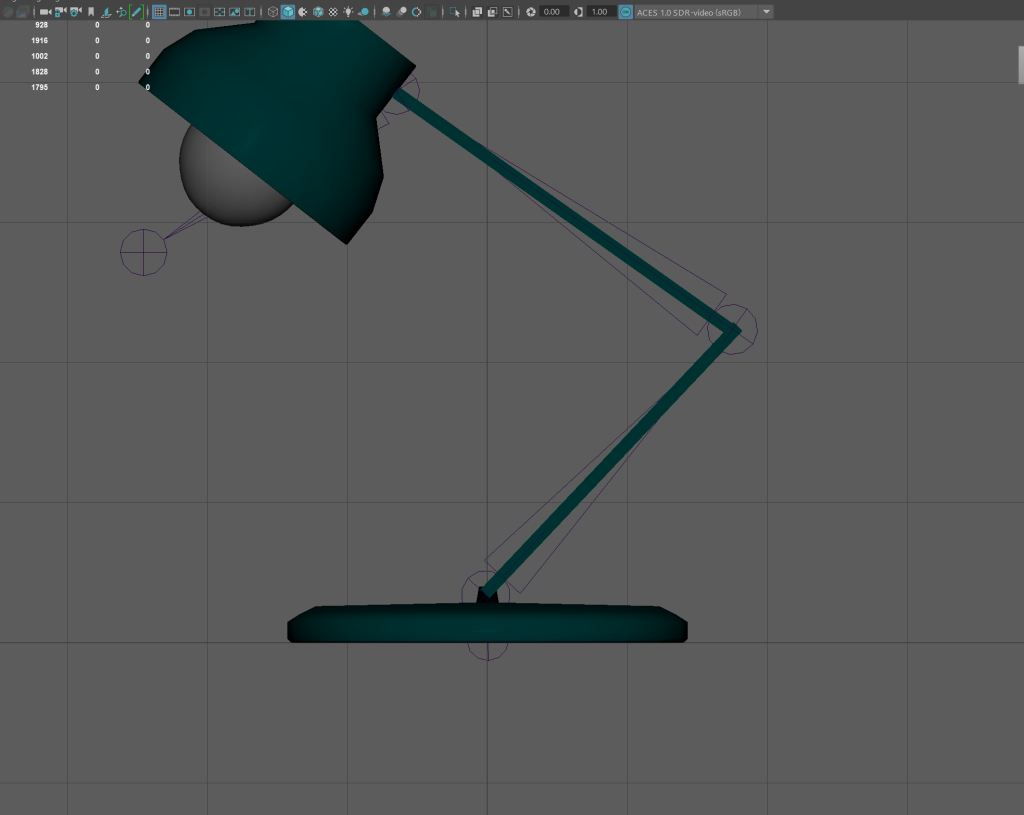
Before working on my model I did rigging practice on a lamp to get used to adding bones and to also familiarise myself with Maya as it had been a few months since I had used it so it made a good refresher.
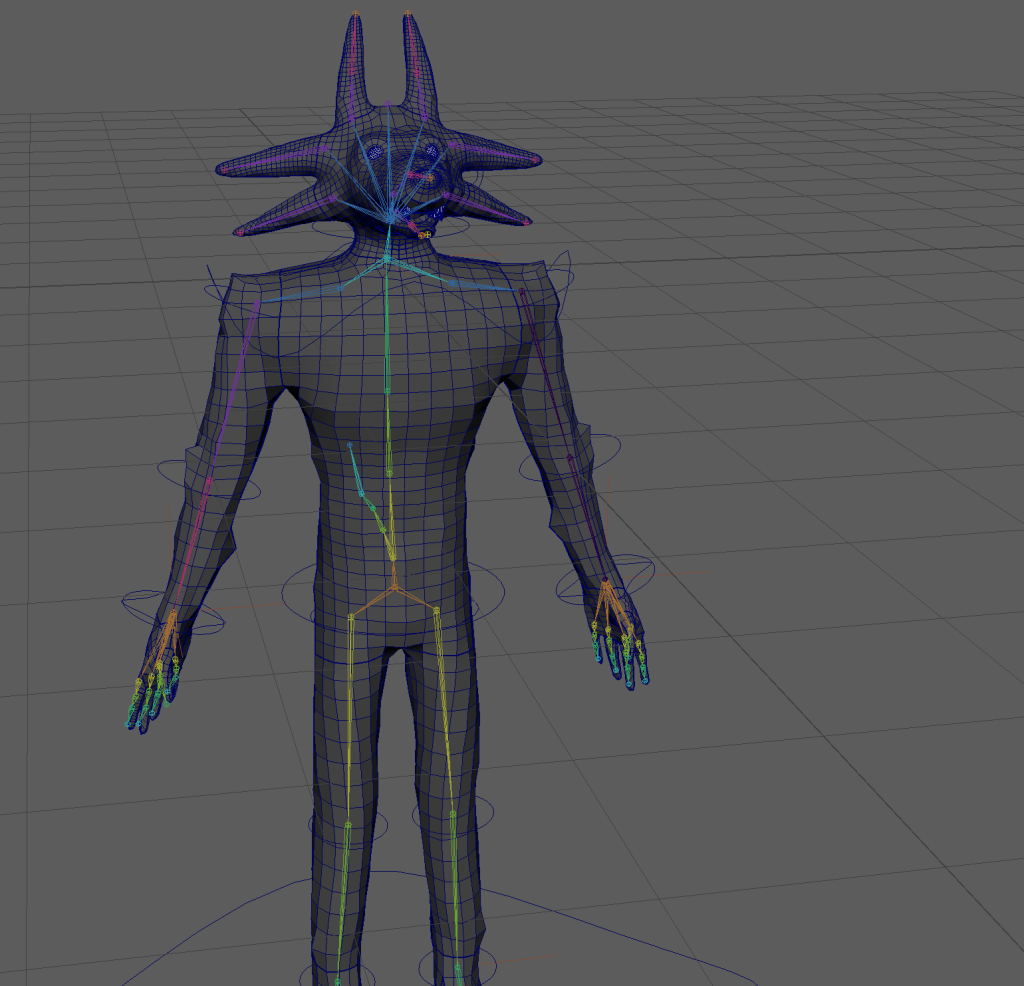
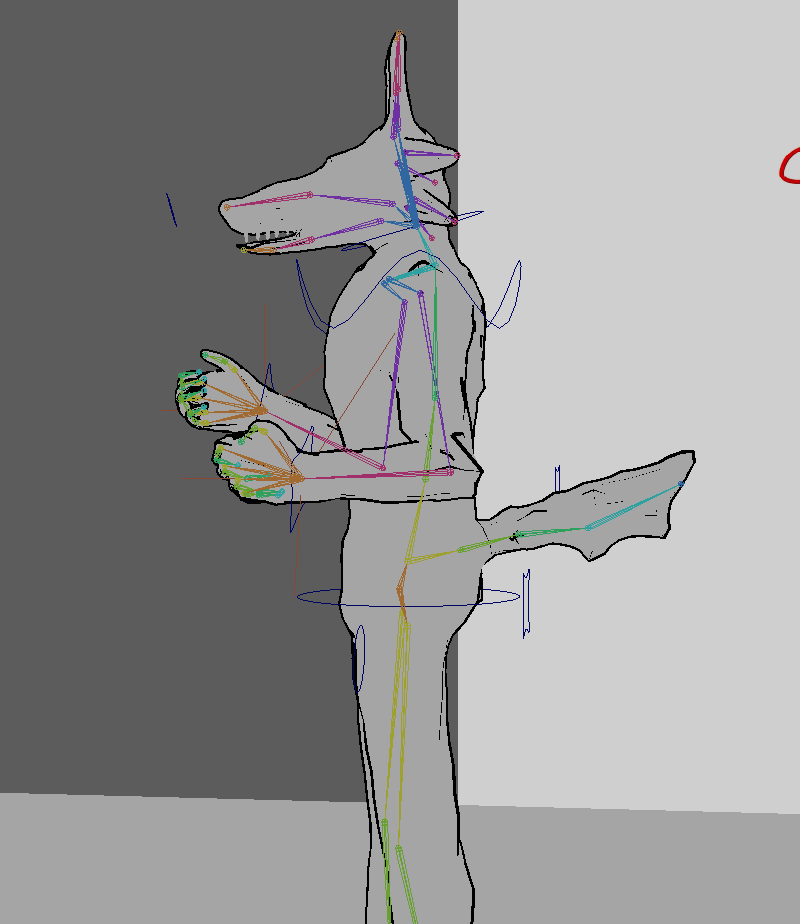
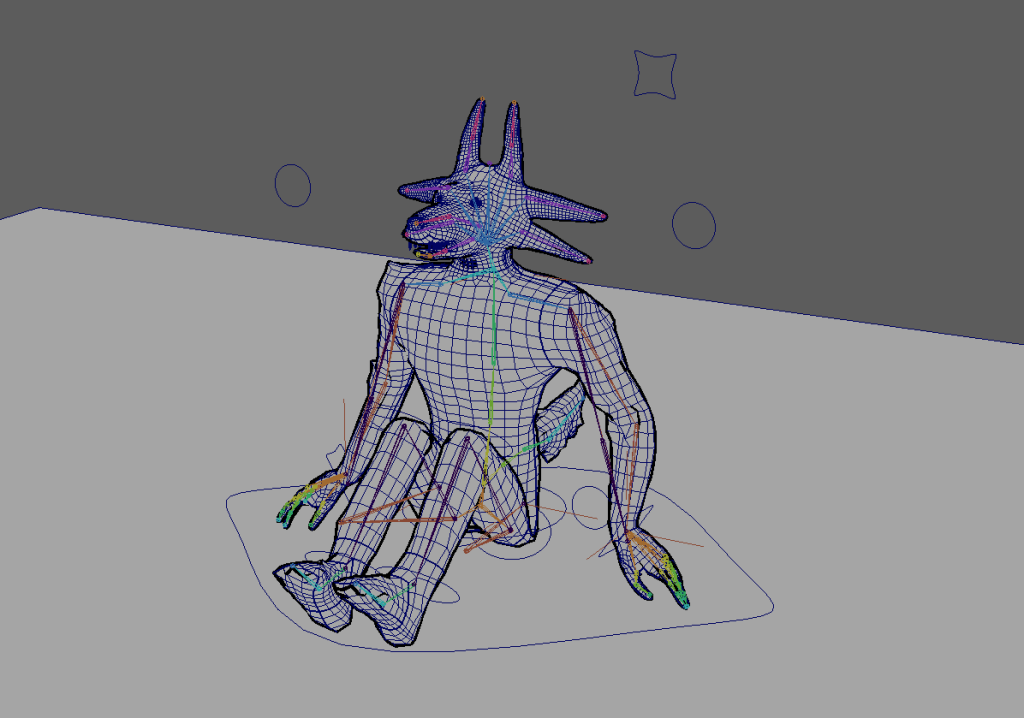
I put Snitch (the wolf character) into Maya with my old textures and started to evaluate where his bones would be placed and if he needed any extra for secondary actions down the line.
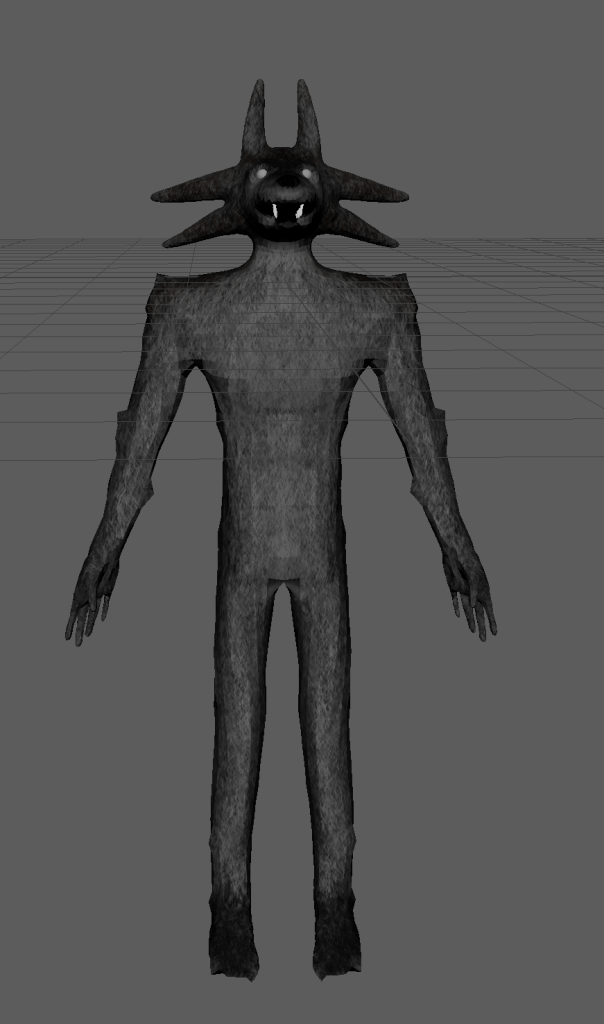
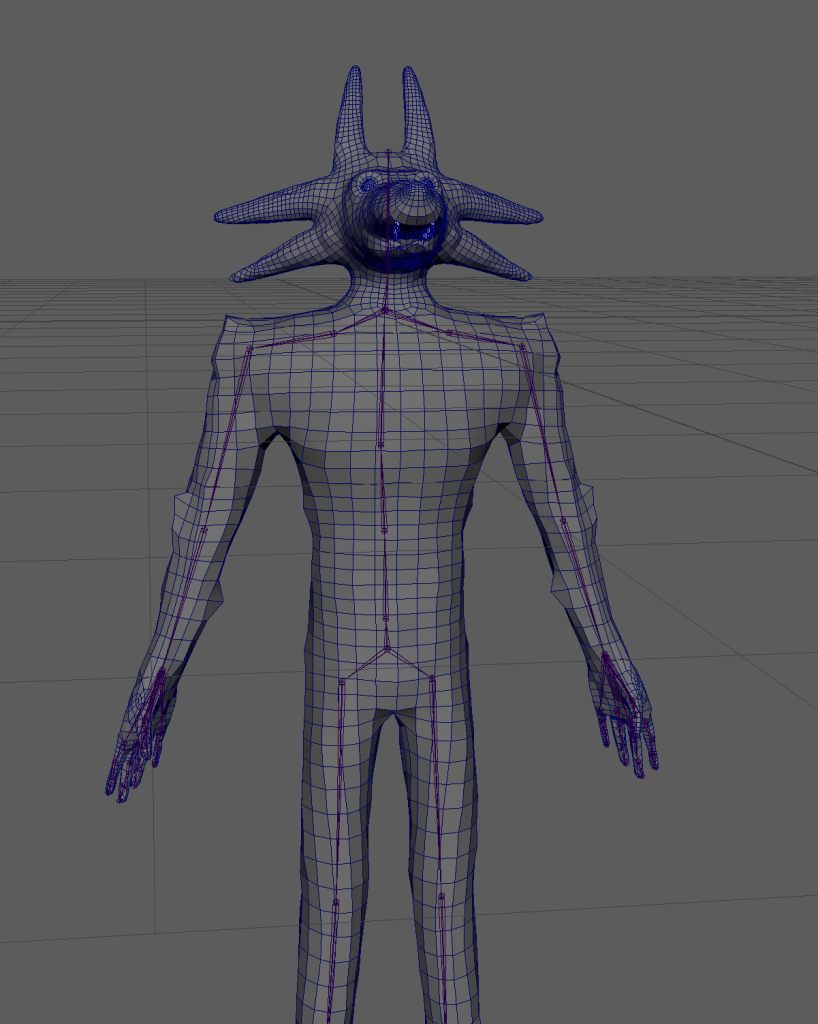
I was sure to add bones for his face and tail as this will make him look more alive as with him sleeping I will have his ears twitching as is common with animals so he has some unique actions along with his human ones which helps build his character.
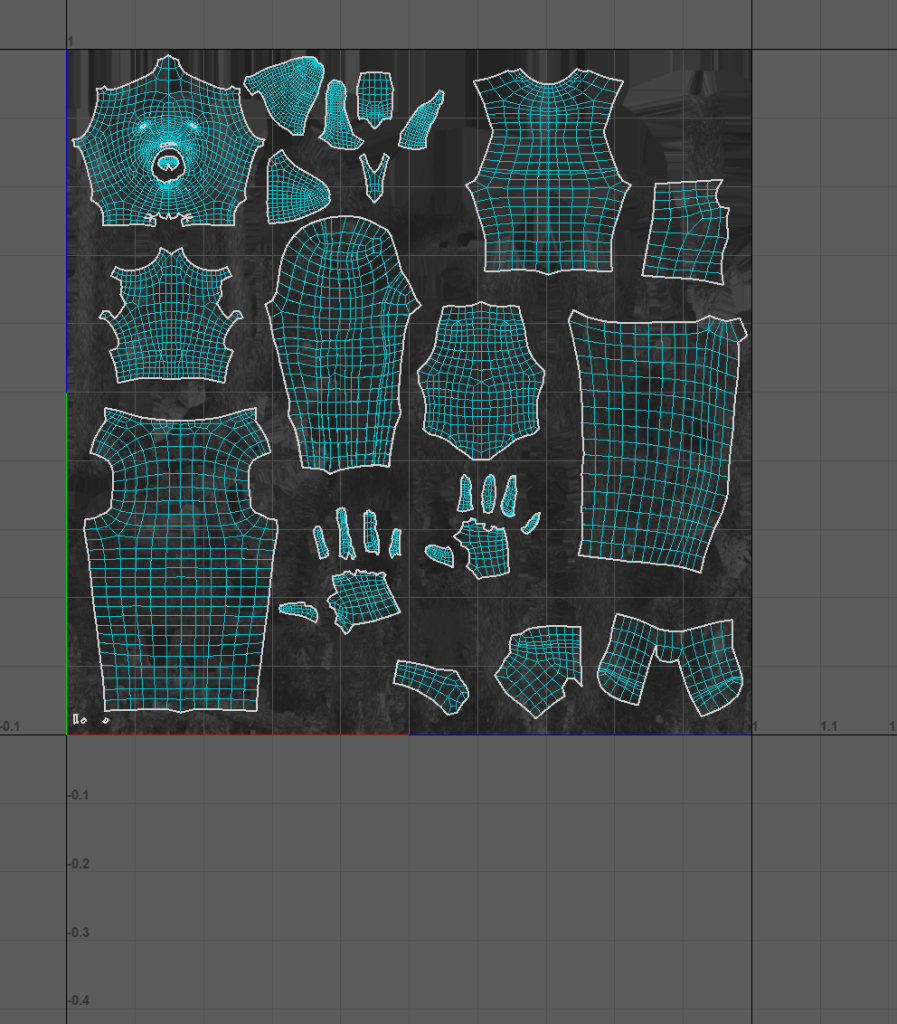
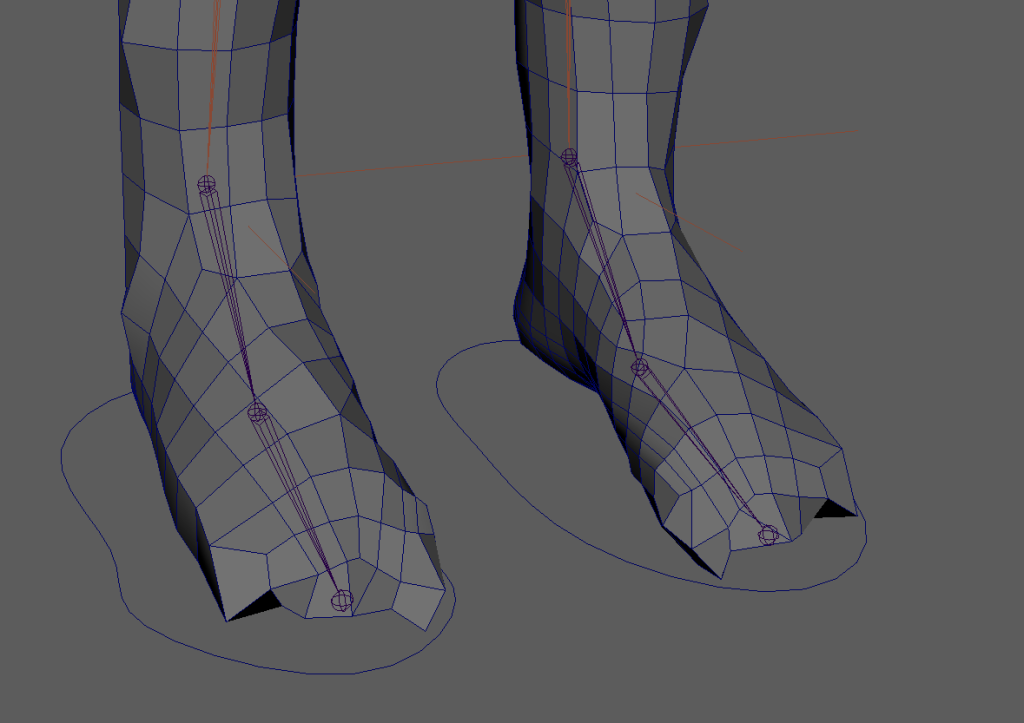
When the basic bone rig was done I took a look at my uv’s and saw they was very poor due to using an auto unwrap feature previously so spent a few hours of fixing my uv’s by manually cutting them, unwrapping them and then using the find similar feature to lay the uv’s over each other to make them neat. This will help me as now when I start to move my model due to me having better seam it will be a lot less likely to have nay ripping and tearing especially on problem areas like the armpits and groin as the cuts there and now clean.
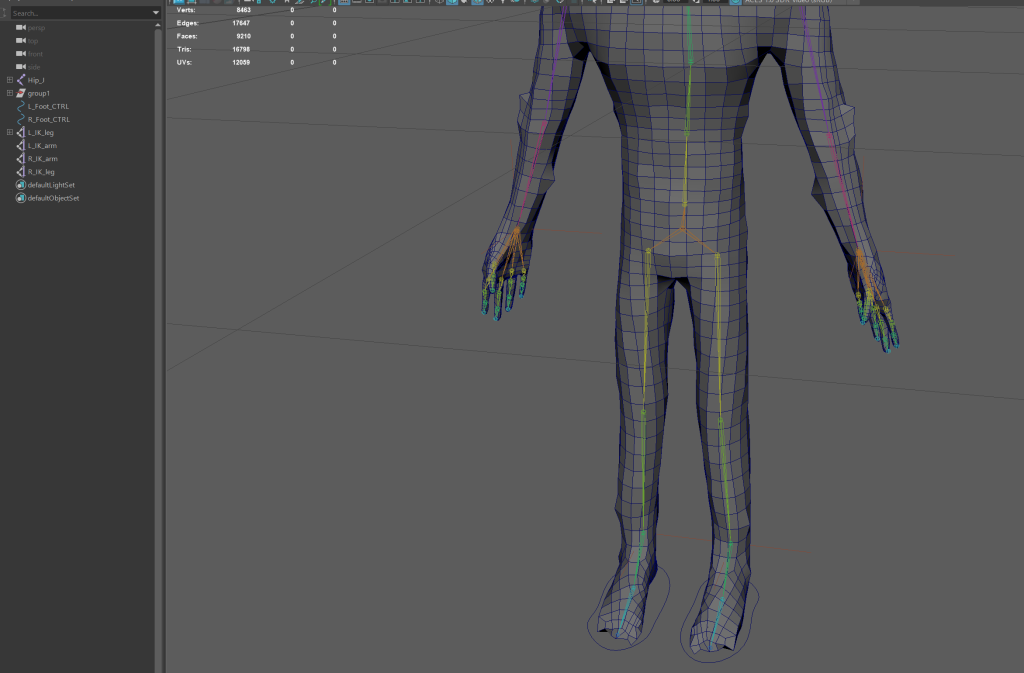
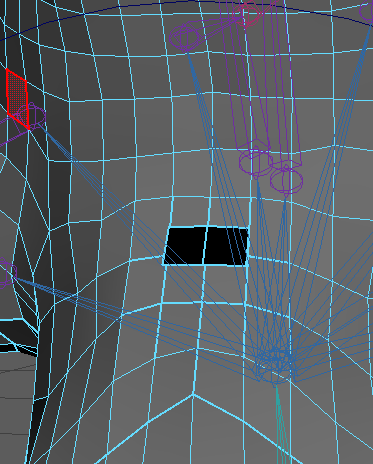
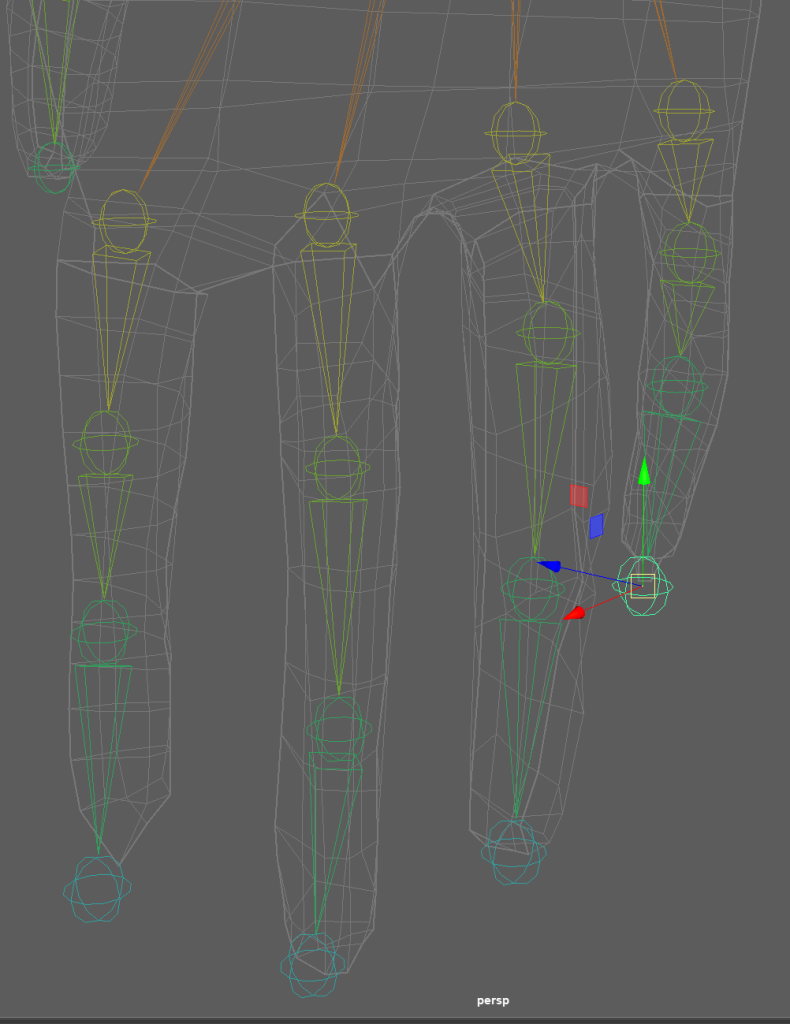
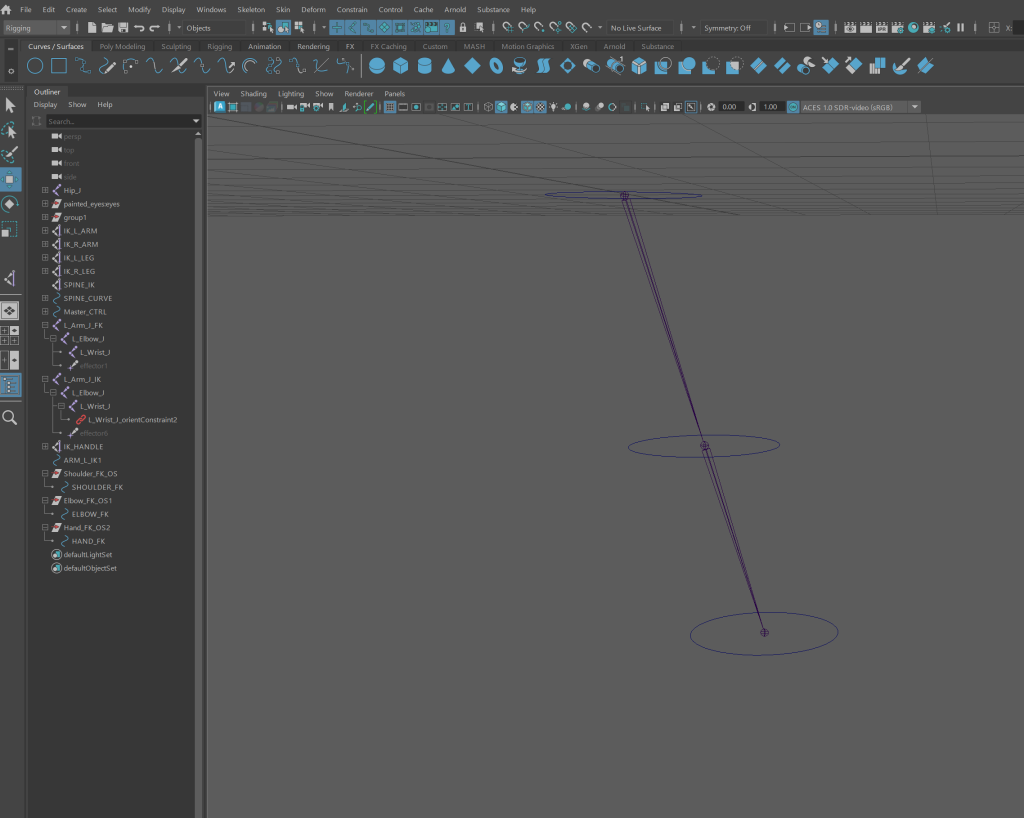
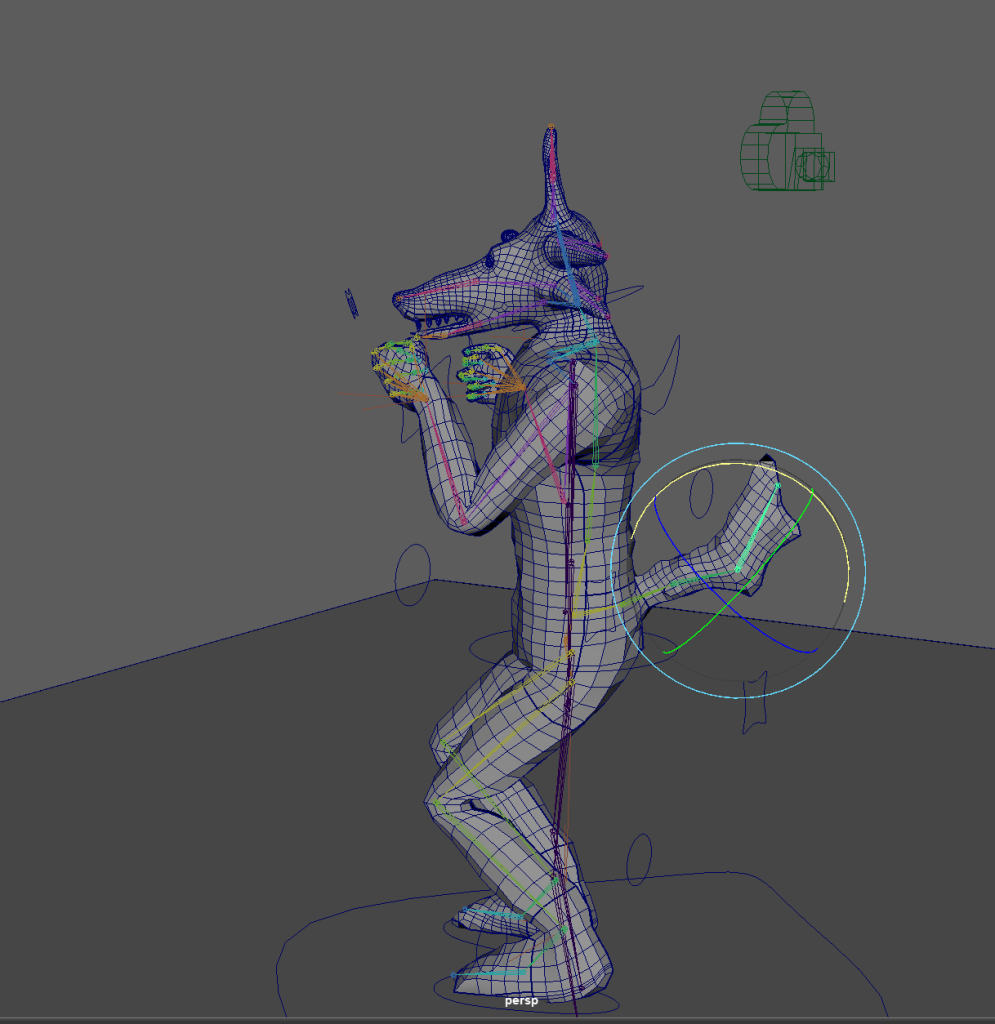
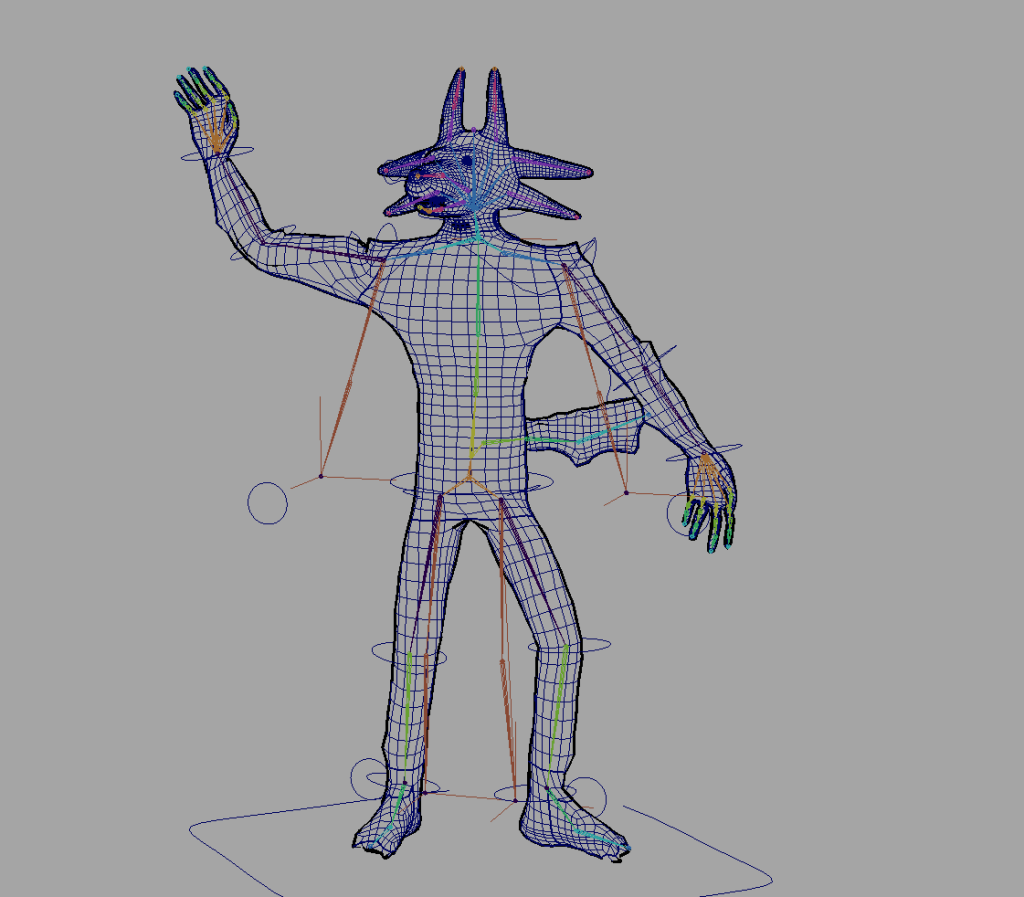
Once his bones are placed in I can move onto doing his IK handles, these where relatively easy but I had struggles with getting them to work due to making mistakes with constraining them or not freezing the transformations so when using them they broke resulting in me having to redo them.
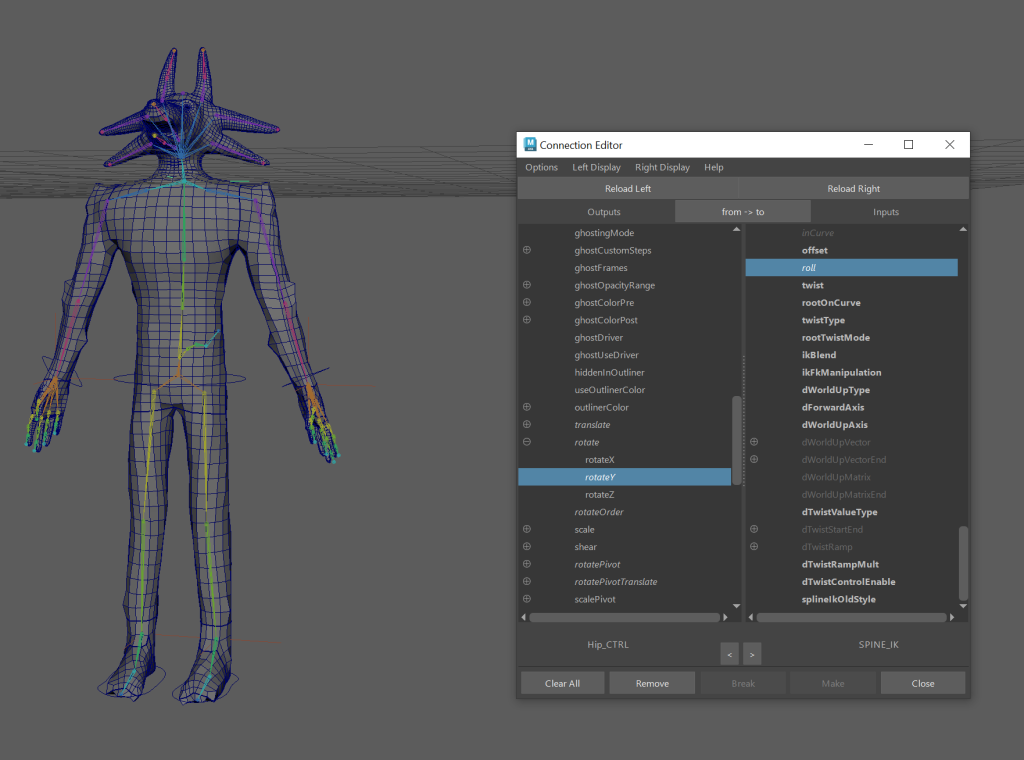
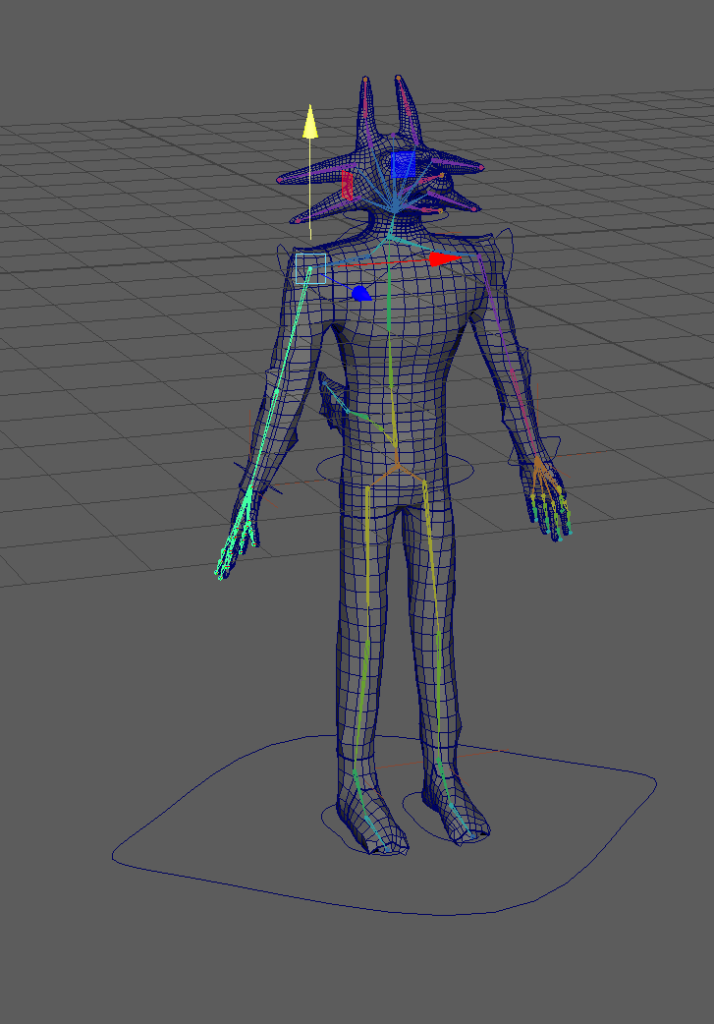
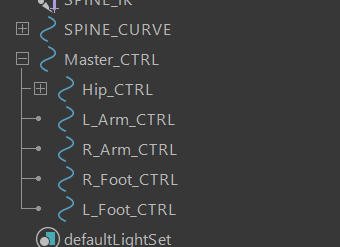
With the controls done I needed to add a spine handle and the handle would not place in normally so to fix this I had to select the bones within the menu instead of clicking directly on them. This did eat up some time sadly as this is not an issue of me but an issue with the latest version of Maya. The spine control is very important thought so I am glad we worked around this Maya bug. Chest, hip, neck and hand controls all followed and went smoothly, one done I made sure to parent them to one another in the correct order so when I moved the chest the head followed and ensured everything had good naming conventions so I could understand what is what.
Before I started weight painting I tested to make sure each control worked and to do this I moved each one and looked to see if it worked as intended with only the desired part of the mesh moving and also looked for where seemed to be an issue with weight painting to know where to focus when I started. After fixing some poorly done constraints on the arm controls, which only took around 30 minutes, I could move on.
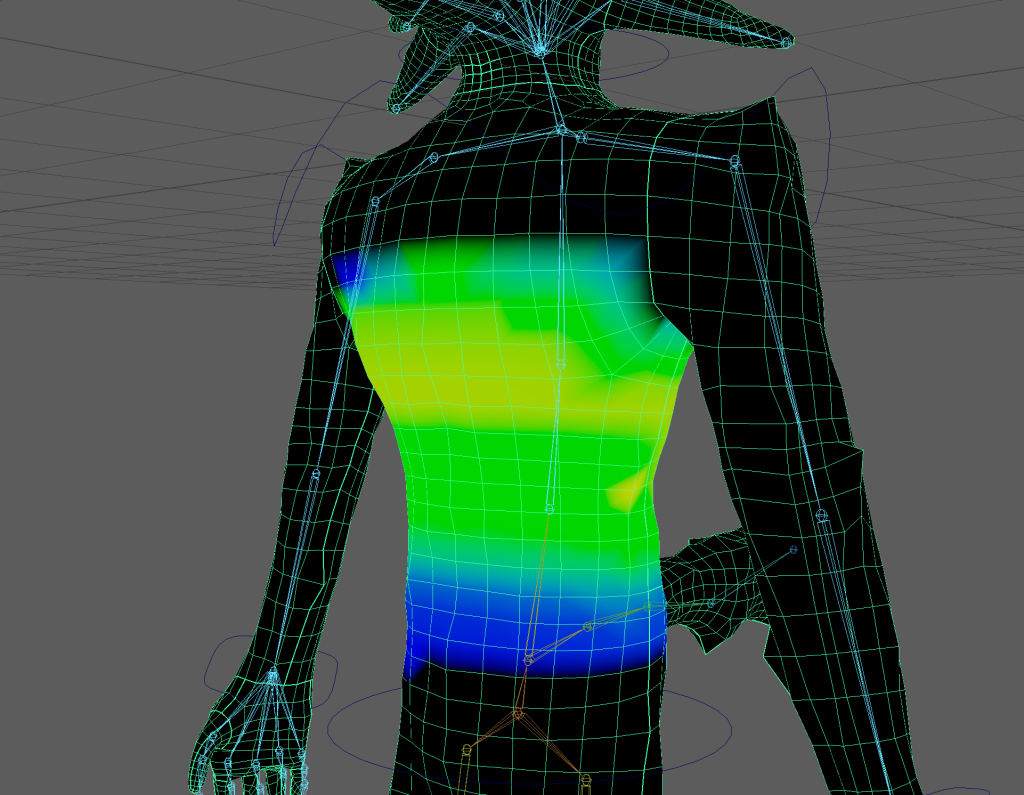
Weight painting
When tackling weight painting I worked my way down the body head to toe and locked each joint as it was completed and this meant as I worked down any of the extra influence never went back up so kept the painting workflow smooth.
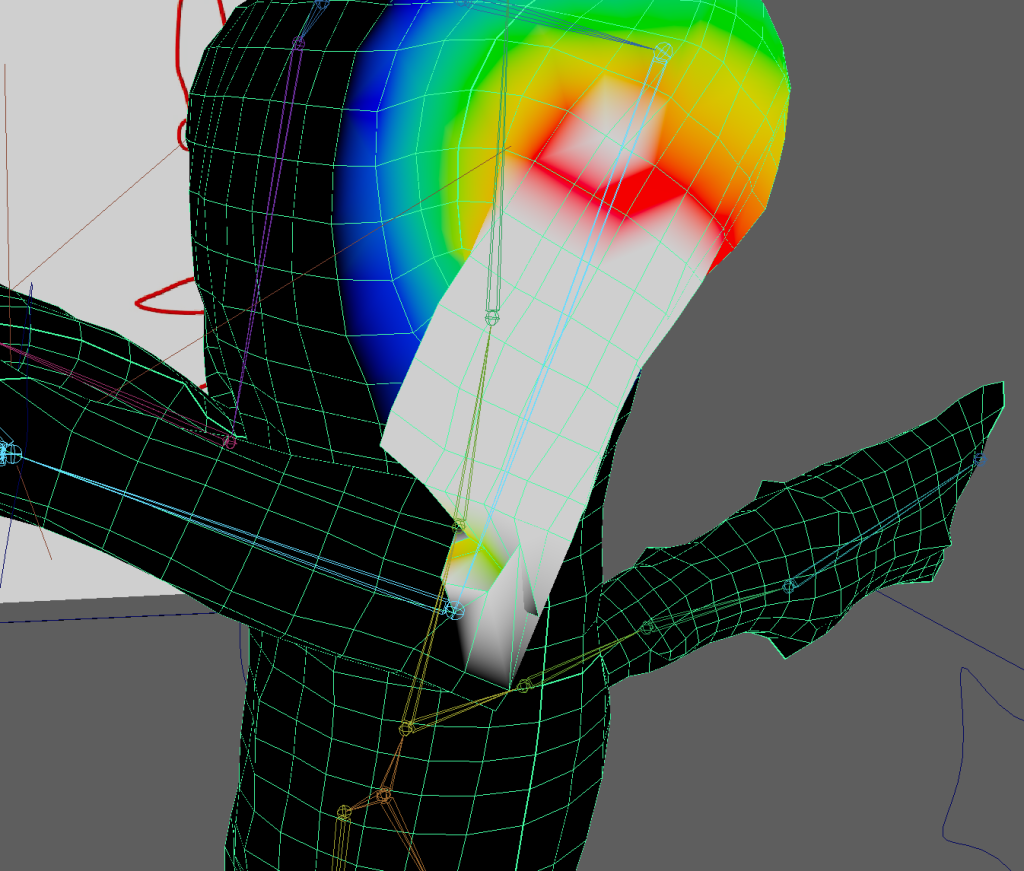
Soon after starting I found some major issues such as his neck here.
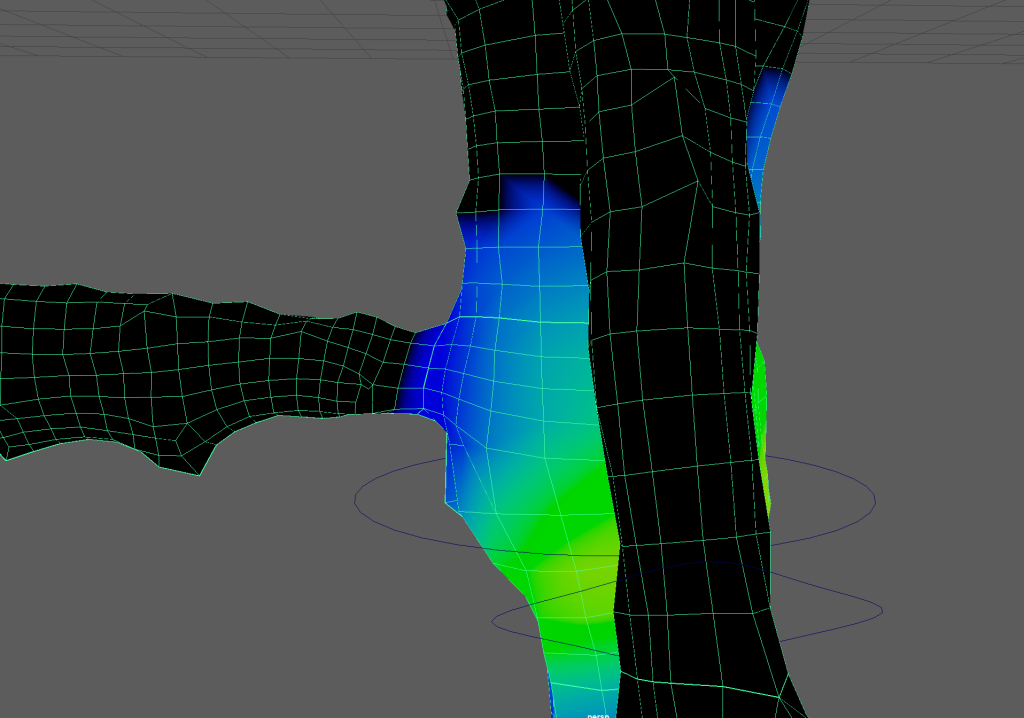
They was a problem area with his weight painting as when moving his neck his back mesh moves along with it, this was fixed easily though with making sure on the neck joint they was no influence painting over the blue on his back with a 0 brush. Another issue is when moving neck extra faces appeared so I deleted them and this fixed the issue as it was as simple as when I made him I messed up the faces on his neck duplicating them.
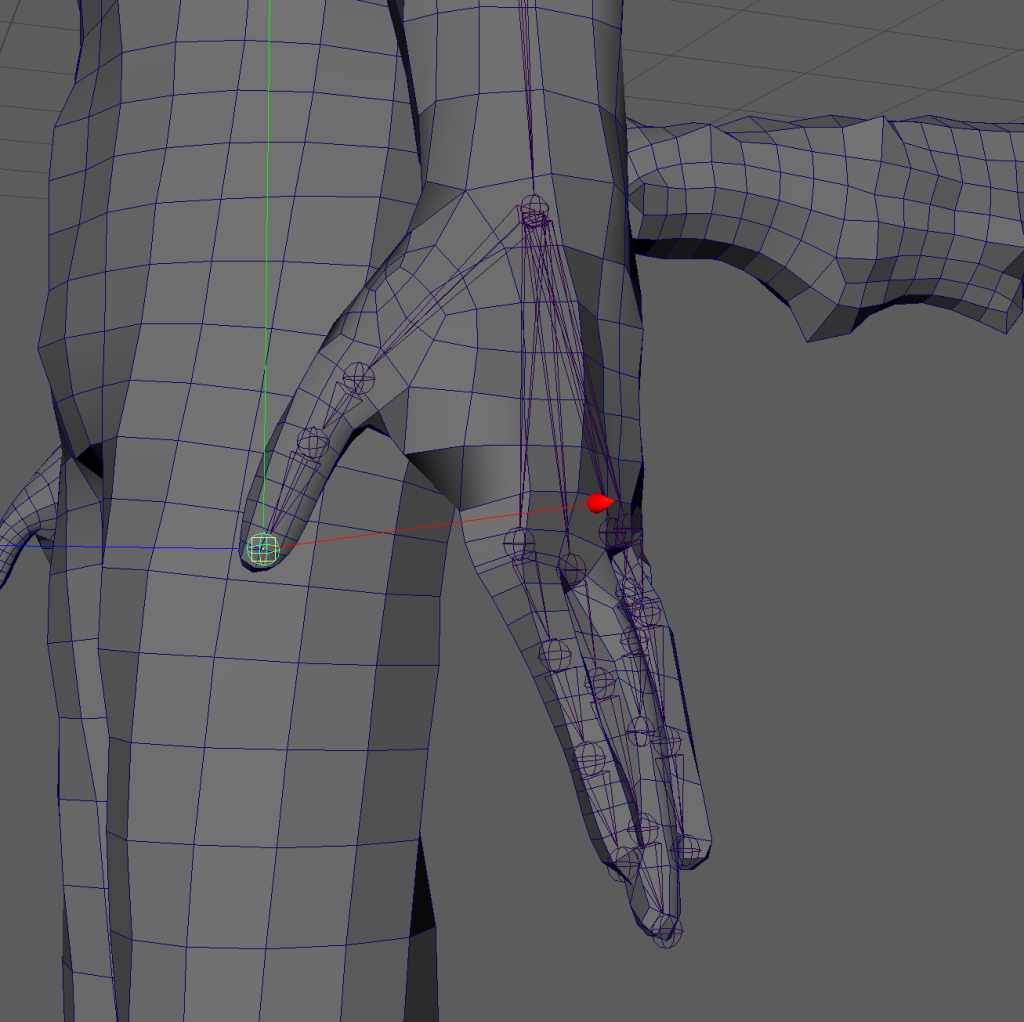
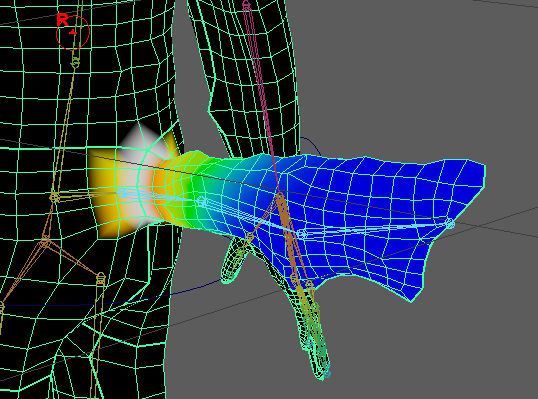
Another problem area was the tail and armpits and this meant lots of trail and error with getting them correct. Multiple times I had to go over the same area fixing them then moving the body parts to see if the stretching issues had been fixed. The tail was fixed first the armpits following a few hours later, using a white ring of influence around the armpit seemed to fix it.
Weight painting was completed and took a few weeks as I had to go back and fix multiple issues and wanted to make sure it was perfect so I didn’t have to come back later so I could focus on animating when I get there. When loading up my Maya file one day I noticed that the hand joints had drifted out of the hand and this caused major panic as I did not want to waste time redoing the hands but online found that is a move skinned joints tool and spent some time carefully placing the joints back into the hands, sadly this would be a reoccurring issue.
The weight painting also needed redoing in some areas with his ears moving too much of his scalp and the neck again causing strange chest tearing but again these were easy fixes by unlocking the area of issue and where the influence can go then painting a 0 influence over the area I don’t want to move, checking the layers around it then if good locking again.
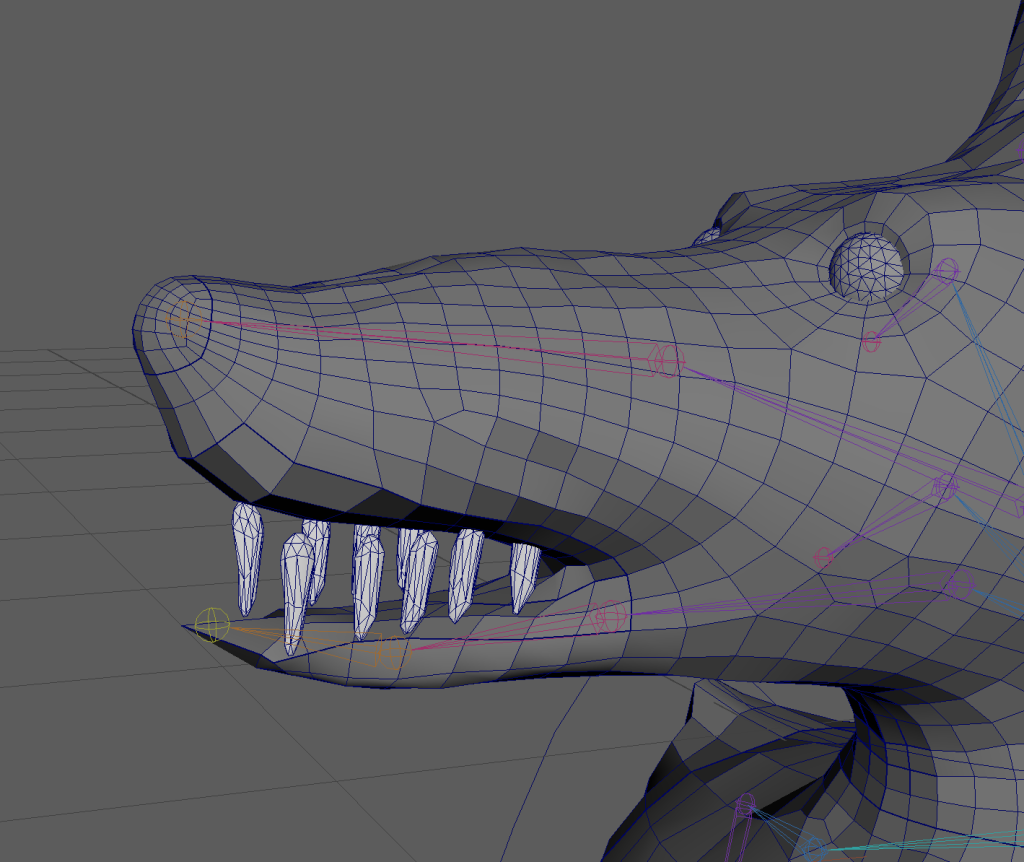
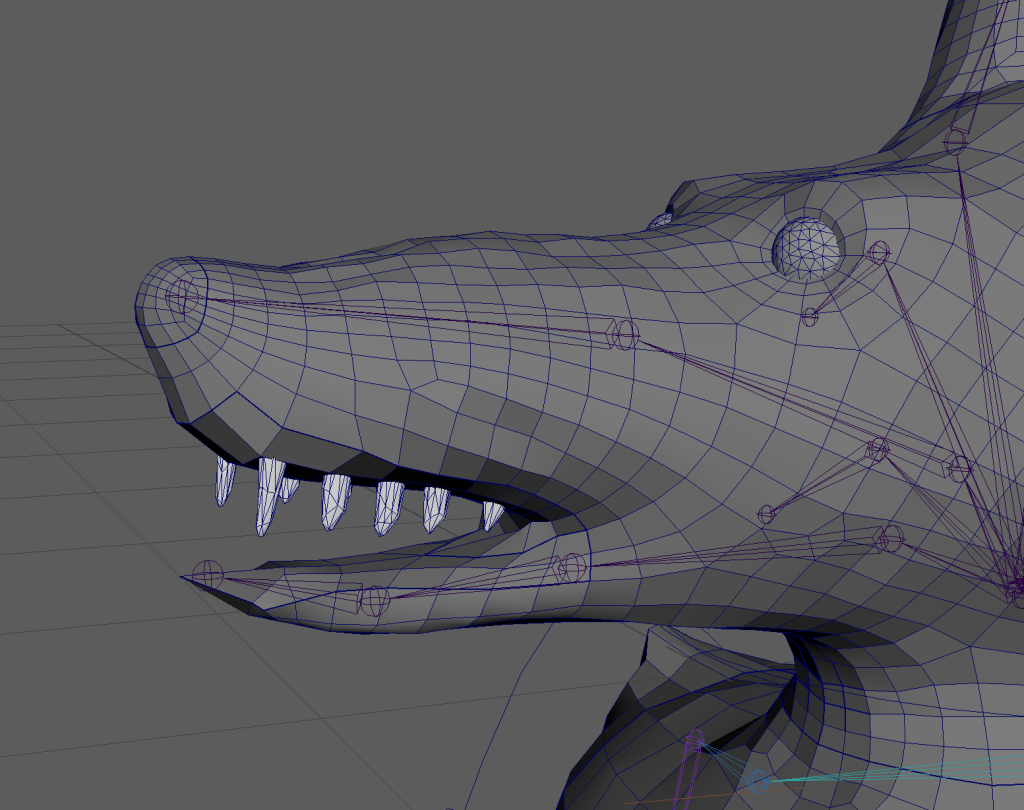
His teeth were floating out of his mouth and this is due to me accidently binding them to the skin so to fix I un-parented the teeth and eyes from the base mesh and then unskinned them putting them into their own layer and then did a orient constraint to the main head bone so that when animating they will follow the head as it moves.
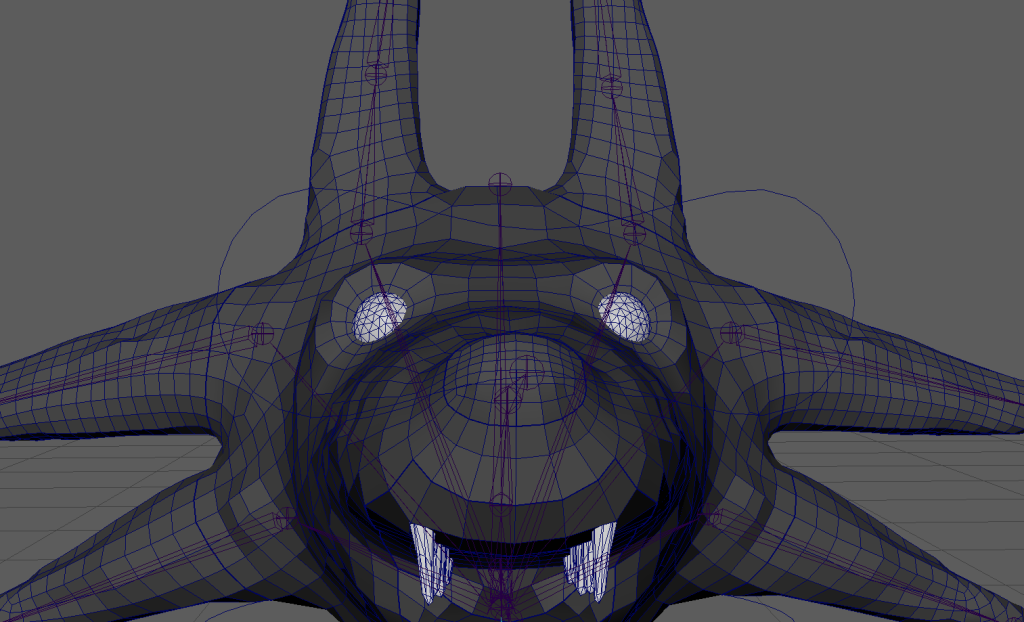
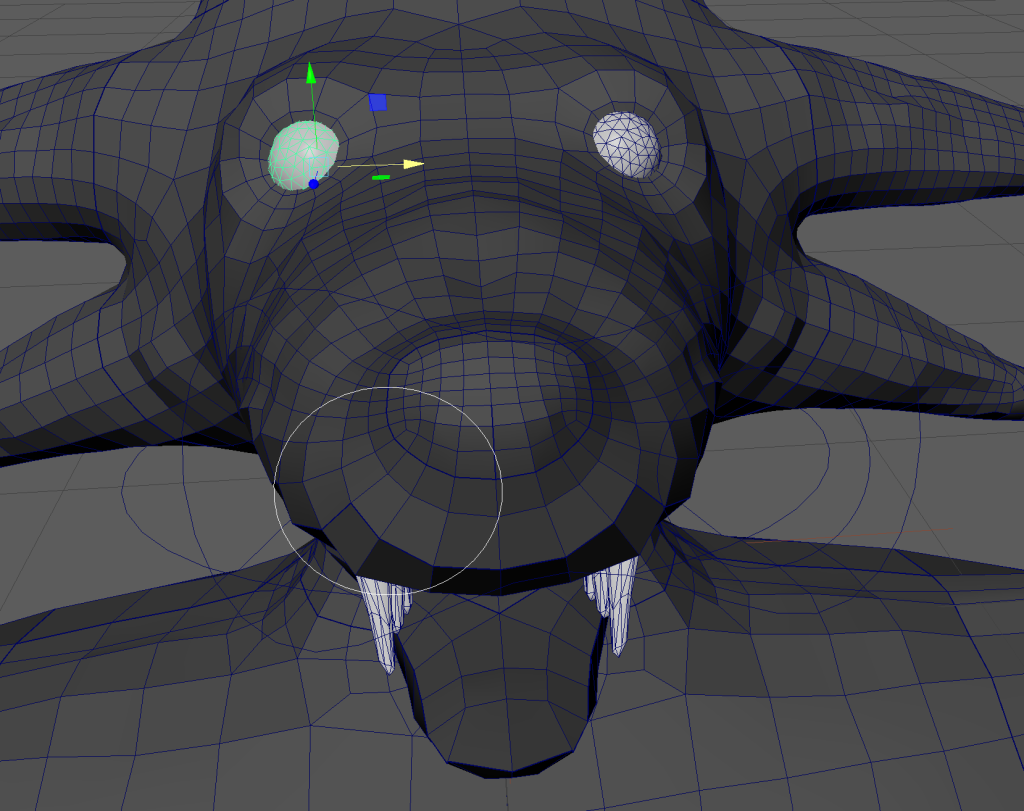
I chose to add an eye controller and for the controller I had to separate the eyes as they were one object and this as effecting the controller as you need to be able to move each independently. I did not end up using this feature in my animations but I am glad I added it as it gave me practice making such things for any future models.
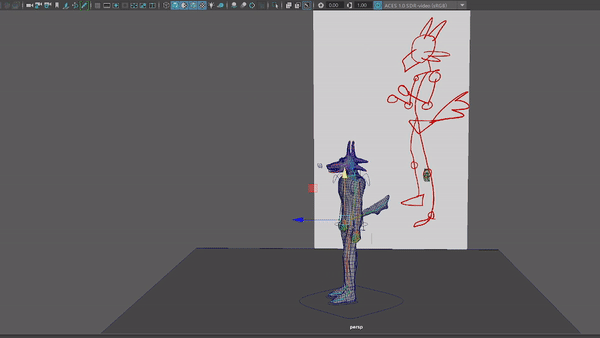
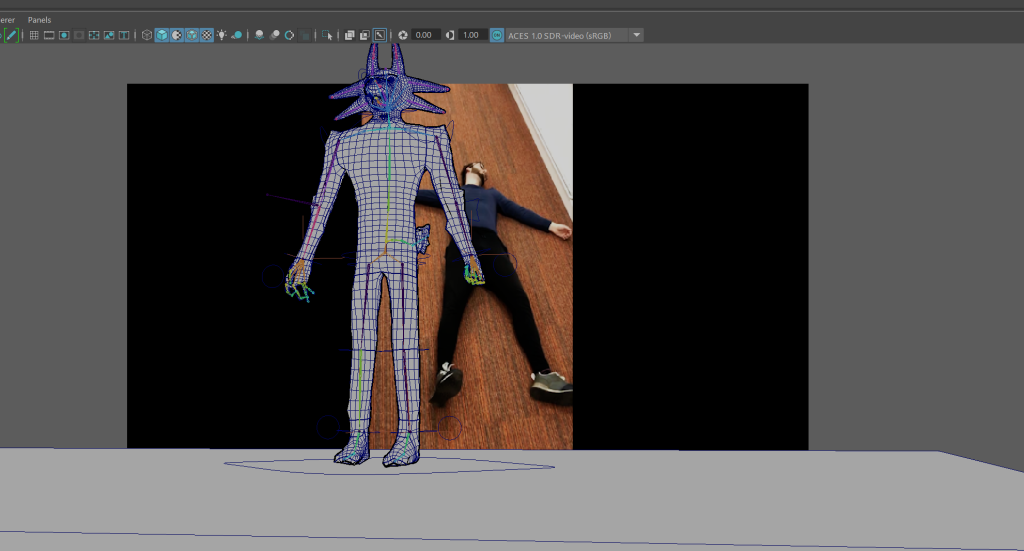
Now I blocked out my most complex reference as I knew I’d be animating soon. I used snycsketch to allow me to draw over my video and this proved very helpful as I could map out the important joints and also when done I can export then as a grease pencil for Maya and import them straight in with ease. Having the frame number in the corner will allow me to easily match the timings up for the movements as I can go along the timeline and match them to the video.
Again had weight painting issues with it undoing itself and had to redo armpits as when I was reloading Maya it was undoing any weight painting process I was making. This was greatly annoying but just had to keep redoing it every time I needed. On top of that the controls broke so I needed to redo hands and feet. They broke due to me not freezing the transformations so when redoing them was very aware of this fact and made sure not to forget. To start on the handles I had to skin the character but keep weight painting history and this all went okay.
Got the set up for the controls done but had to do the pivot offset by hand which was rather simple and I could copy and paste the rotation to make sure they were all the same.
Again on another reload had to redo his chest weight painting as it kept placing random influence in the middle of his chest causing tearing issues. An easy but annoying fix of redoing the section again, at least due to me redoing this section frequently it allowed me to become very efficient with fixing it.
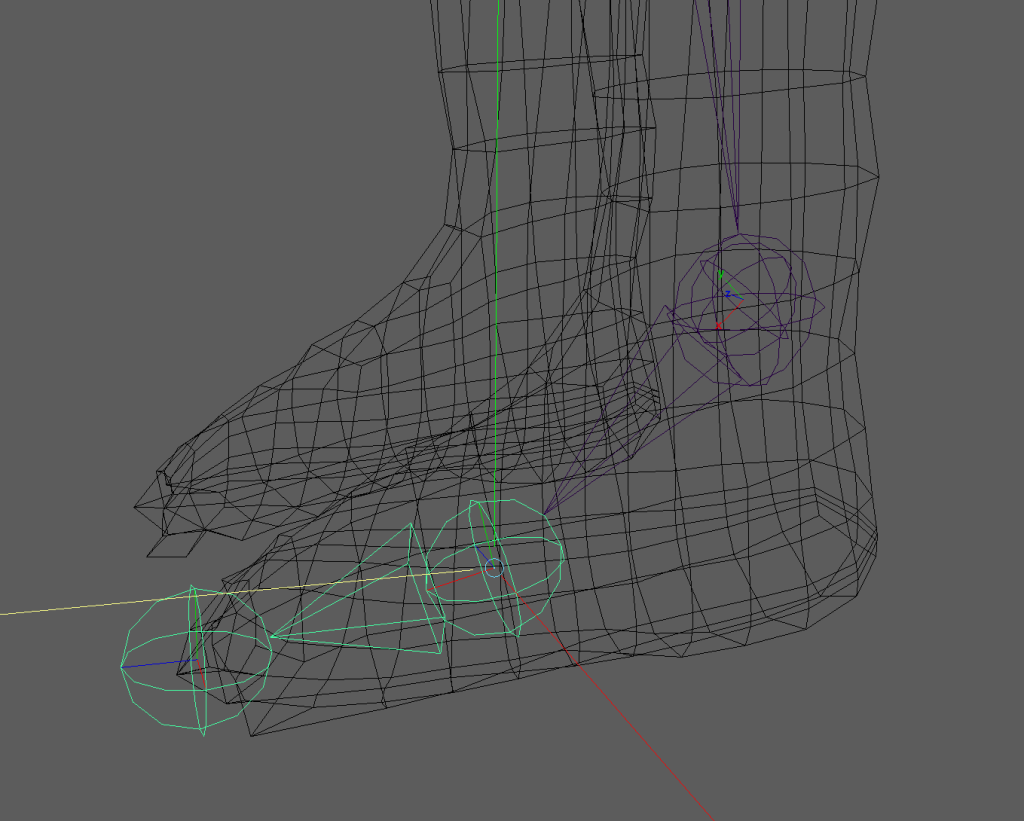
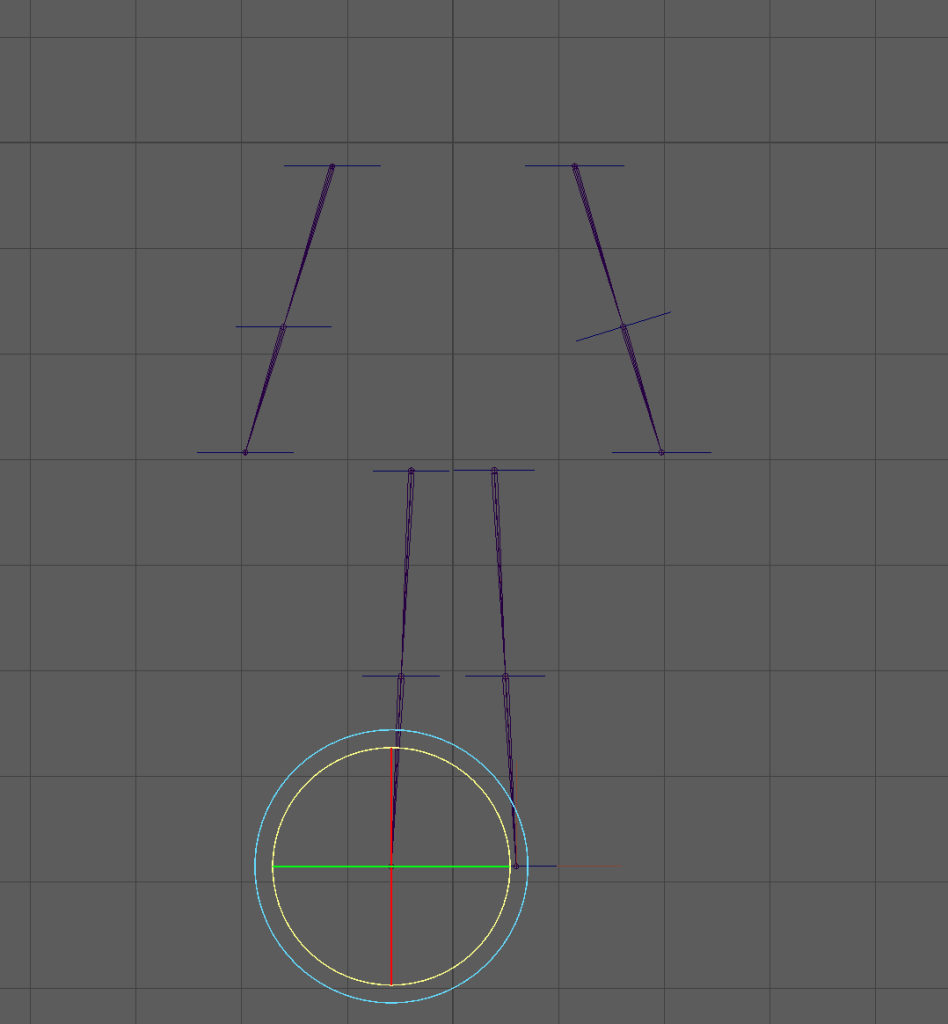
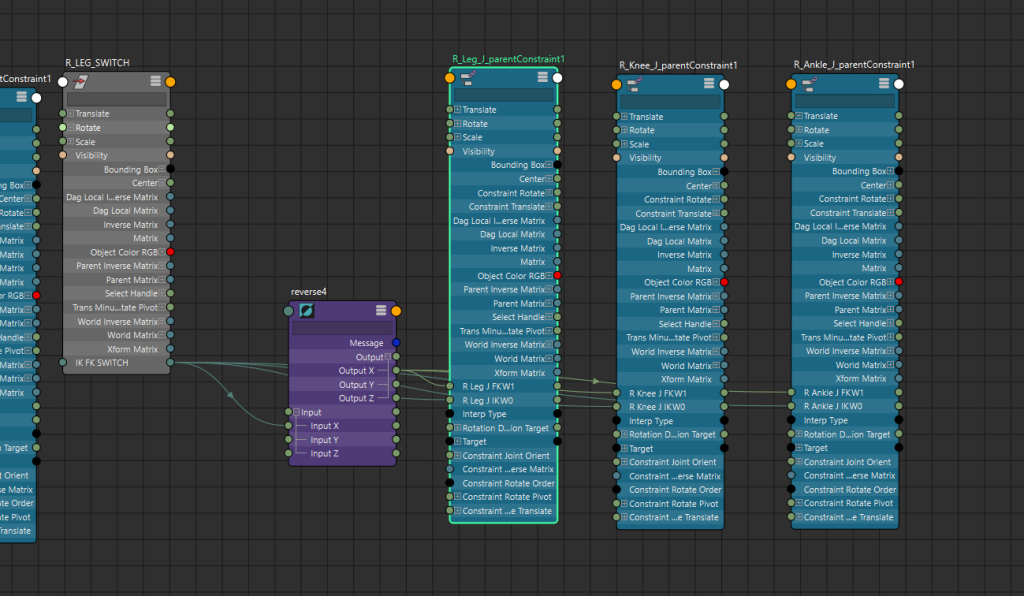
When testing the rig one last time I found I had to redo some controls as they were major issues with the switch not working at at all and both sets always being visible. Luckily this did not take too much time as I was able to redo the IK controls on the legs within a couple of hours.
Here is the fixed graph of the leg switch, I also did not connect the nodes properly so the switch was not functioning as normal, again this was an easy fix of simply being extra careful when following the tutorial and ensuring each node was connected right.
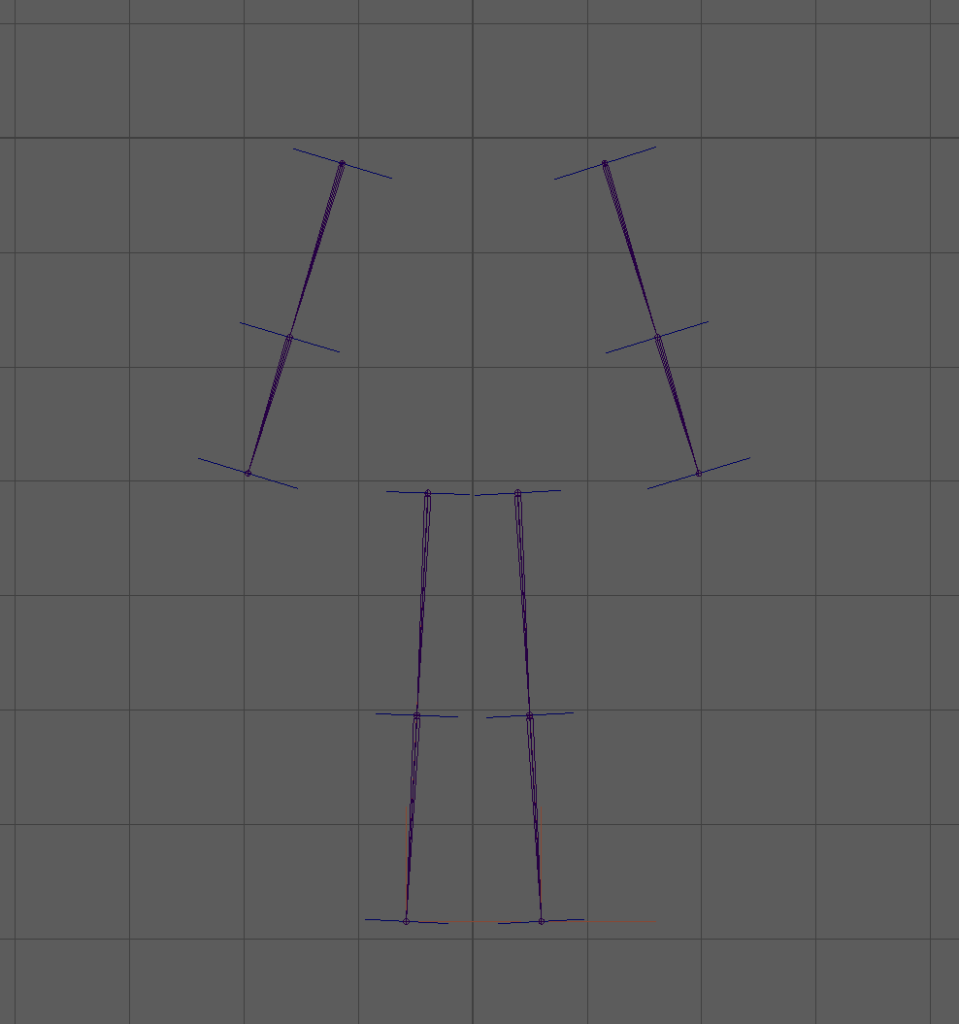
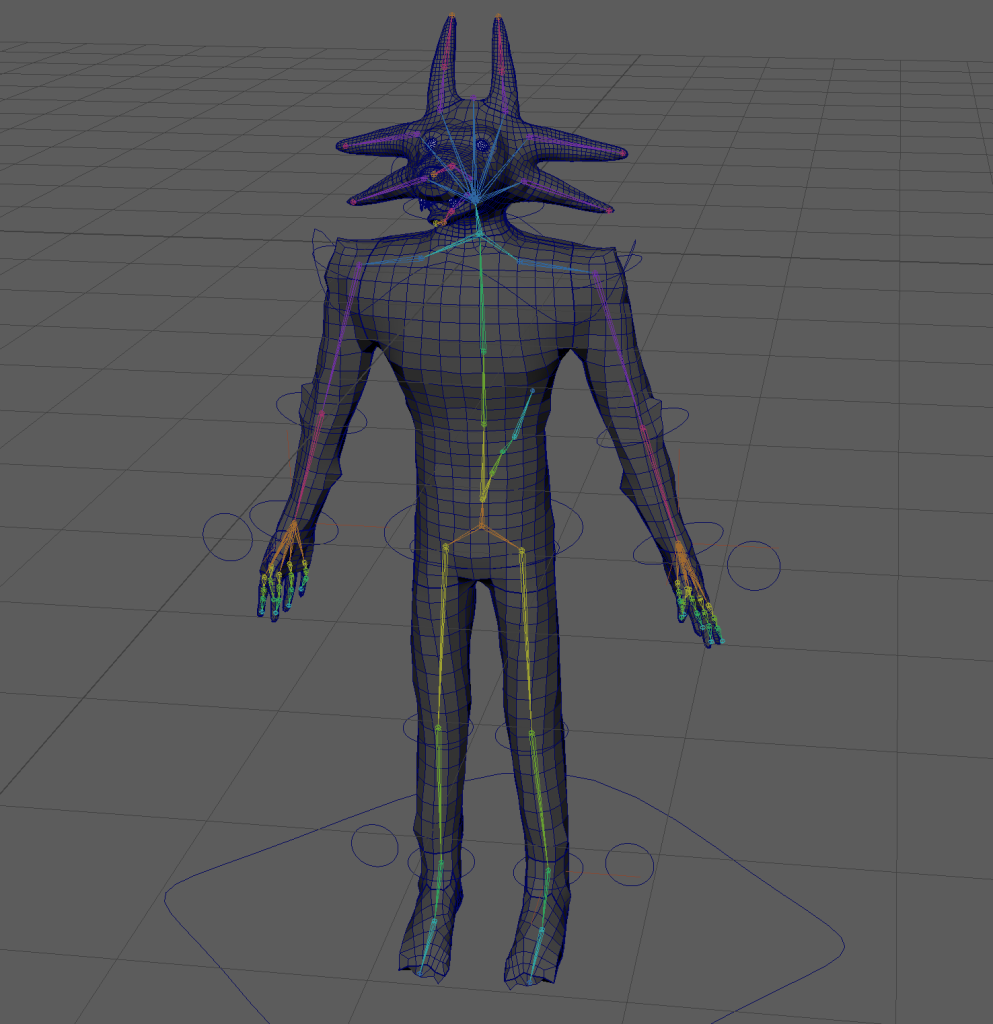
After this the rig was completed I did one final test of moving each control and using the switch and all worked as intended.
Animating
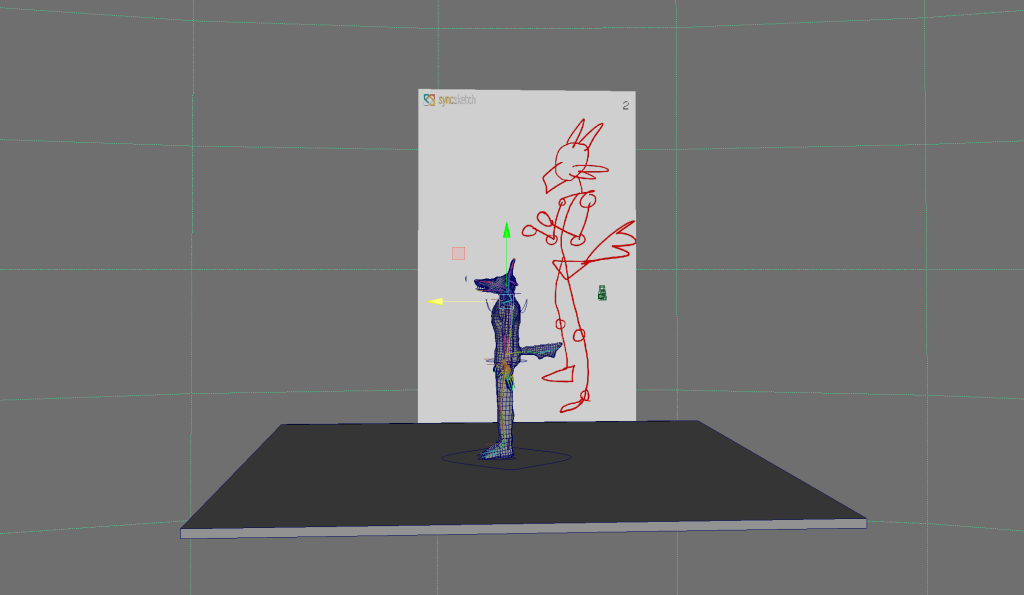
I imported my drawn reference as an image plane sequence so when I changed the frame the reference would move with them allowing for me to line up timings.
When bending his bellow his bicep looked unnatural and to fix it I painted in 1 influence on his bicep head and then blended it using a 0.5 at the crease on both the arm and elbow joint and this allowed for a natural bicep curl.
Boxing
I chose to do the boxing animation first as it is my most complex and will require the most time. For the blockout I will do minimal amount of animation before adding secondary and complex actions such as face and hands.
On his down jumps I have him hold for anticipation and also on his peak he holds them for a frame to make the jumps seem impactful.
I use a toon shader on him which really helped bring out his features and further pushes this 2D to 3D look I am aiming for.
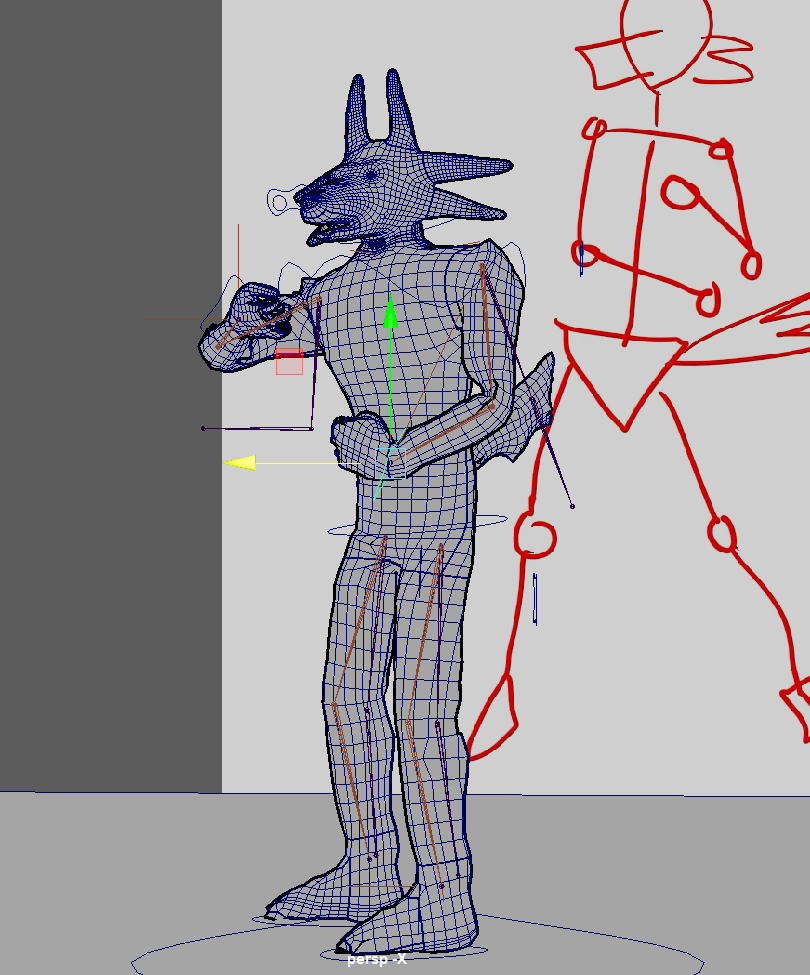
His eye kept flying out his skull so I had to redo the aim constraint on them. I used FK for his kicking but changes how he kicked to make it easier on myself and had him do a front kick instead of a spinning kick. I also added breathing by using a scale constraint on the chest and added ear wiggles throughout the animation.
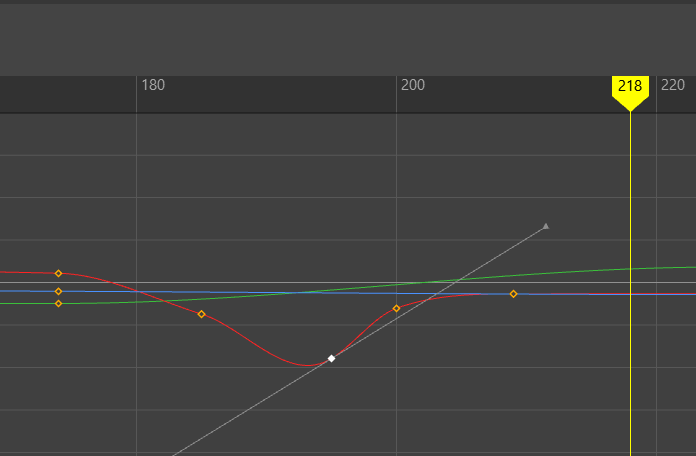
Did some graph tweaking on the kick to make it smoother.
Sleeping
Placed reference into the scene and lined him up. To give the illusion he is lying down I placed a wall behind him and when rendering I will tilt the camera so it looks like he is lying down.
I used used FK for an arc on his arm scratching his stomach so it moved smoothly.
Blockout
I made it so instead of his hands touching the floor at the end after they keep in the air as this looks more natural as he is meant to be shocked.
Scoot
I chose to have him scooting on the floor like a dog as I think this fits his character as he is meant to be a comedic character and allowed me to have a movement cycle as my other are stand alone actions.
I had his tail wagging as an secondary action along with him breathing to make him look alive.
Once the blockout was done I added hand rotation and neck and chest movement as he moves in time with the momentum of his body for follow through.
One done I thought it was be effective to have him at the end scratching his butt for comedic effect.
Final touches and rendering
I added my plain textures onto my models using aistandardsurface for the matte colours so that were not glossy and set up basic stage lighting using a sky light for flat light. Due to my model being stylized this flat lighting and matte colours worked with his 2D become 3D character look.
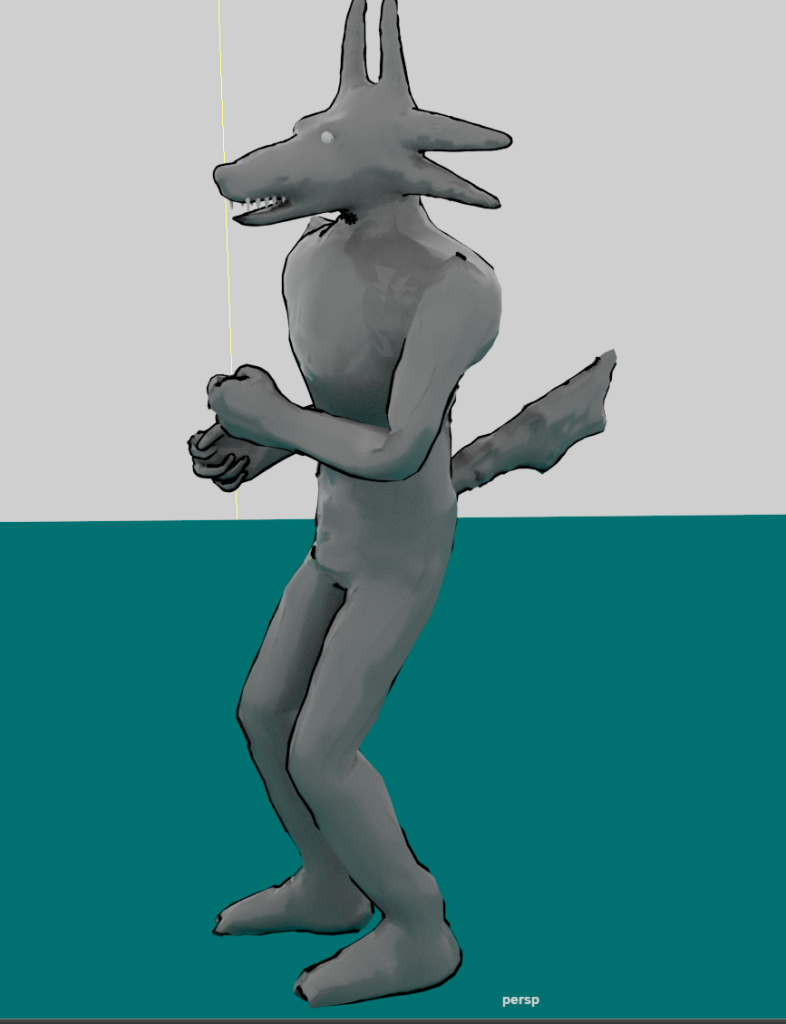
Before rendering to make my model look more pleasing I clicked the base model then used the smooth mesh tool, this made the matte textures look flat instead of bumpy as they were previously. I am very glad to have used this tools as before he had these harsh edges on his chest that were rather distracting.
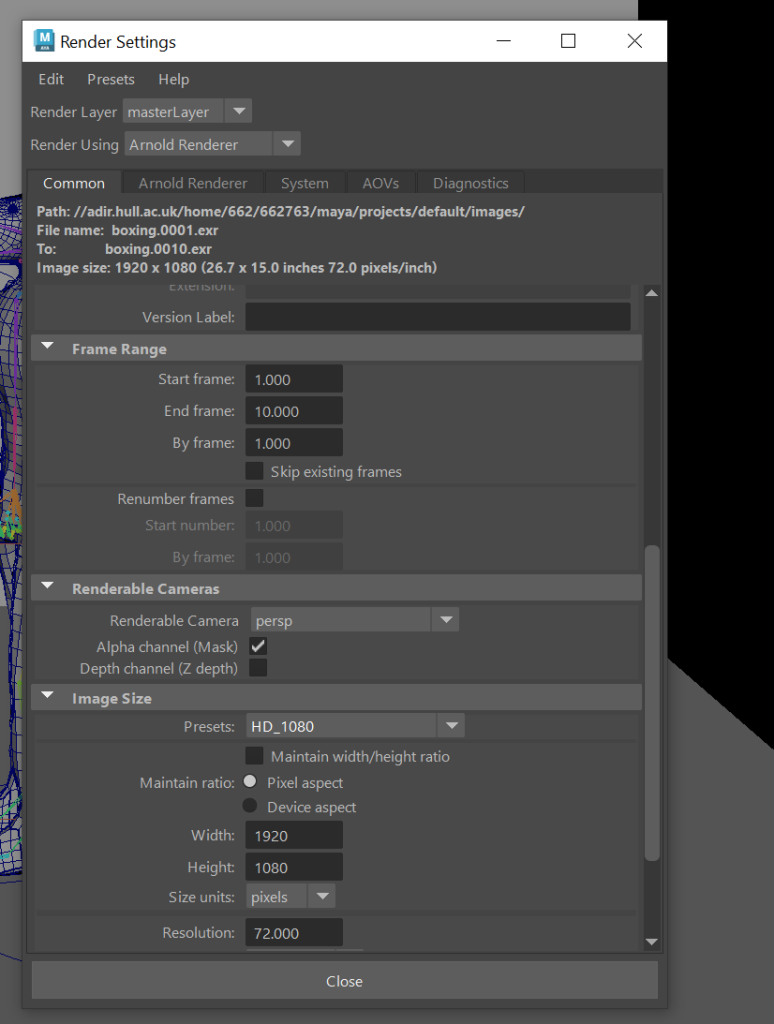
I did practice renders using Arnold and Mayas hardware itself to see what different rendering software’s results we be for when I choose to render my final animations. Viper was not an option as it wasn’t working giving over 24 hours to produce my render which is time I simply didn’t have to wait.
Maya hardware render:
Arnold render:
From looking at the test renders I chose to use Arnold as the shading was very smooth on my model and also the lighting worked easier and to avoid myself extra work worrying about shaders Arnold was the easy choice. The downside is the time it takes but I set up multiple pc’s rendering at the same time so it only took me around 10 hours which in the total hours put into this project a very small amount. A good use for the poorer quality renders was to check my movements looked good like from these I learnt I needed to move my model lower to the ground so it looked like it was scooting on the floor.
Finished renders
Boxing:
Sleeping:
Scooting:
Reflection
Overall I am happy with the quality of my renders and model and have learnt a plethora of skills throughout my animation and rigging process. I can now say with confidence I am able to rig characters to a high level with multiple controllers for secondary actions and can also be creative when given challenges such as making the character look like they breathing. I believe my rig was of a good quality with the joints and handles but if I was to make it again I would have added finger controls and maybe have had blend shapes with his face. Weight painting was a great challenge and took a great deal of patience but when animating the time I put in payed off as my joints moved smoothly and I had minimal tearing issues with armpits which are a common problem area. If I were to have used a different model I maybe could have more high quality animations due to the topology being cleaner and having a more expressive face for if I wished to use blend shapes for lip syncing. I am happy with my animations and I believe they show of my creative abilities with Maya well.
SITES AND REFERNCES USED
syncsketch.com. (n.d.). Log In. [online] Available at: https://syncsketch.com/pro/#/project/292883/reviews [Accessed 5 April 2023].
makeagif.com. (n.d.). Front Kick Tutorial (ball of foot on Make a GIF. [online] Available at: https://makeagif.com/gif/front-kick-tutorial-ball-of-foot-EH4HaP [Accessed 20 April 2023].